lp-505 Rev. 000 Rel. 015 Date 1.7.20
18
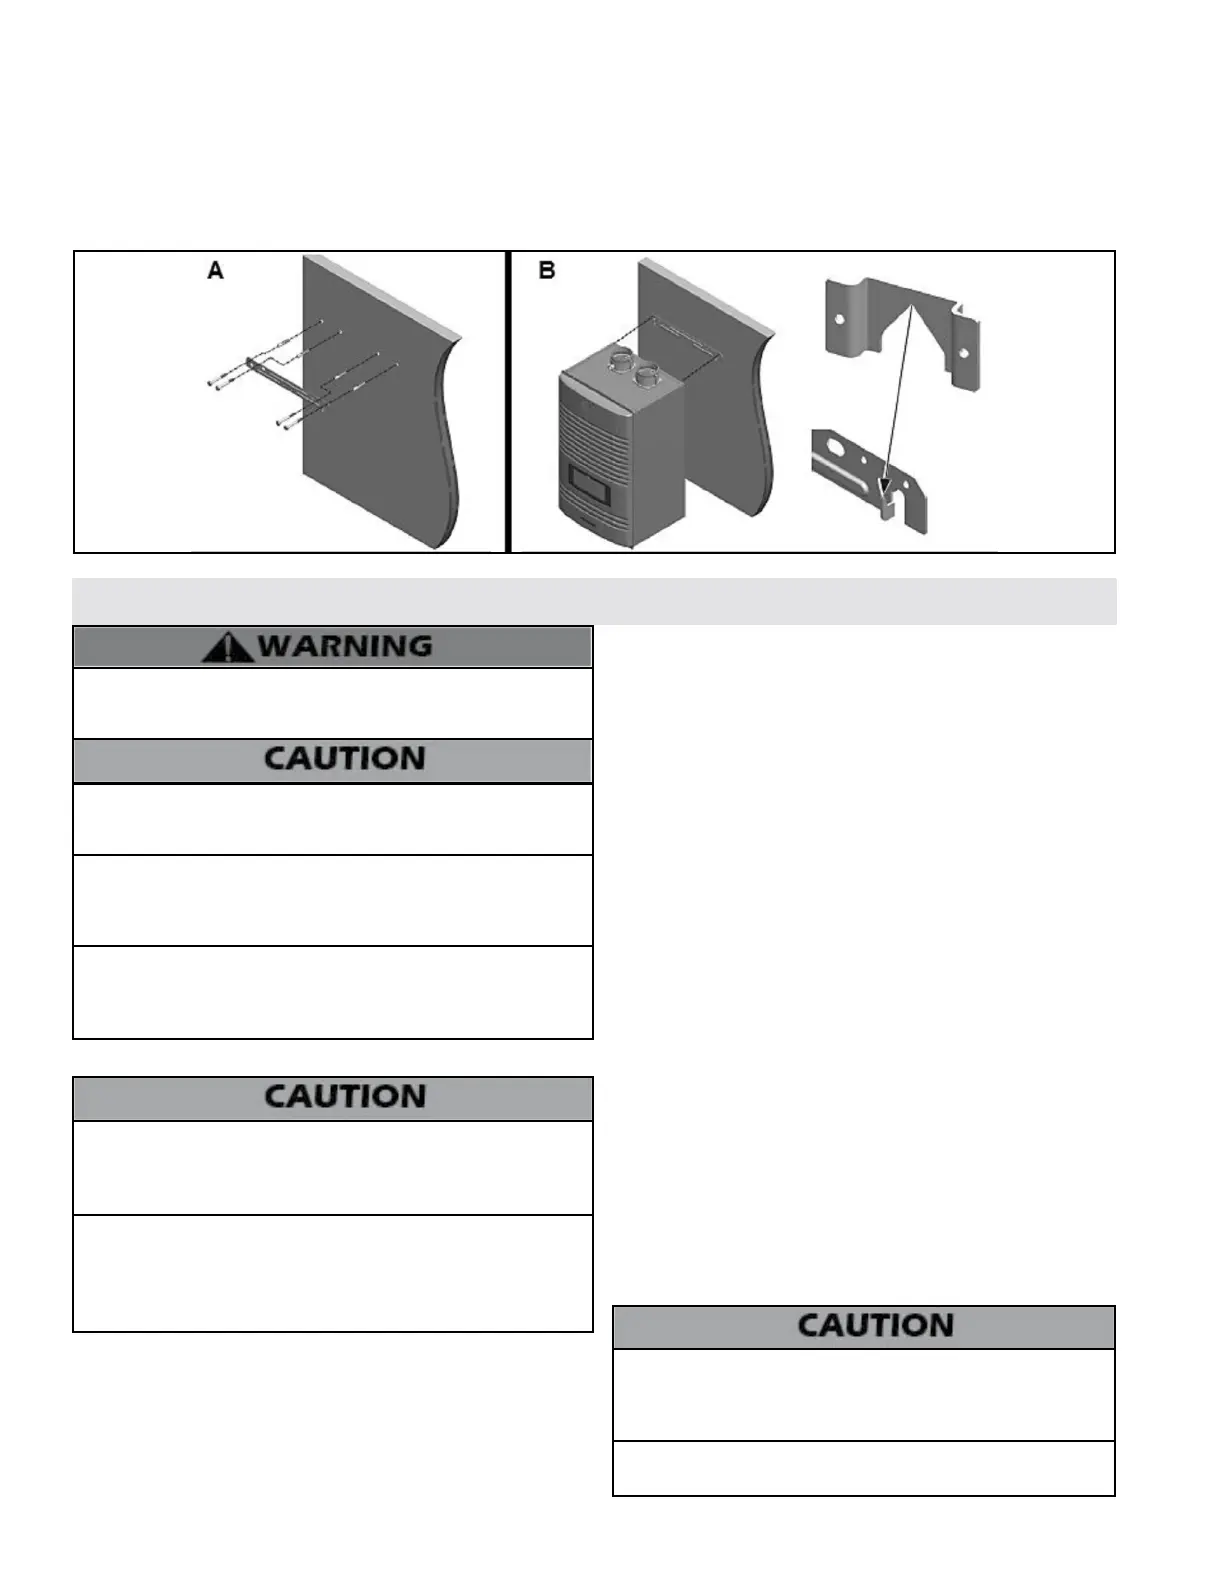
Positioning the Water Heater on the Wall
1. Attach the wall bracket on the location where you want to install the water heater. Ensure it is level and on stud (16” centers) before
proceeding.
2. Mark the four drill holes with a pencil or marker. Remove the wall bracket.
3. Drill four (4) holes using a 5/32 drill bit at the marked hole locations.
4. Mount the wall bracket to the wall with the four (4) included anchor bolts. Ensure the mounted bracket is level. See Figure 6A.
5. Align the heater bracket grooves on the back of the water heater with the tongues on the wall bracket and hang the water heater on
the bracket. See Figure 6B.
Figure 6 - Wall-Mounting the Water Heater
Part 4 - Water Piping
Failure to follow the instructions in this section WILL VOID the
warranty and may result in property damage, severe personal injury,
or death.
DO NOT pipe this water heater with black iron, galvanized steel,
steel, or lead pipe. Doing so will result in premature product failure
and property damage, and WILL VOID the warranty.
Do not apply a torch within 12” of the water heater. If sweat
connections are used, sweat tubing to the adapter before tting
adapter to the water connections on the heater. Damages due to
improper installation practices ARE NOT covered by warranty.
Dielectric unions or galvanized steel ttings must not be used in a
system with this water heater. Doing so WILL VOID the warranty. Use
only copper, brass, or stainless steel ttings. Teon thread sealant
must be used on all connections.
A. General Plumbing Guidelines
Use two wrenches when tightening water piping at heater. Use one
wrench to prevent the heater inlet or outlet line from turning. Failure
to prevent piping connections from turning could cause damage to
heater components.
The heater control module uses temperature sensors to provide
both high limit protection and modulating temperature control.
The control module also provides low water protection by sensing
the water level in the tank. Some codes / jurisdictions may require
additional external controls.
The domestic water connections must be installed in accordance with
all local and national plumbing codes, or any applicable standard
which prevails. The inlet (cold) and outlet (hot) ports are 3/4” on all
models.
• Pipe material must be suitable to meet local codes and industry
standards.
• The pipe must be cleaned and without blemish before any
connections are made.
B. Backow Preventer
Use a backow preventer specically designed for water heater
installations. This valve should be installed on the cold water ll
supply line per local codes.
C. Potable Expansion Tank
A potable hot water expansion tank is required to oset heated
water expansion. In most city plumbing systems, the water meter
has a no return or back ow device built into the system to prevent
back owing of water into city mains. Some local codes require
back ow preventers on all incoming water supplies. The hot water
expansion tank must be listed for potable water use. The expansion
tank should be located on the cold inlet piping close to the water
heater.
Expansion Tank
1. Ensure that the potable expansion tank is sized to correctly
handle water heater, related piping, and connected storage volume
and system temperature.
Undersized expansion tanks cause system water to be lost from
the relief valve, causing make-up water to be added. Eventual
heater failure can result due to excessive make-up water addition.
SUCH FAILURE IS NOT COVERED BY WARRANTY.
The expansion tank must be suitable for hot potable water
systems.
• Isolation (shuto valves) should be used to ease future
servicing. HTP oers isolation valves (Part #7850P-090).
These optional parts may be purchased separately.
• All water piping should be insulated.
It is recommended to install a sweat shut-o valve and a union in the
cold inlet piping and hot outlet to ease future servicing. If there is a
backow preventer or any type of a no return valve in the system,
install an additional tee here, suitable for a potable hot water
expansion tank.
In the hot outlet, install a suitable adapter to match the tubing of the
plumbing system. A thermal trap or heat trap loop may be installed
here to provide additional energy savings and prevent the thermal
siphoning of domestic hot water.
 Loading...