The main mounting bracket for installing a blade RRU can connect to the main mounting bracket for installing a
common RRU in the scenarios of adding RRUs, as shown in Figure 4.
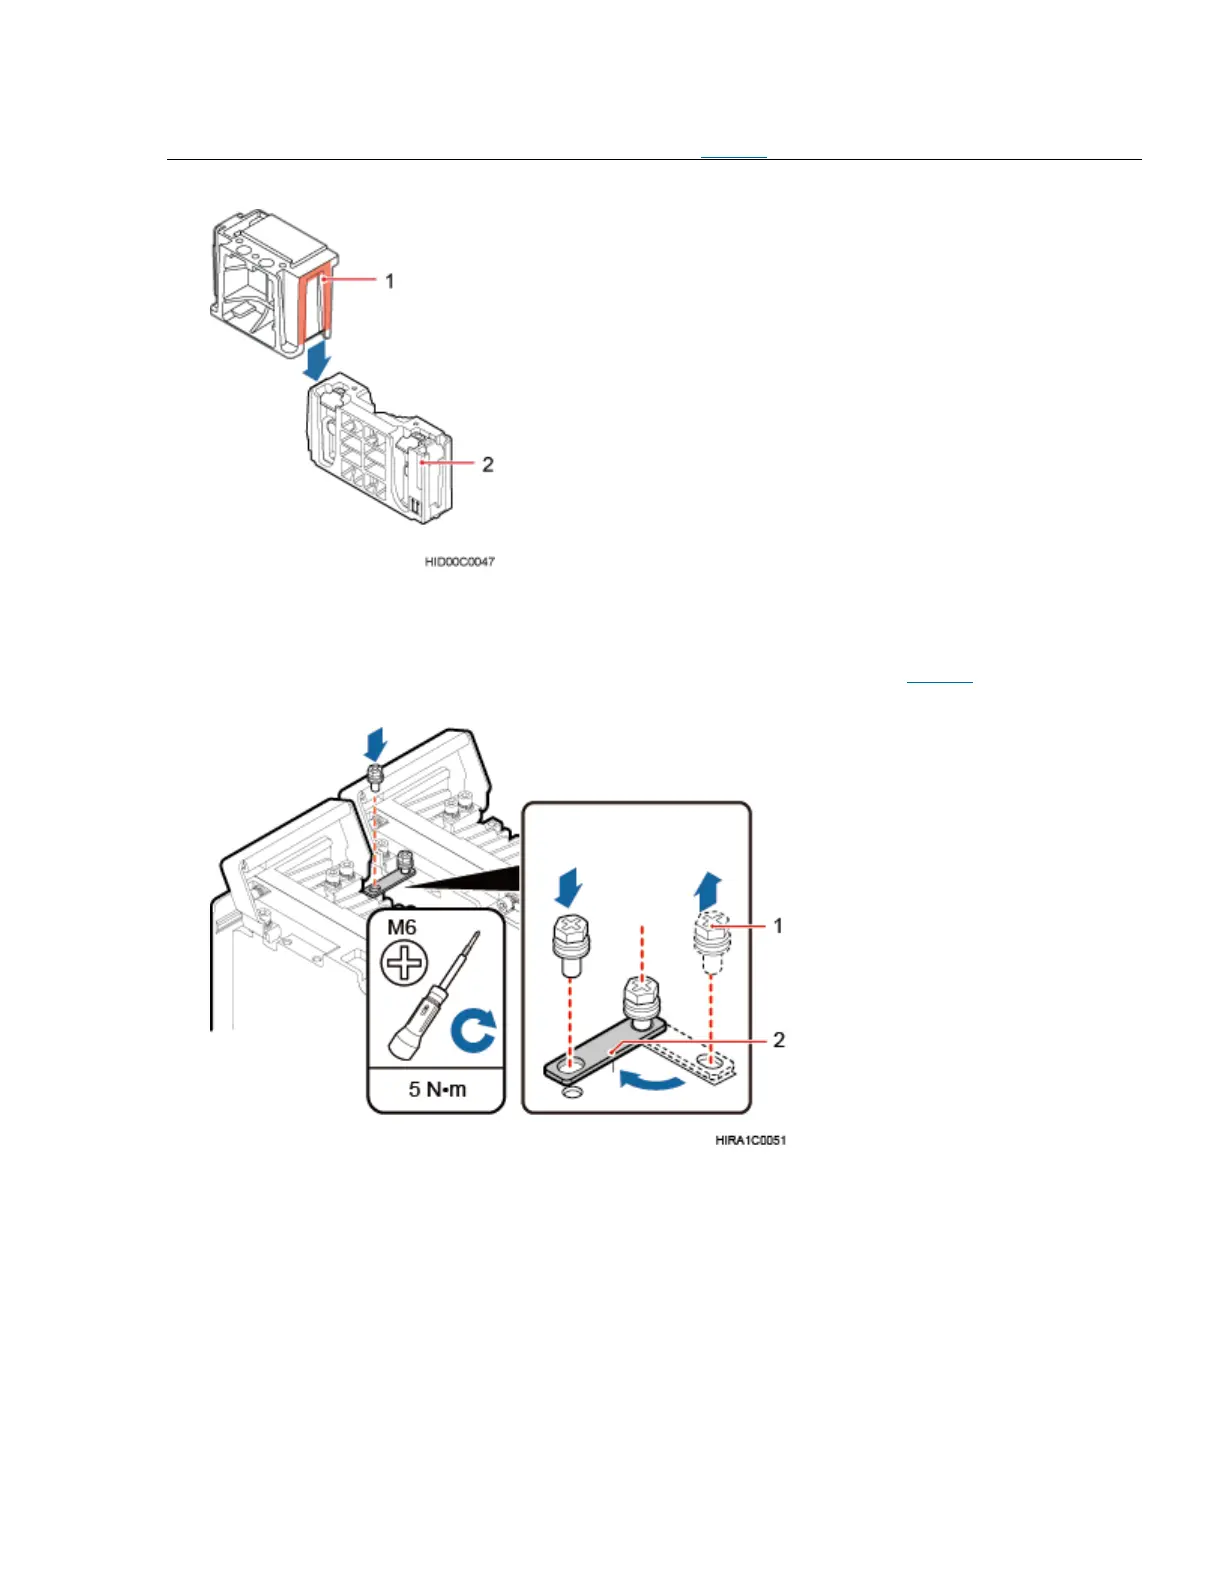
Figure 4 Connecting to the main mounting bracket for installing a common RRU
(1) Main mounting bracket for a blade RRU
(2) Main mounting bracket for a common RRU
4. Install the sheet metal tab for fixing the neighboring RRUs, as shown in Figure 5.
Figure 5 Installing the sheet metal tab
a. Use an M6 Phillips screwdriver to loosen the screw on the sheet metal tab farther from the
handle of the first RRU and remove the screw.
b. Use an M6 Phillips screwdriver to loosen the screw on the sheet metal tab closer to the
handle of the first RRU. Then, rotate the sheet metal tab to align the vacant hole in the sheet
metal tab with a hole on the top of the third RRU.
c. Insert the removed screw into the hole on the top of the third RRU and use an M6 torque
screwdriver to tighten the screw to 5 N·m (44.25 lbf·in.).
 Loading...