English - 23
3. INSTALLATION
3.4 Installation of the boundary wire
The boundary wire can be installed in one of the following ways:
• Securing the wire to the ground with staples.
It is preferable to staple down the boundary cable, if you want to make adjustments to the boundary
wire during the first few weeks of operation.
• Bury the wire.
It is preferable to bury the boundary wire if you want to dethatch or aerate the lawn.
If necessary both methods can be combined so one part of the boundary wire is stapled down and the
remainder is buried.
Best position for the boundary wire
The boundary wire should be laid so it:
• Forms a loop around the working area for Automower
®
. Only an original boundary wire must be used.
This is tinned and has a high quality insulation to withstand the dampness in the ground.
• Maintains a maximum distance of 100 ft (35 metres) from Automower
®
in the entire working area.
• Ideally not longer than 1600 ft (500 metres). For installations where a longer boundary wire of up to
800 metres is required, we recommend a Signal amplifier (522 42 58-01) which is available as an
accessory.
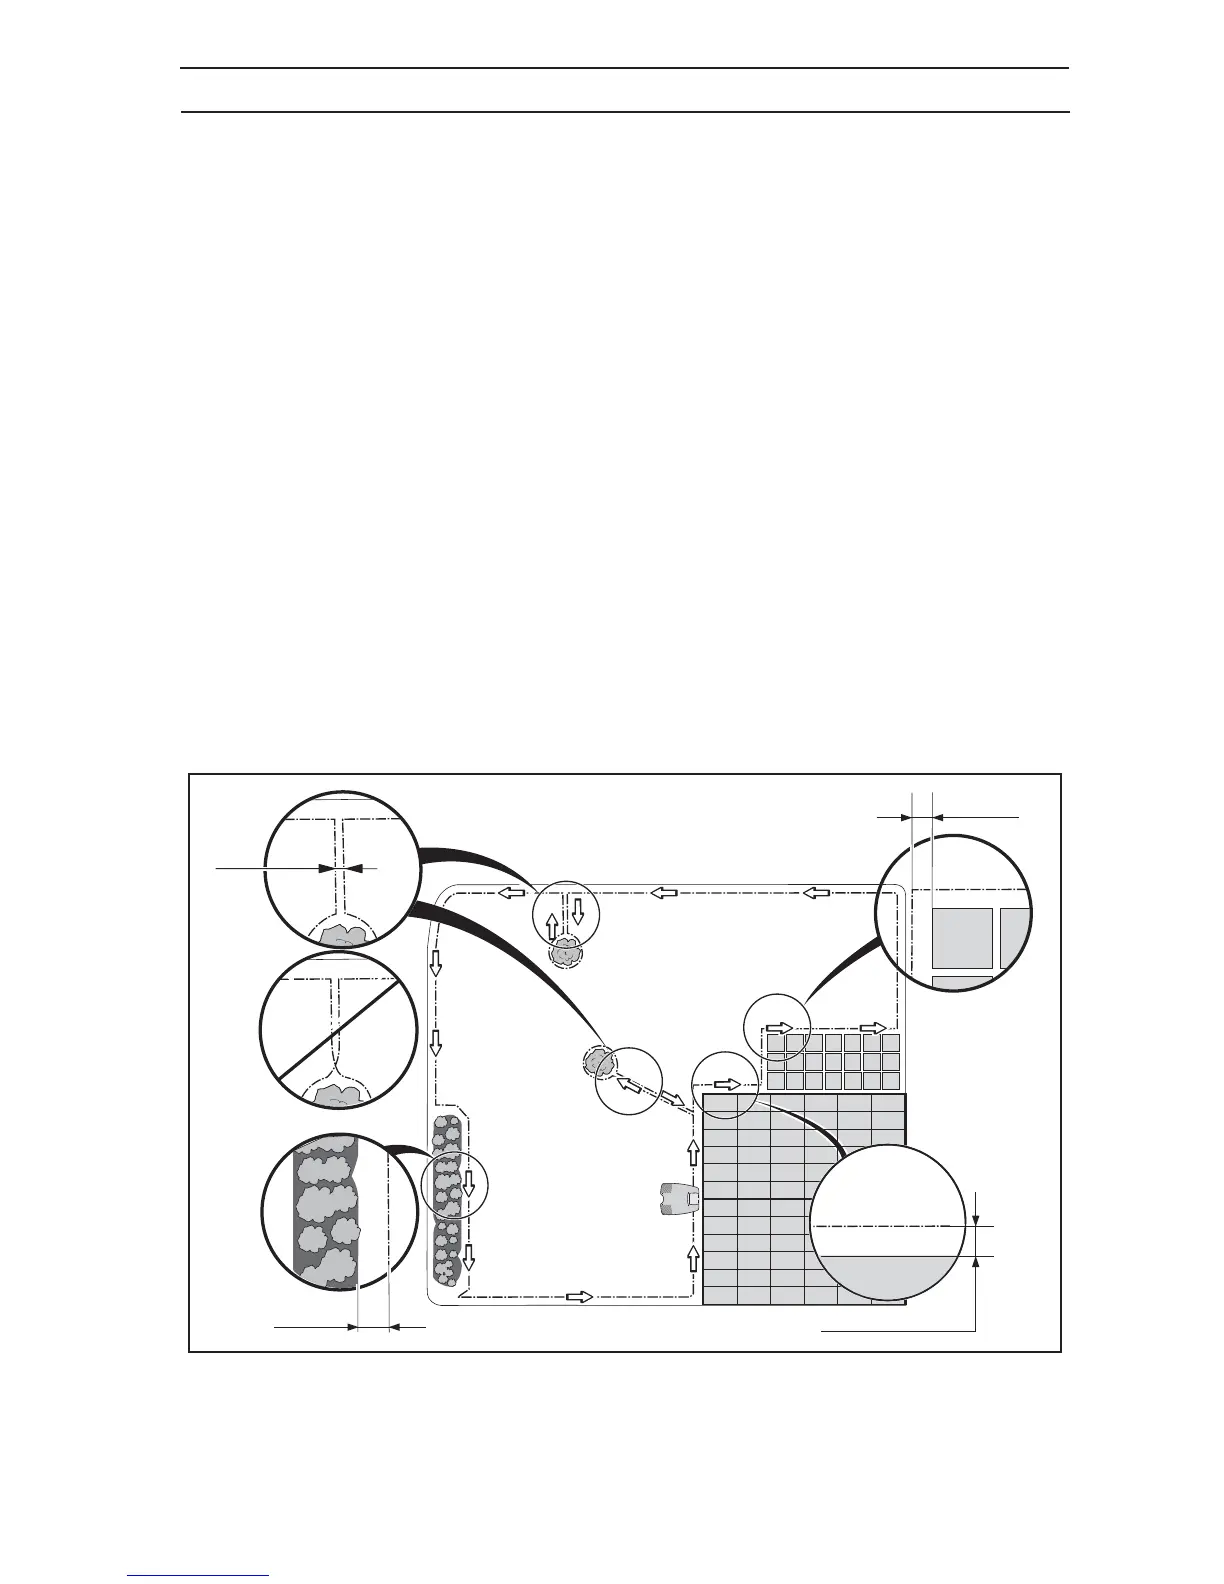
• The boundary wire is laid at different distances from obstacles depending on what the working area
borders. The picture below shows how the boundary wire should be routed around the working area
and around obstacles.
0”
4”
14”
16”

 Loading...