English – 23
Maintenance
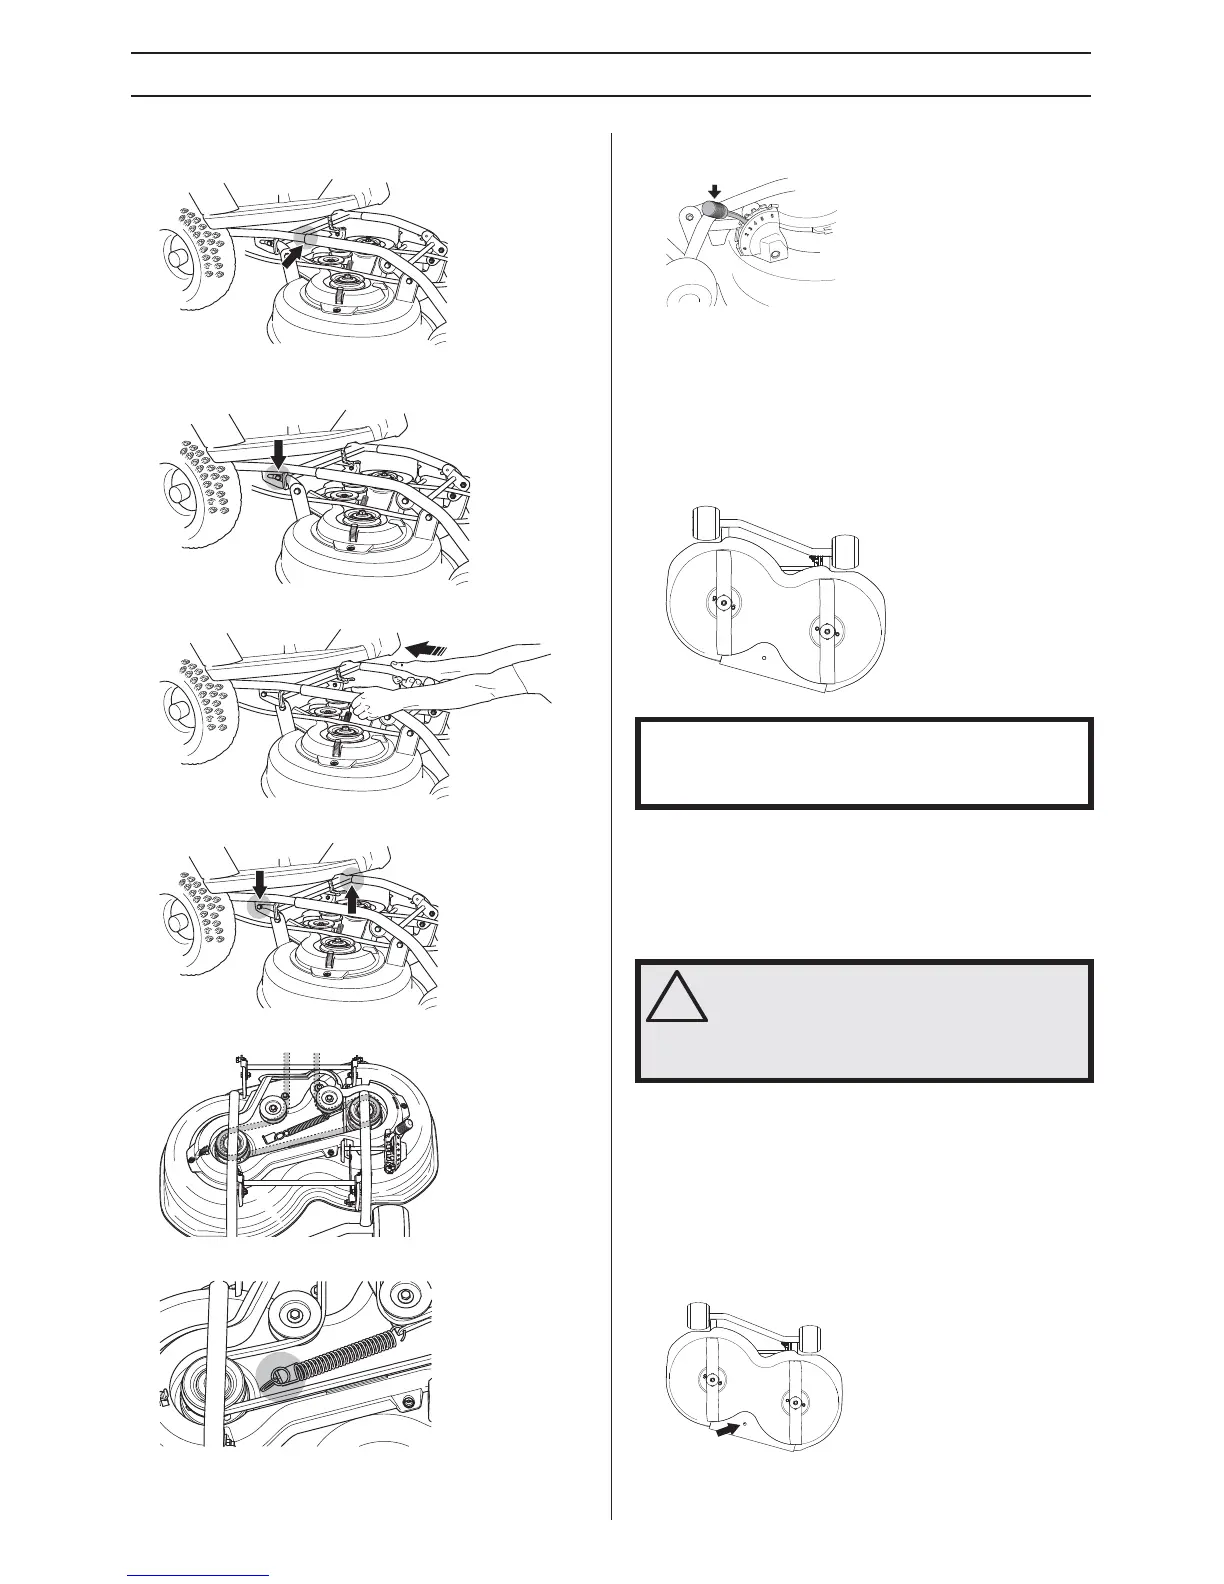
2 Fit the cutting deck's pipe together with the deck frame's
pipe.
3 Push the cutting deck in and make sure the guide bolts fit
into the groo
ves on the deck frame, one on each side.
4 Grab the pipes and push the deck in.
5 Push the deck until you feel the pipes touch bottom.
6 Fit the belt according to the picture.
7 Tension the belt with the belt adjuster.
8 Fit the front cover.
9 Set the cutting deck height control in any of the positions
2-6.
Checking the blades
To achieve the best mowing results it is important that the
blades are undamaged and well-sharpened.
Check that the blades’ attachment screws are tight.
• Put the unit in the service position, see Service position
f
or the cutting unit.
The b
lades should be balanced after sharpening.
Damaged blades should be replaced when hitting obstacles
that result in a breakdo
wn.
Let the servicing dealer judge
whether the blade can be repaired/ground or must be
discarded.
Removing the BioClip plug
To change a BioClip deck from the BioClip function to a
cutting deck with rear ejection, remove the BioClip plug, which
is located under the unit, attached with a screws.
1 Put the unit in the service position, see Service position
for the cutting unit.
2
Loosen the screw holding the plug and remove it.
3 Fit cutting unit.
4 Fit the BioClip plug in the reverse order.
IMPORTANT INFORMATION
Replacing or sharpening the blades should be conducted
by an authorised service workshop.
!
WARNING! If the blades are cracked,
whether caused by poor repair or other
damage, they could break while being used.
The risk increases if the blades are poorly
balanced.
 Loading...