REV U 3-2 604220
in the “ON” (start) position. Do not operate the machine
in the “ON” (start) position.
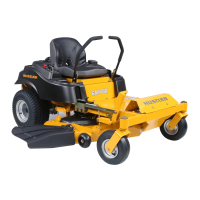
E. Electronic hour meter (Figure 3-3 & Figure 3-4) — regis-
ters 1/10 hour increments up to 9,999.9 total hours.
Connected to the ignition switch, the meter records the
accumulative time while the ignition key is switched to
the RUN position.
Controls
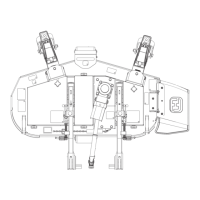
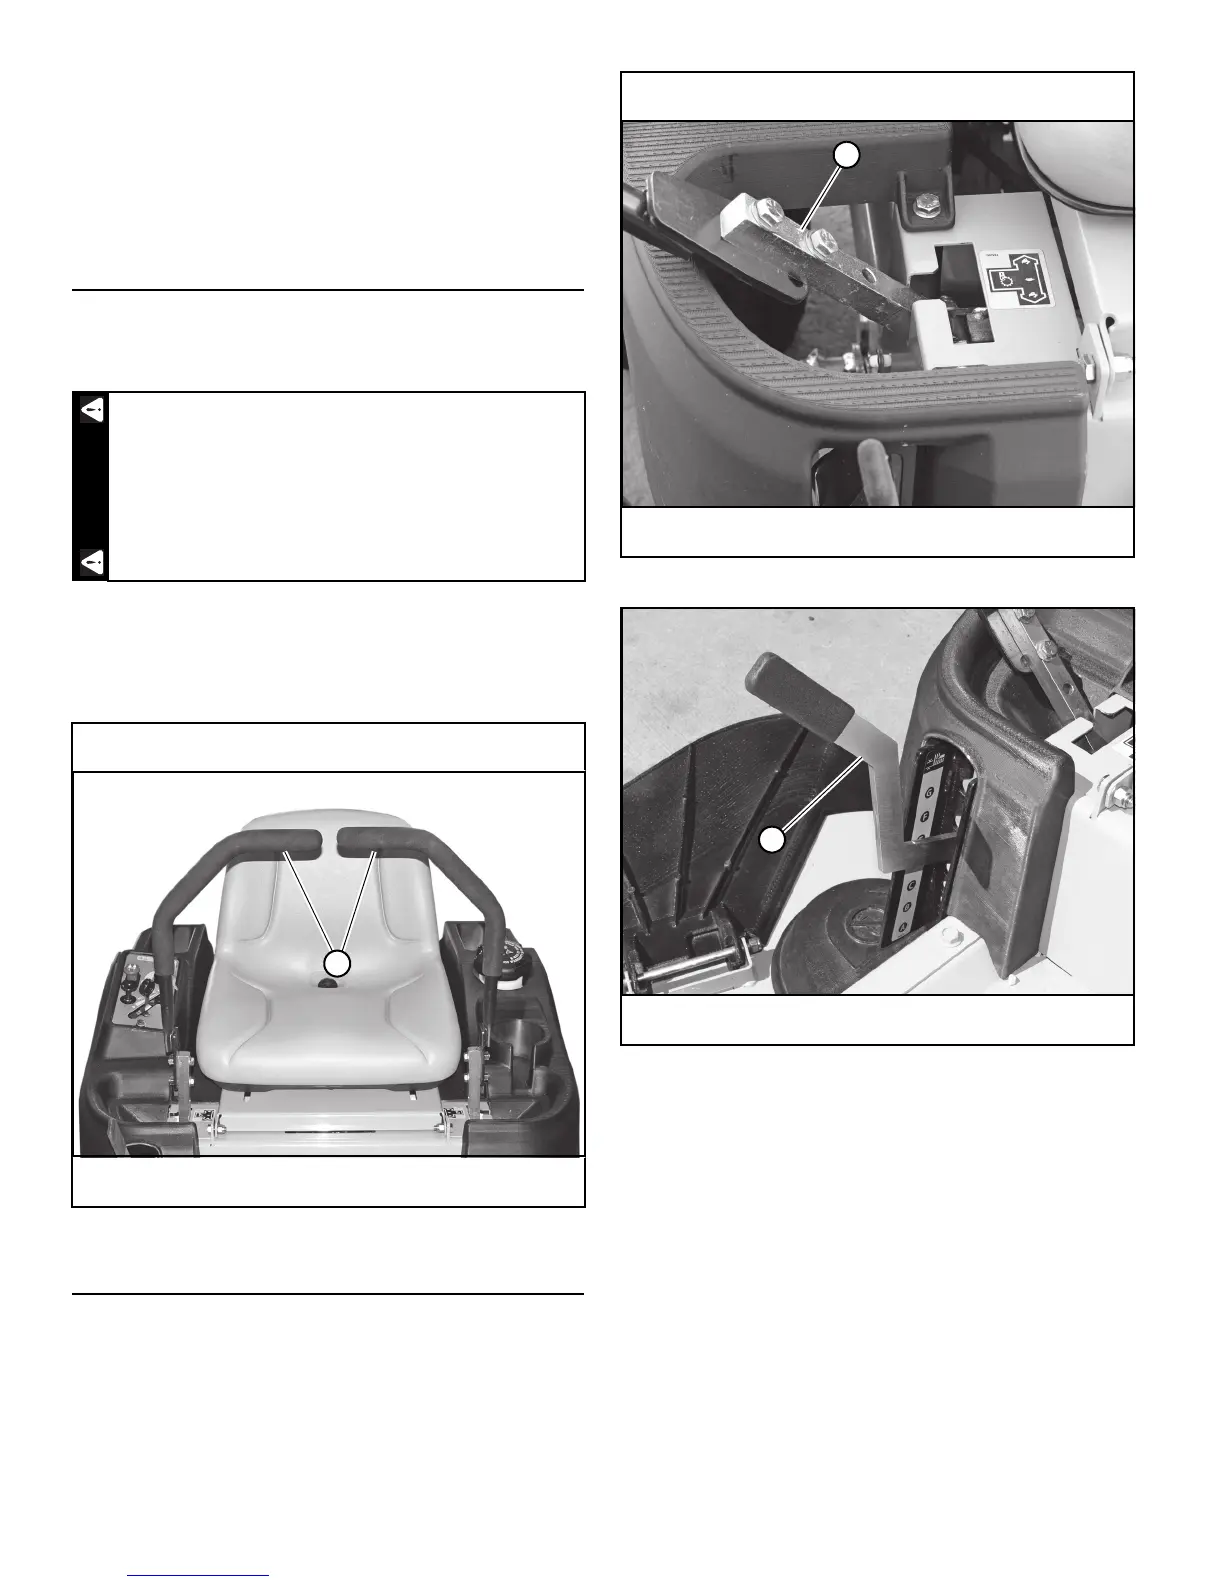
A. Steering control levers (Figure 3-5 & Figure 3-6) —
these levers control the mower’s speed, direction,
stopping, and park brake.
B. Deck cutting height adjusting lever (Figure 3-7) — the
deck cutting height adjusting lever is used to raise or
lower the deck. Slide the lever out of a notch and raise or
lower the lever and slide it into the desired cutting height
notch.
Safety Start Interlock System
The mower’s safety start interlock system consists of the
park brake switches, seat switch, and deck clutch switch.
IMPORTANT: Repair this important safety feature
immediately if it malfunctions.
This safety feature prevents mower runaway or accidental
entanglement during operation.
Check the mower’s safety start interlock system daily,
prior to operation.
To inspect the system:
1. Sit on the seat when testing the seat switch.
2. Set both steering control levers in the park brake
position.
3. Start the engine and allow it to warm up to operating
temperature.
4. With the deck clutch switch down and the steering
control levers in the park brake position, slowly rise off
of the seat. The engine should continue to run.
5. With the deck clutch switch up and/or the steering
control levers in the neutral position, slowly rise off of
the seat. The engine should stop.
The parking brake may not hold the mower if
parked on a slope. Block or chock the machine
when parked on a slope.
Shown with steering control levers in the neutral position
A. Steering control lever
Figure 3-5
Shown with steering control lever in the park brake position
A. Steering control lever
Figure 3-6
A. Deck cutting height adjusting lever
Figure 3-7
 Loading...