REV A 6-4 127180
When mounting blades, rotate them after installation to
make sure blade tips do not touch each other or sides of the
mower.
Belts
Inspect belts frequently for wear and serviceability.
Replace a belt that shows signs of:
• severe cuts
• tears
• separation
• weather checking
• cracking
• burns caused by slipping.
Slight raveling of belt covering does not indicate failure,
trim ravelings with a sharp knife.
Inspect the belt pulley grooves and flanges for wear. A new
belt, or one in good condition, should never run against the
bottom of the groove. Replace the pulley when this is the
case, otherwise, the belt will lose power and slip excessively.
Never pry a belt to get it on a pulley as this will cut or
damage the fibers of the belt covering.
Keep oil and grease away from belts, and never use belt
dressings. Any of these will destroy the belt composition in a
very short time.
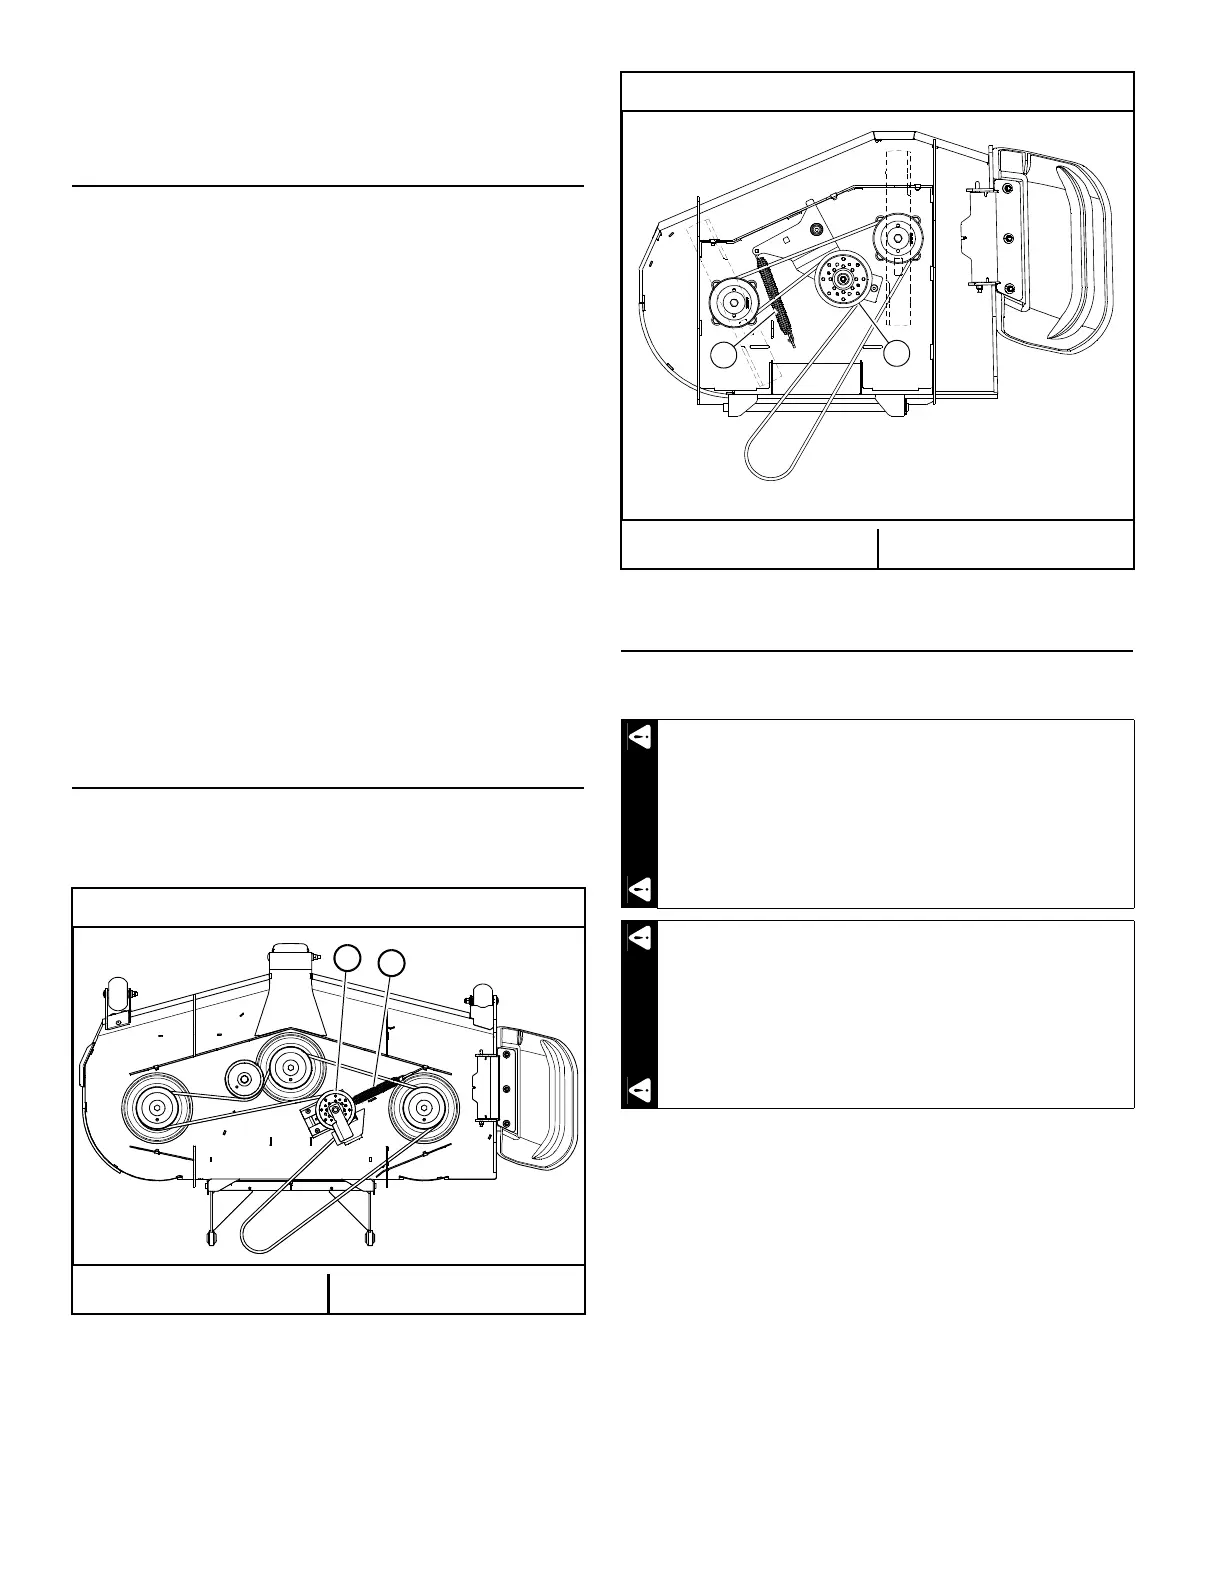
Deck Belt Adjustment
The deck belt tension remains constant by means of a
tension idler and spring. There is no tension adjustment of this
belt. Figure 6-8 & Figure 6-9
Deck Belt Replacement
36" Deck Belt Replacement
1. Before proceeding perform the following sequence:
• Always stop on level ground.
• Disengage the deck clutch.
• Place the steering control levers in the neutral
position.
• Place the park brake lever in the engaged park
brake position.
• Stop the engine.
• Remove the ignition key.
• Wait for the engine and all moving parts to come
to a complete stop.
• Disconnect the negative battery cable.
2. Lower the deck to the lowest setting.
48”/52”/60" Deck shown
A. Idler Spring B. Tension idler
Figure 6-8
36” Deck shown
A. Idler Spring B. Tension idler
Figure 6-9
Allow the engine and muffler to cool before
proceeding with the following procedure.
Exercise caution when releasing spring tension
from the belt idler.

 Loading...