8
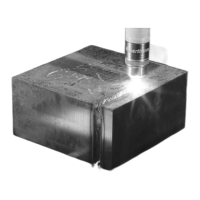
Stationary piercing (up to 3-inch stainless steel and aluminum)
Piercing thicknesses over 2 inches (50 mm) has been
challenging in the past. As a result of the PowerPierce
technology incorporated into the HPR800XD, piercing up
to 3 inches (75 mm) is easily achievable with stainless steel
and aluminum. The torch lifter must have the capability of
using transfer height, pierce height, and cut height
settings.
Pierce control (or pierce complete) signal
High amounts of shield flow during the piercing operation
can be helpful in:
• Clearing the molten pool of metal away from the pierce hole
• Deflecting slag away from the torch
• Cooling the shield
Normal gas operation for HPRXD power supplies switches
both the plasma and the shield gases from preflow to
cutflow as soon as arc transfer is sensed. HPRXD power
supplies incorporate a “pierce control” signal that, when
turned on, delays the switching of the shield flow from
preflow to cutflow until after the pierce delay has expired.
For any HPRXD process with the shield preflow setting
higher than the shield cutflow setting, the pierce control
signal must be turned ON. Conversely, for any HPRXD
process with the shield preflow setting lower than the shield
cutflow setting, the pierce control signal must be turned
OFF. For the 600 A and 800 A processes, the pierce
control signal must be turned OFF. For HPRXD
processes where the shield preflow setting is equal to the
shield cutflow setting, it does not matter whether the pierce
control signal is turned on or off.
Initial height sense
Position the torch over the pierce location and command the
torch lifter to perform the initial height routine. Refer to the
timing diagram (Figure 8 on page 9).
Move to transfer height
Position the torch to the transfer height as listed in the cut
chart (by process and metal thickness).
Note: You can find the cut charts in the Operation section of the
HPR800XD Instruction Manual.
Initiate arc transfer
Initiate the arc firing sequence. The arc will extend from the
torch and transfer to the surface of the plate.
Pull torch back from plate to pierce height
Immediately after arc transfer, move the torch to the pierce
height as listed in cut chart.
Allow arc to penetrate material
Remain stationary for the duration of the pierce delay as
listed in the cut chart. The arc should be fully through the
plate prior to initiating motion. Some adjustment may be
necessary to the pierce delay based on the material type
and the condition of the consumables in the torch.
Initiate motion into part lead-in
Maintain the torch at the pierce height and begin motion into
the part lead-in. Drop the torch to the cut height before the
end of the lead-in section. Lead-in lengths may vary, but as a
general rule lead-in length should be equal to the material
thickness to ensure the pierce puddle has been cleared
prior to initiating the cut.
Cut the part
Finally, complete the contour cut of the part.
 Loading...