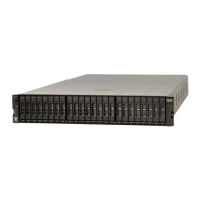
4. Pull the rail forward, away from the rear bracket, as shown in Figure 111.
5. Repeat step 1 on page 127 through step 4 for the other side of the rail assembly.
Replace the support rails
6. To reinstall the support rails, or replace them with support rails from FRU
stock, follow the procedure in “Installing or replacing the support rails:
2077-92F” on page 49.
Connecting the optional 2077-92F SAS expansion enclosures
After you install expansion enclosures into the rack, you must connect them to
each Storwize V5000 Gen2 system that will use them. The system requires software
version 7.8.0. Do not connect the expansion enclosure if software version 7.8.0 is
not installed on the system.
About this task
This task applies if you are installing a 2077-92F expansion enclosure.
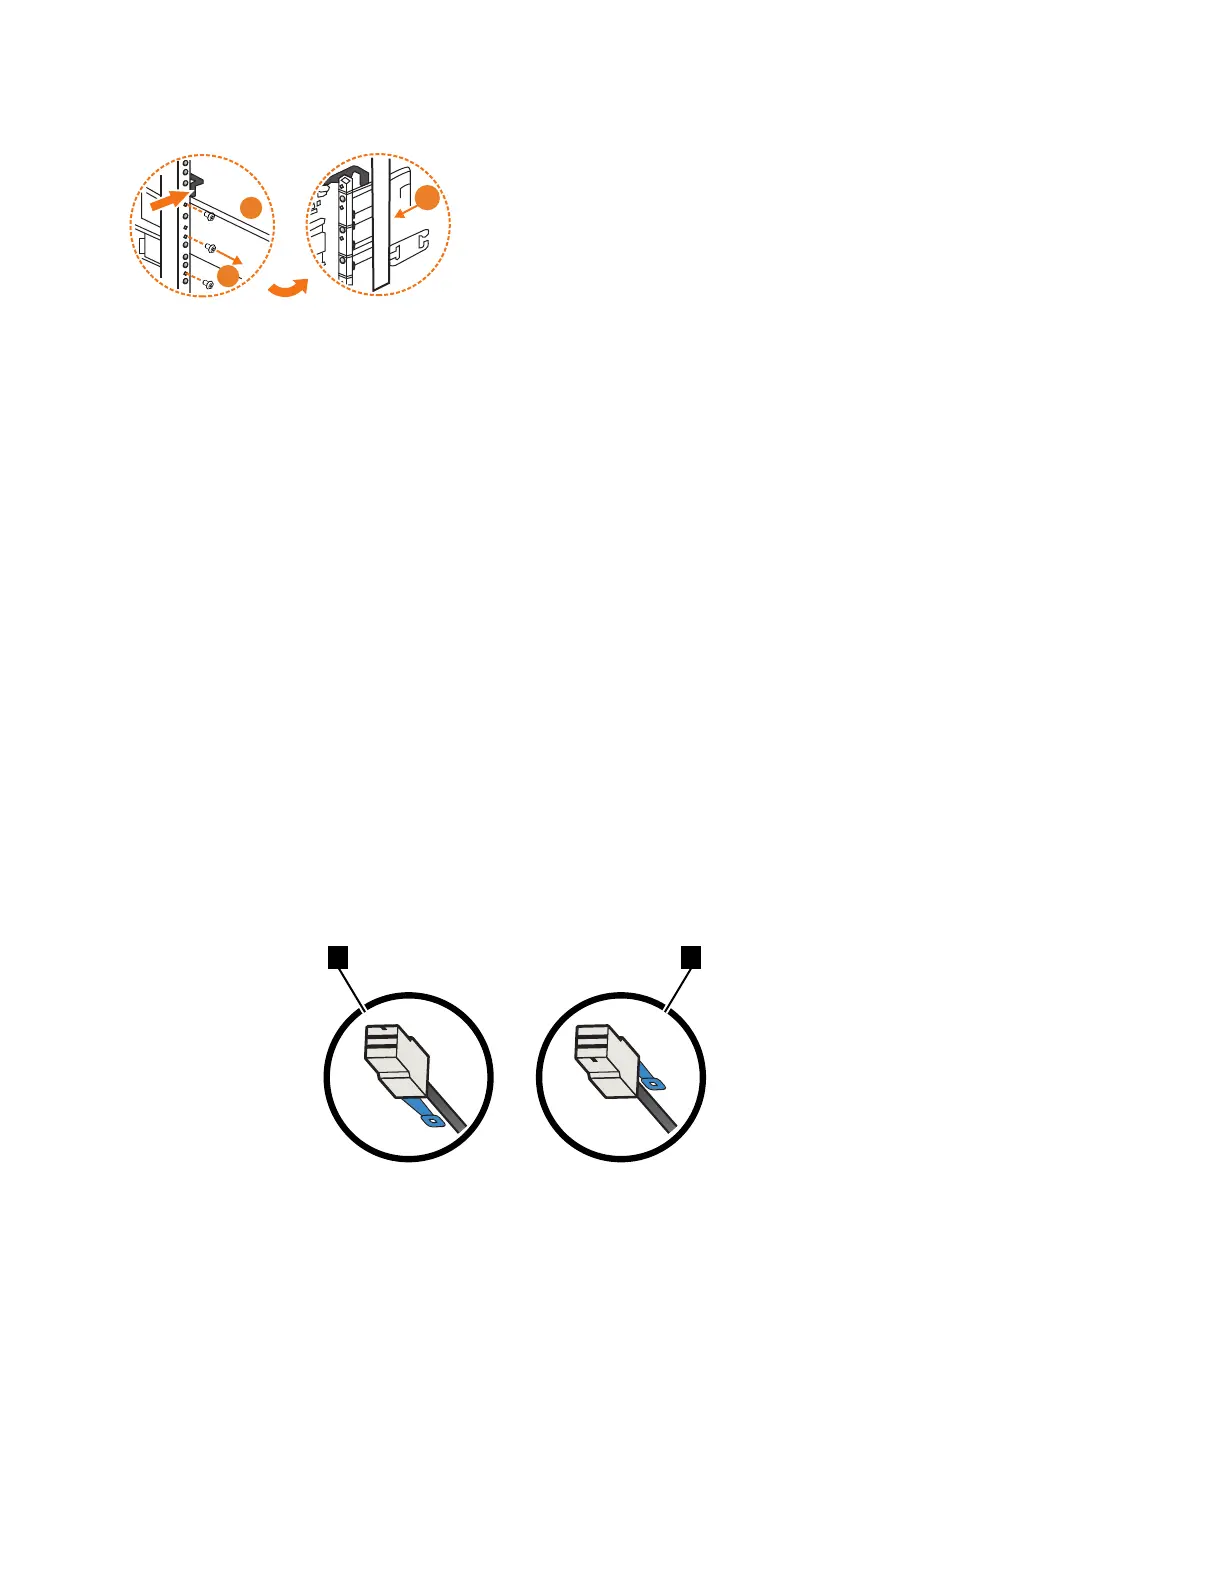
Note: When you insert SAS cables, ensure that the connector is oriented correctly
to the node and expansion enclosure.
v For Storwize V5000 Gen2 control enclosures and 2145-24F or 2145-12F expansion
enclosures, the blue pull tab must be below the cable (▌1▐ in Figure 112).
v For 2077-92F enclosures, the blue pull tab must be above the connector (▌2▐ in
Figure 112).
v Insert the connector gently until it clicks into place. If you feel resistance, the
connector is probably oriented the wrong way. Do not force it.
v When inserted correctly, the connector can be removed only by pulling the tab.
Be aware of the following guidelines when you attach the cables to the SAS ports.
Figure 111. Remove the rail assembly from the rear frame bracket
Figure 112. SAS cable connector orientation
128 Storwize V5000 Gen2: Quick Installation Guide
 Loading...