Installing a RAID adapter battery remotely in the server
Use this information to install a RAID adapter battery remotely in the server.
About this task
The batteries must be installed only on top of the microprocessor 2 air baffle. To
install a RAID adapter battery in the server, complete the following steps:
Procedure
1. Read the safety information that begins on “Safety” on page v and
“Installation guidelines” on page 43.
2. Turn off the server and peripheral devices and disconnect the power cords.
3. Remove the cover (see “Removing the cover” on page 51).
Note: Steps 4 through 5 apply to a RAID adapter that is already installed in
the server riser-card. If no RAID adapter is installed, skip to step 6.
4. Remove the riser-card assembly from the server and set it aside (see
“Replacing a PCI riser-card assembly” on page 68).
5. Remove the adapter from the riser-card assembly.
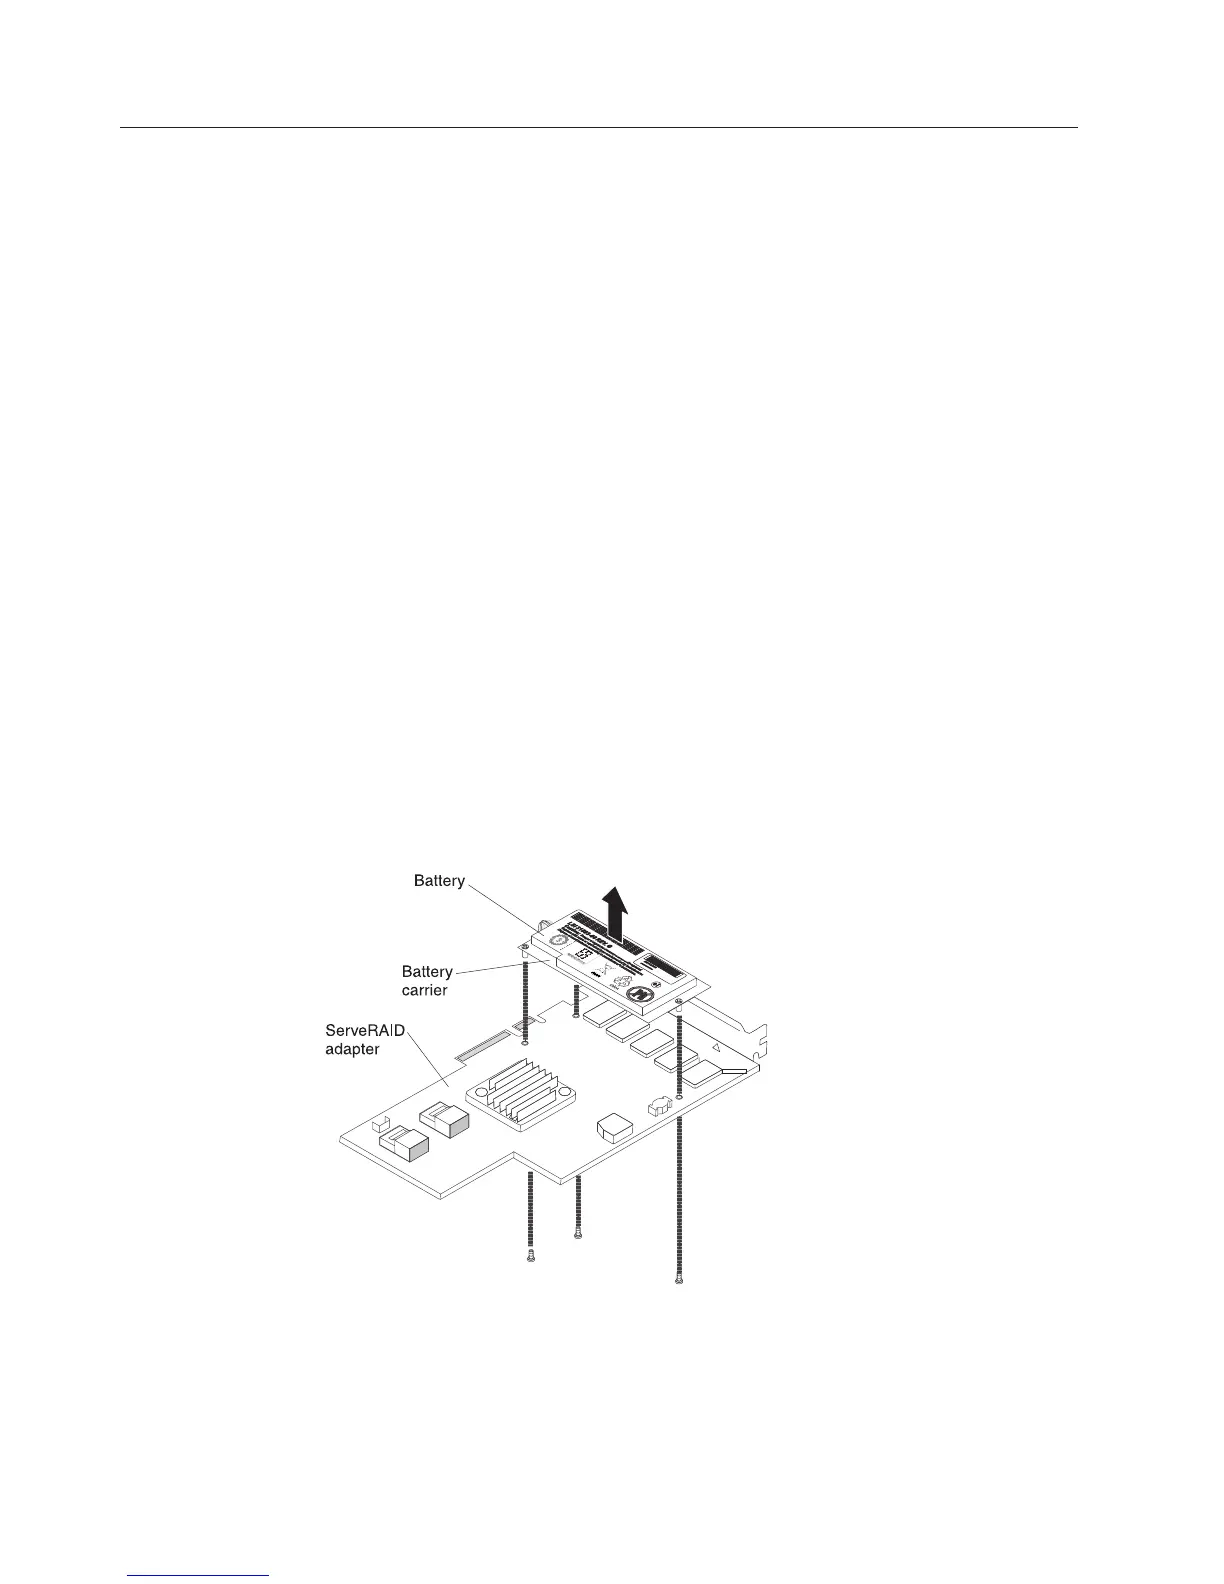
6. If a battery and battery carrier are attached to the RAID adapter, disconnect
the battery carrier cable from the battery and remove the three screws that
secure the battery carrier to the adapter. Set the battery and battery carrier
aside.
Note: If your battery and battery carrier are attached with a clip, squeeze the
clip on the side of the battery carrier to remove the battery from the battery
carrier.
7. Install the interposer card in the interposer card connector on the RAID
adapter:
a. Remove the interposer card and the screw from the bag.
b. Rotate the plastic standoff on the interposer card so that it aligns with the
hole on the RAID adapter; then, align the connector on interposer card
Figure 64. Battery removal
90 IBM System x3550 M3 Type 4254 and 7944: Installation and User's Guide
 Loading...


