25
9
OPTIONAL SPEAKER-MICROPHONE
1
2
3
4
5
6
7
8
9
10
11
12
13
14
15
16
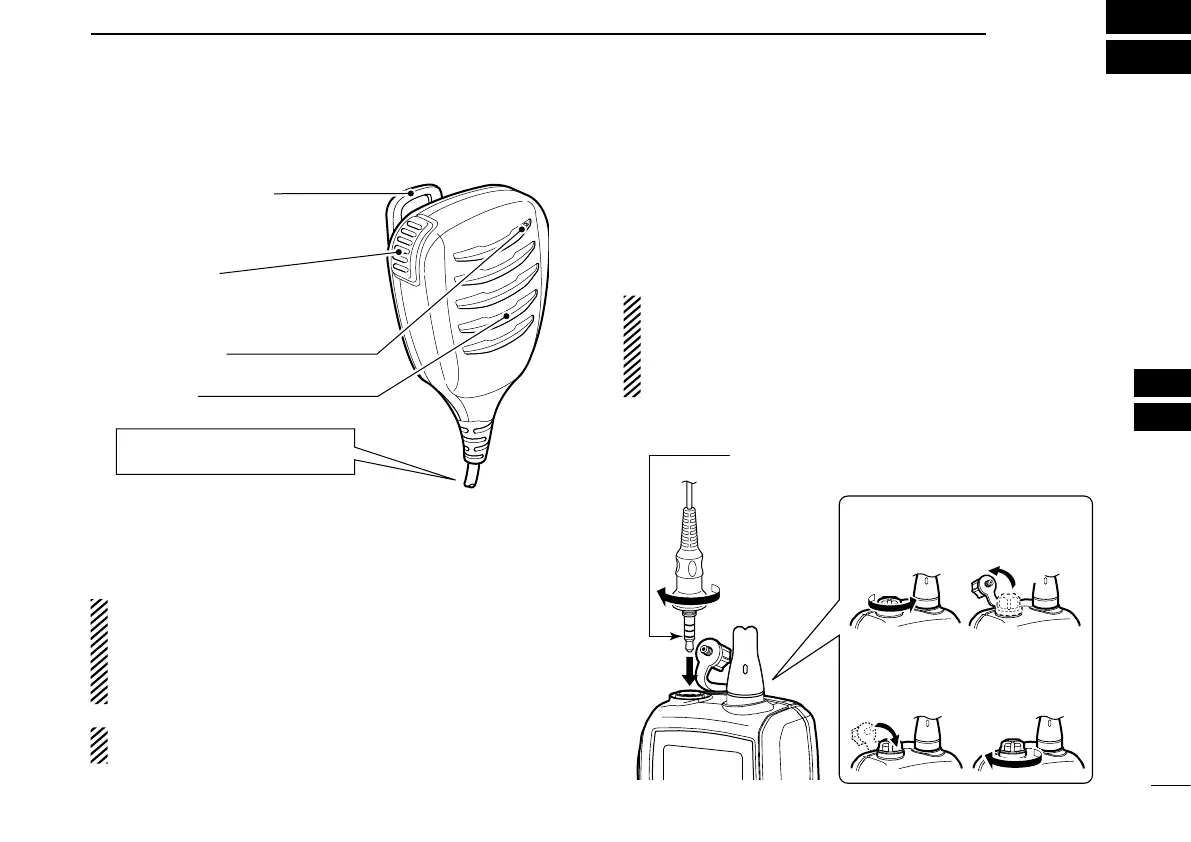
■ HM-165 descriptions
witch
ansmits during push.
es during release.
ophone
Speaker
Alligator type clip
To
attach the speaker-microphone
our shirt or collar, etc.
Tu rn the transceiver power OFF
when connecting the HM-165.
NEVER immerse the connector in water. If the connector
gets wet, be sure to dry it BEFORE attaching it to the trans-
ceiver.
NOTE: The microphone is located at the top of the
speaker-microphone, as shown above. To maximize the
readability of your transmitted signal (voice), hold the mi-
crophone approx. 5 to 10 cm from your mouth, and speak
in a normal voice level.
NOTE: When the speaker-microphone is connected to
the transceiver, the noise cancellation does not work.
■ Attachment
Turn power OFF before attaching the speaker-microphone.
Then, insert the speaker-microphone
’s
connector into the
[SP MIC] connector and carefully screw it tight, as shown
below. Be careful not to cross-thread the connection.
IMPORTANT: KEEP the transceiver’s [SP MIC] cap at-
tached when the speaker-microphone is not in use. If the
cover is not attached, water will get into the transceiver.
Moreover, the terminals (pins) will become rusty, or the
transceiver will function abnormally if the connector gets wet.
CAUTION: Attach the speaker-microphone’s
connector securely to prevent accidental
loss, or water intrusion in the connector.
Detaching:
Rotate the [SP MIC] cap counter-
clockwise (q), then detach it (w).
Attaching:
Attach the
[SP MIC]
cap (
q
), then
rotate it clockwise completely (
w
).
q
w
w
q

 Loading...