INSTALLATION
52
INITIAL LIGHTING
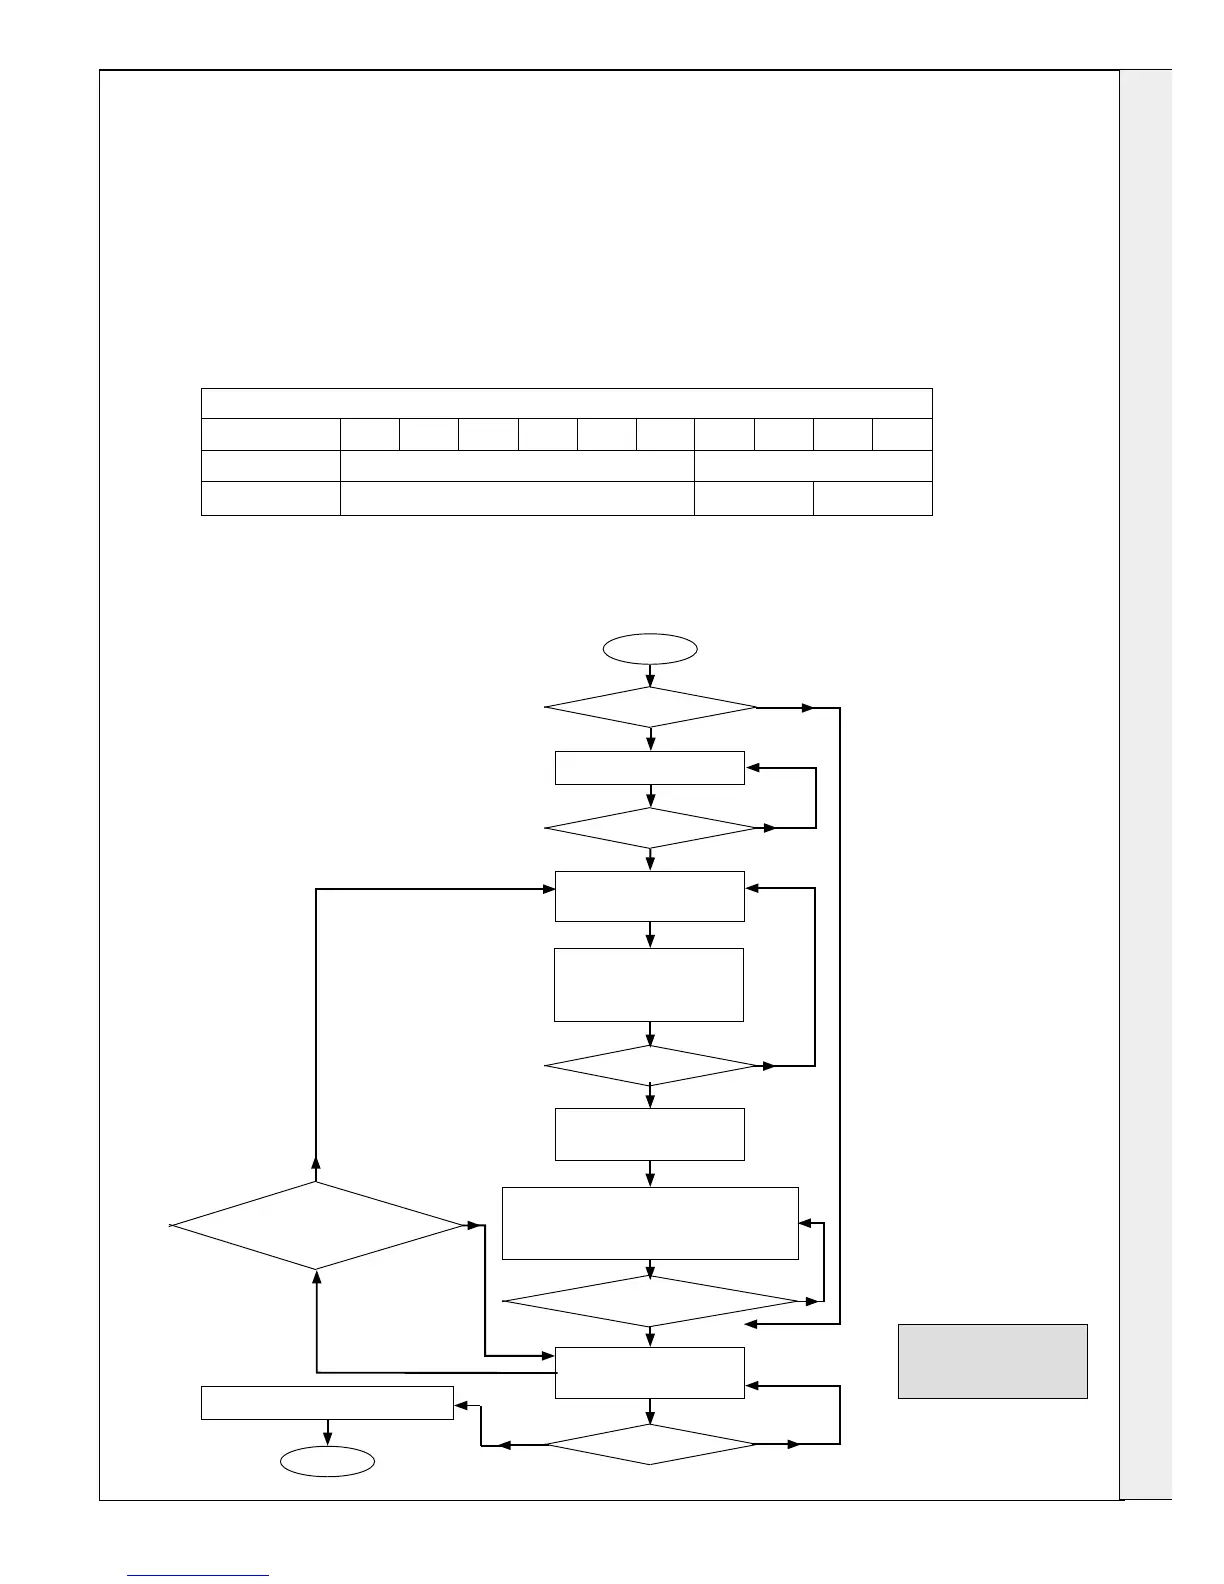
OPERATING SEQUENCE
1. Check that the system has been lled and the boiler is not air locked -
air in the boiler could damage the heat exchanger. For this reason the
airvent located in the left top side must never be shut off.
2. Check that all the drain cocks are closed and any valves in the ow
and return are open.
3. Check that the GAS SERVICE COCK IS ON.
4. Fill the condensate trap with water before putting the unit into operation
(see Frame 62 for condensate trap removal).
5. Check the indication on the pressure gauge. If the pressure is less
than 1 bar the installation should be lled up rst (sealed system only).
6. Switch the electricity supply ON and check that all
the external controls are calling for heat. Check
boiler is set for winter operation - see user interface
basic operating instructions.
7. The boiler will commence the ignition sequence. If
after 5 attempts the boiler has failed to light then it
will lock out. Press the reset button to restart the
ignition sequence.
8. Operate the boiler for 10 minutes and check the gas
rate (Table 1). You should be able to read at least
90% of the nominal.
Flue CO
2
% measurements (hot condition)
40 60 80 100 120 150 30P 40P 60P 80P
Max Rate
9.7%
11.4%
Min Rate
8.7%
10.2% 10.5%
Standby
yes
yes
yes
yes
no
no
no
no
no
noyes
yes
Heat demand on?
Temp. < setpoint?
Demand
off or Temp. >setpoint?
Heat Demand Off?
Fan off. Pump off
Flame detected?
Demand On
& Temp. <Set point & Anti-cycle
done?
Fan On
20s Fan Pre-purge
Pump On
Spark Generator On
Gas Valve On
3s Ignition Period
Burner Output controlled relative to
Heat Demand by varying Fan Speed
Burner On
Spark Generator Off
1st Stabilisation Period
Gas Valve Off
Pump Overrun
Note. The fan runs for
4 mins after the burner
switches off
Standby
 Loading...