11
Fitting the Burner
THIS BURNER MUST BE SECURELY FIXED TO THE FIREBOX THROUGH THE FRONT LEGS
Refit the burner tray into the fire box by locating the front leg holes over the studs in the fire box. Se-
cure using the 2 nuts previously removed. Tighten the nuts. If the burner has been supplied with the
remote control then the sensor lead must be left suitably positioned to enable mounting. (See sec-
tion on Sensor mounting page 13).
If the burner is to be fitted with the Horizontal Front then the brackets will need fitting at this stage
before the burner is finally bolted and connected into the firebox. Otherwise it becomes difficult to lo-
cate the screws with the burner fitted particularly with the manual version. (See Figs. 7)
Gas Connection
A means of isolation must be provided in the supply to facilitate servicing. An 8mm compression
isolating cock/pressure test point has been supplied at the inlet to the appliance. This is required to
allow subsequent servicing to take place.
After refitting the burner tray complete the gas connection by connecting the pipe to the isolating
cock/pressure test point elbow.
Turn the gas supply ON and check for gas soundness at all joints.
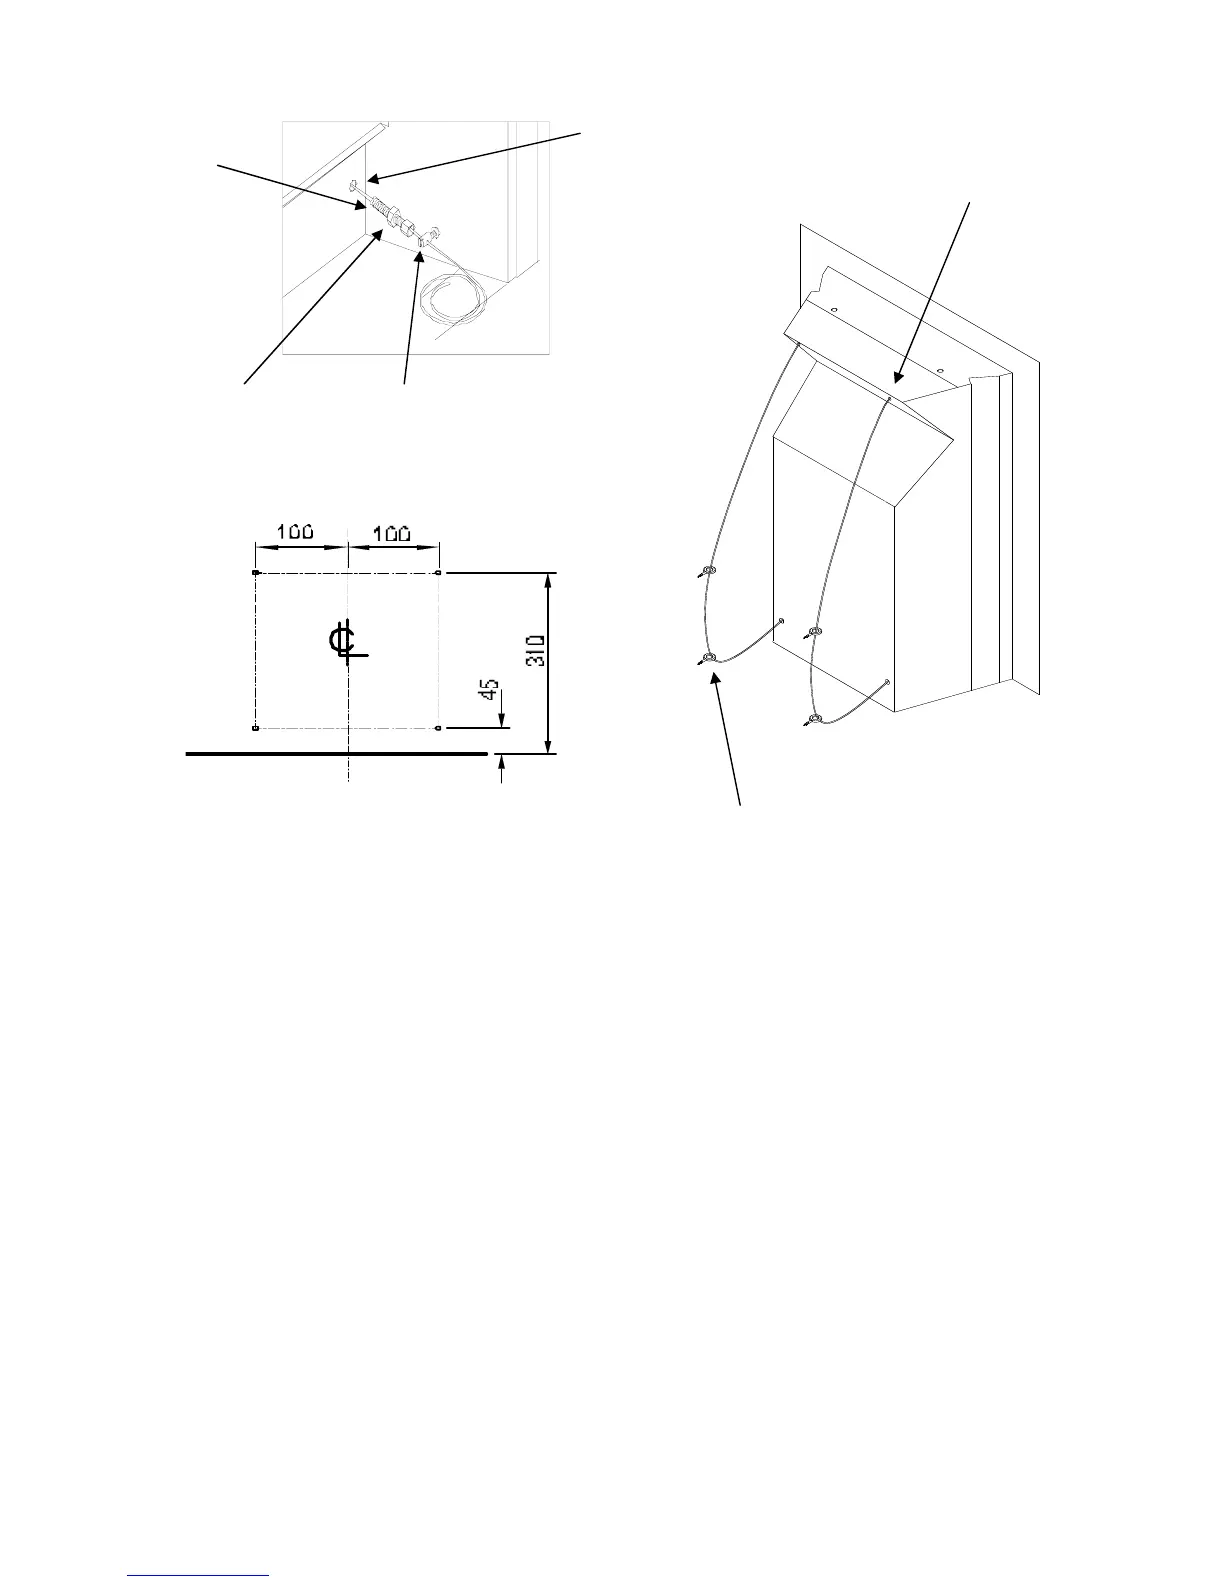
Cable Holes
Eye Bolts
Fig 3
Fig 4
Fig 5
Eye Bolt Fixing Positions
Hole In Back
Of Firebox
Threaded
Adjuster
Cable Retainer Tensioning Nut

 Loading...