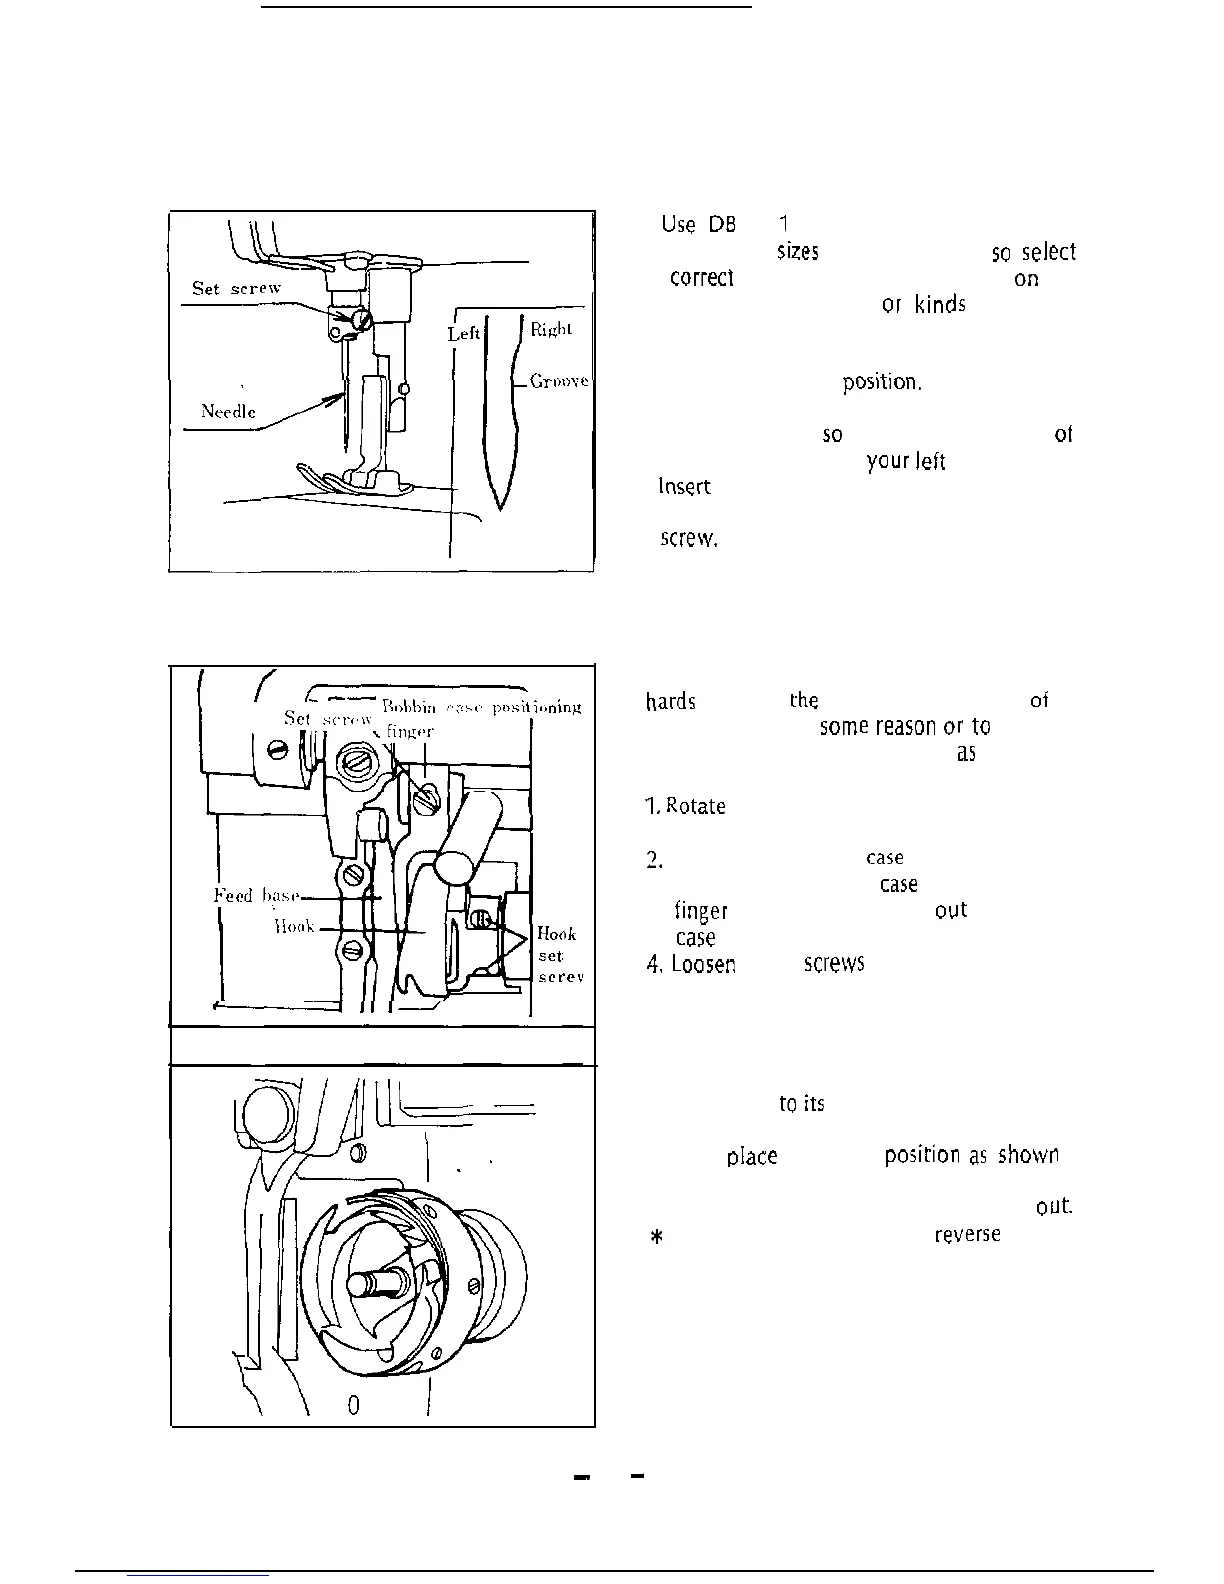
INSERTING THE NEEDLE
INSTALLING AND REMOVING
r
“re
DB
X
1
needler.
There are many
numbers and
sizes
of the needle,
IO
select
the mrrect size and number depending
on
the
thickness of the thread
or
kinds of sewing
material.
1. Rotate the hand wheel and bring the needle
bar to the highest porition.
2. Loosen the needle clam,, screw.
3. Hold the needle so that the long groove
of
the needle comes to your
leit
side.
4. insert the needle deep into the needle hole
5. Then securely tighten the needle clamping
screw.
THE SEWING HOOK
-
10
-
During the running of the machine, if thread
hardr
get into
rhe
hook or the position
ai
the
hook changes for
borne
reason
01
to exchange
the hook with a new one, do
ar
follows in
order:
1.
Rotate
the hand wheel and bring the needle
bar to the highest position.
2.
Remove the bobbin
case
and the needle
3. Remove the bobbin
case
base positioning
finger
ret screw and take out the bobbin
case
positioning finger.
4.
Loaren
the 3 xrews of the sewing hook.
5. Rotate the hand wheel and raise up the
feed base
to
its
highest position.
6. Rotate the sewing hook with your hand
and
place
it in the
position
ar
shown in
the figure.
7. Pull the hook to your left and take it
out.
*
To install the hook back, reverre this pro-
cedure.
 Loading...