– 14 –
警告
警告
ミシンの不意の起動による事故を防ぐため、電源を切ってから行ってください。
WARNING :
Turn OFF the power before starting the work so as to prevent accidents caused by abrupt start of the
sewing machine.
为了防止意外的起动造成的事故,请关掉电源后再进行操作。
18.
ペダル圧とストローク
/
PEDAL PRESSURE AND PEDAL STROKE
/
踏板压力和行程
(DLU-5490N-7, DLU-5490NE-7, DLU-5494N-7)
19.
ペダルの調整
/ ADJUSTMENT OF THE PEDAL /
踏板的调整
(DLU-5490N-7, DLU-5490NE-7, DLU-5494N-7)
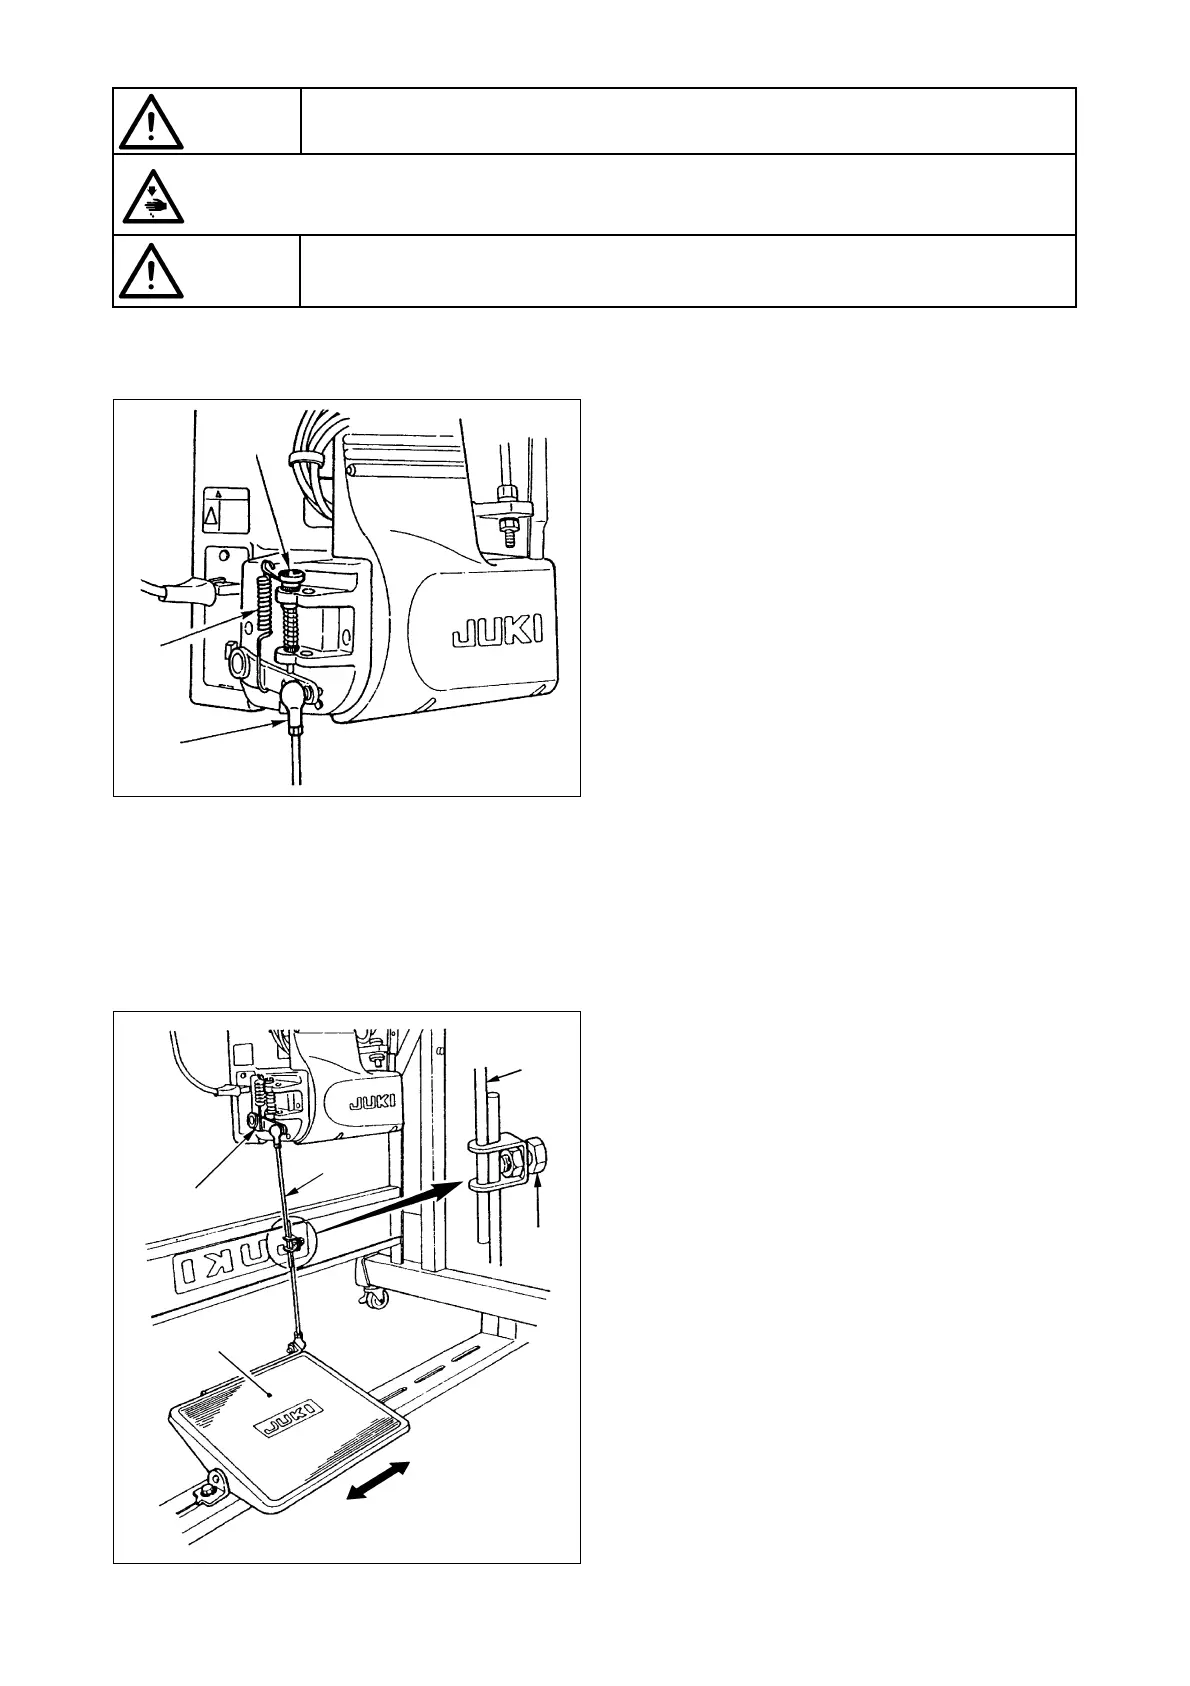
1.
ペダル踏み込み庄の調整
ペダル圧調節ばね❶を掛け替えて調整できます。
2.
ペダル踏み返し力の調整
逆踏み調節ねじ❷にて調節できます。
3.
ペダル踏み込みストロークの調整
連結棒❸を左側の穴に付け替えると、ストローク
は小さくなります。
1.
Adjusting the pressure required to depress the
front part of the pedal
This pressure can be changed by altering the mount-
ing position of pedaling pressure adjust spring
❶
.
2.
Adjusting the pressure required to depress the
back part of the pedal
This pressure can be adjusted using regulator screw
❷
.
3.
Adjusting the pedal stroke
The pedal stroke decreases when you insert con-
necting rod
❸
into the left hole.
1.
踏板踩踏压力的调整
调换踏板压力调节螺丝
❶
可以调节压力。
2.
踏板回踩力的调整
用回踩调节螺丝
❷
可以进行调节。
1.
連結棒の取り付け
モータ制御レバー
❶
と連結棒
❷
がまっすぐになるよう、
踏板調節板
❸
を矢印の方向に動かしてください。
2.
ペダルの角度
1)ペダルの傾きは、連結棒の長さを調節することに
より、自由に変えられます。
2)調節ねじ❹をゆるめ、連結棒❷を出し入れして行
います。
1.
Installing the connecting rod
Move pedal
❸
to the right or left as illustrated by the ar-
rows so that motor control lever
❶
and connecting rod
❷
are straightened.
2.
Adjusting the pedal angle
1) The pedal tilt can be freely adjusted by changing the
length of the connecting rod.
2) Loosen adjust screw
❹
and adjust the length of
connecting rod
❷
.
1.
联结杆的安装
把踏板调整板
❸
沿箭头方向移动,让马达控制杆
❶
和
联结杆
❷
成一直线。
2.
踏板角度
1) 调整联结杆的长度,可以自由地调整踏板的倾斜度。
2) 拧松调节螺丝
❹
,拉出或插进联结杆
❷
进行调整。
❷
❶
❸
❶
❷
❷
❹
❸
3.
踏板踩踏行程的调整
把联结杆
❸
调换到左侧的孔后行程变小。
 Loading...