– 7 –
WARNING :
To protect against possible personal injury due to abrupt start of the machine, be sure to start the
following work after turning the power o and ascertaining that the motor is at rest.
4-4. Installing a bobbin
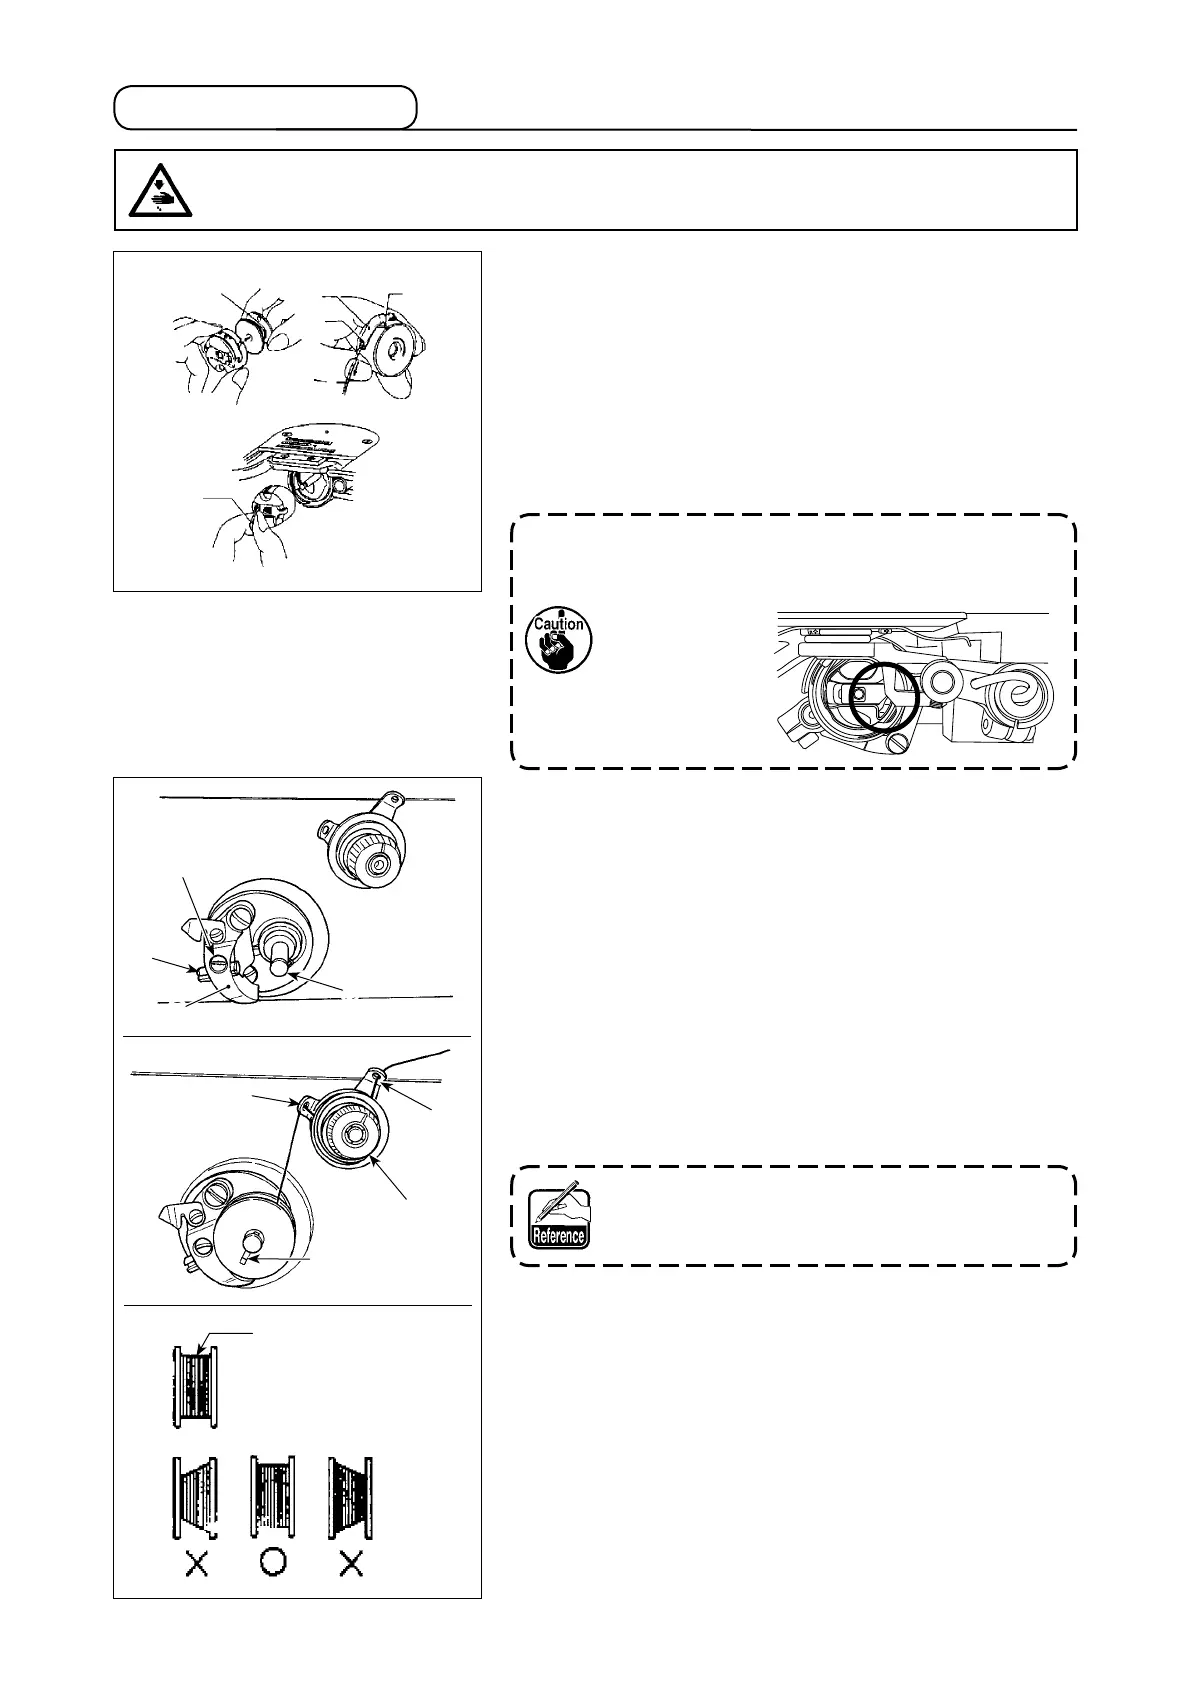
1. Installing a bobbin
Firstly, t a bobbin in the bobbin case. Draw the bobbin
thread from the bobbin to the right. Then, pull the thread
through threading openings
❶
to
❸
.
After pulling out the bobbin thread, observe the bobbin from
the bobbin side (not from the bobbin case side) to check
whether or not the bobbin turns clockwise.
The bobbin thread tension can be adjusted with spring
❷
.
Open bobbin cap
❹
. Fit the hook in position.
In the case the feed dog base overlaps the bob-
bin case when the sewing machine stops, the
bobbin case may not be removed smoothly.
In such a case,
turn the hand-
wheel in the
reverse direction
and remove the
bobbin case.
2. Winding a bobbin
1) Put a bobbin on bobbin winder shaft
❺
.
At this time, align the spring of bobbin winder shaft
❺
with
groove
❻
on this side.
2) Pass the thread in the order of
❽
to
and wind the
thread on the bobbin.
3) Bobbin winder frame
❼
is set in position by pushing the
bobbin.
4) Run the sewing machine. Then, the bobbin rotates to au-
tomatically wind the thread on the bobbin.
5) When the bobbin is fully wind with the thread, bobbin
winder frame
❼
comes o to stop automatically.
The amount of thread wound on a bobbin must be 80 % of
the full capacity of the bobbin.
❶
❸
❹
❷
Standard amount of thread
wound on a bobbin
80%
Loosen screw
A
of bobbin winder frame
❼
and
adjust the amount of thread wound on a bobbin
by moving pin
B
.
❺
❼
A
B
❻
❾
❽
 Loading...