– 43 –
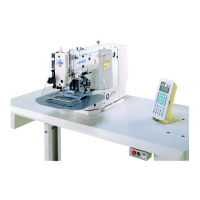
6-14. Stop of the needle bars and angle of corners for corners stitching
(For LH-3568A, 3568A-7, 3588A and 3588A-7)
• Stop of the needle bar
When change lever
❶
is moved to position L, the
left-hand needle bar stops, and when it is moved to
position R, the right-hand needle bar stops.
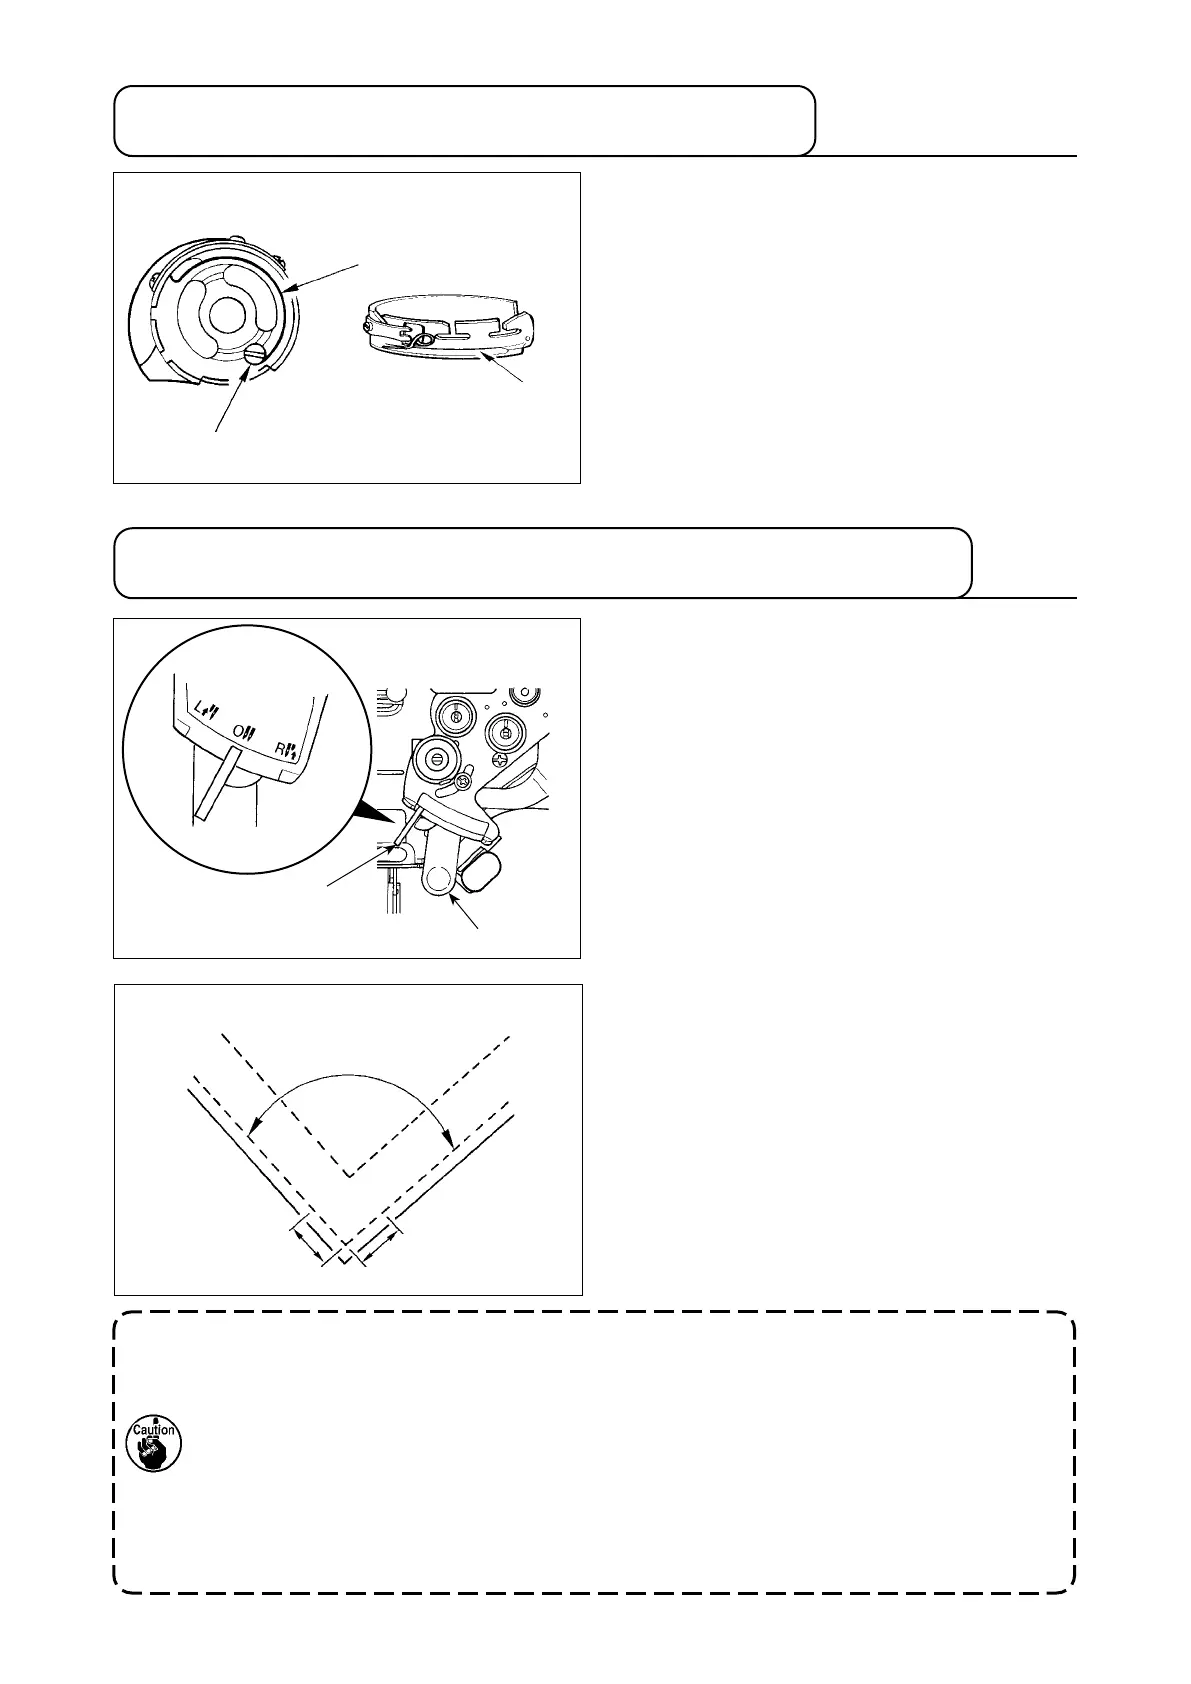
(3/16" gauge)
3 stitches
3 stitches
90˚
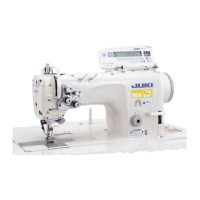
6-13. Replacing the bobbin thread slack preventer spring
(For LH-3568A, 3568A-7, 3588A and 3588A-7)
1) Loosen screw
❶
and remove bobbin thread
slack preventer spring
❷
from the groove on the
bobbin case.
2) Fit bobbin thread slack preventer spring
❷
which
replaces the removed spring in the bobbin case
through the groove.
3) Fix bobbin thread slack preventer spring
❷
in the
bobbin case by tighten screw
❶
. At this time,
carefully check the operating range and tension
or the spring.
Groove
❶
❷
• If sewing a corner of which angle is 40˚ or less, the thread take-up amount of the bobbin thread
slack preventer spring will be insucient. In this case, the thread will remain on the wrong side
of the material.
• When performing the operation of changeover of separately driven needle bar, perform the
work after stopping the sewing machine once.
When the operation of changeover is performed at 1,000 sti/min or more, break-down will be
caused.)
• When the sewing machine is used as the substitute for 1-needle sewing machine in the state of
separately driven needle bar, break-down of the sewing machine will be caused. When per-
forming sewing with 1-needle sewing machine, remove one of two needles and use the sewing
machine in the state that two needle bars operate.
❷
❶
• When returning to 2-needle operation
Press change xing lever
❷
. Change lever
❶
re-
turns to the position "0", and the machine returns to
2-needle sewing.
• Relation between the angle of corners and
stitch length
To perform corner stitching with accuracy, the stitch
length can be determined referring to the table of the
number of stitches by gauges.
However, check whether the stitch length determined
really matches the corner by actually sewing it.
(Example)
To sew a correr of 90˚ of angle using a 3/16" gauge
with the stitch length specied to 1.6mm, the number
of stiches can be obtained in the following way. Ob-
serve the "90˚" columns on the table of the number
of stitches by stitch length gauges to search for the
column in which "1.6" is indicated. Then, you can
nd "3" on the top of the "1.6" lines. This means the
number of stitches is 3.
 Loading...