– 57 –
(2) How to install the gauge
1) Raise the sewing machine.
2) Attach the feed dog in position. Refer to “5.-(1)-2) Adjustment of the right and left
feed dog positions, height, and gradient”
3) Attach the needle clamp and needle in position. Refer to “5.-(1)-4) Needle calmp, -5) Needle entry”
4) Remove the throat plate.
5) Tilt the sewing machine.
6) Move the hook driving shaft saddle from its home position.
Adjust so that the specified clearance is provided between
the needle and the blade point of the hook.
Then, fix the hook driving shaft. Refer to “5.-(2) Timing between the needle and the
hook”
7) Let the pipe guide stay in the position where the pipe layout can be made optimal. Then tighten the
setscrew .
7. Gauge replacing procedure
(1) How to remove the gauge
1) Turn OFF the power switch.
2) Remove the slide plate, needle, needle clamp, presser foot, throat plate and feed dog.
* In the case of a thread trimming machine provided with a wiper, refer to the table of “5.-(13) Wiper
components”. Remove the wiper if the replacing gauge size is not found in the present wiper range.
3) Tilt the sewing machine.
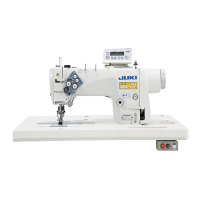
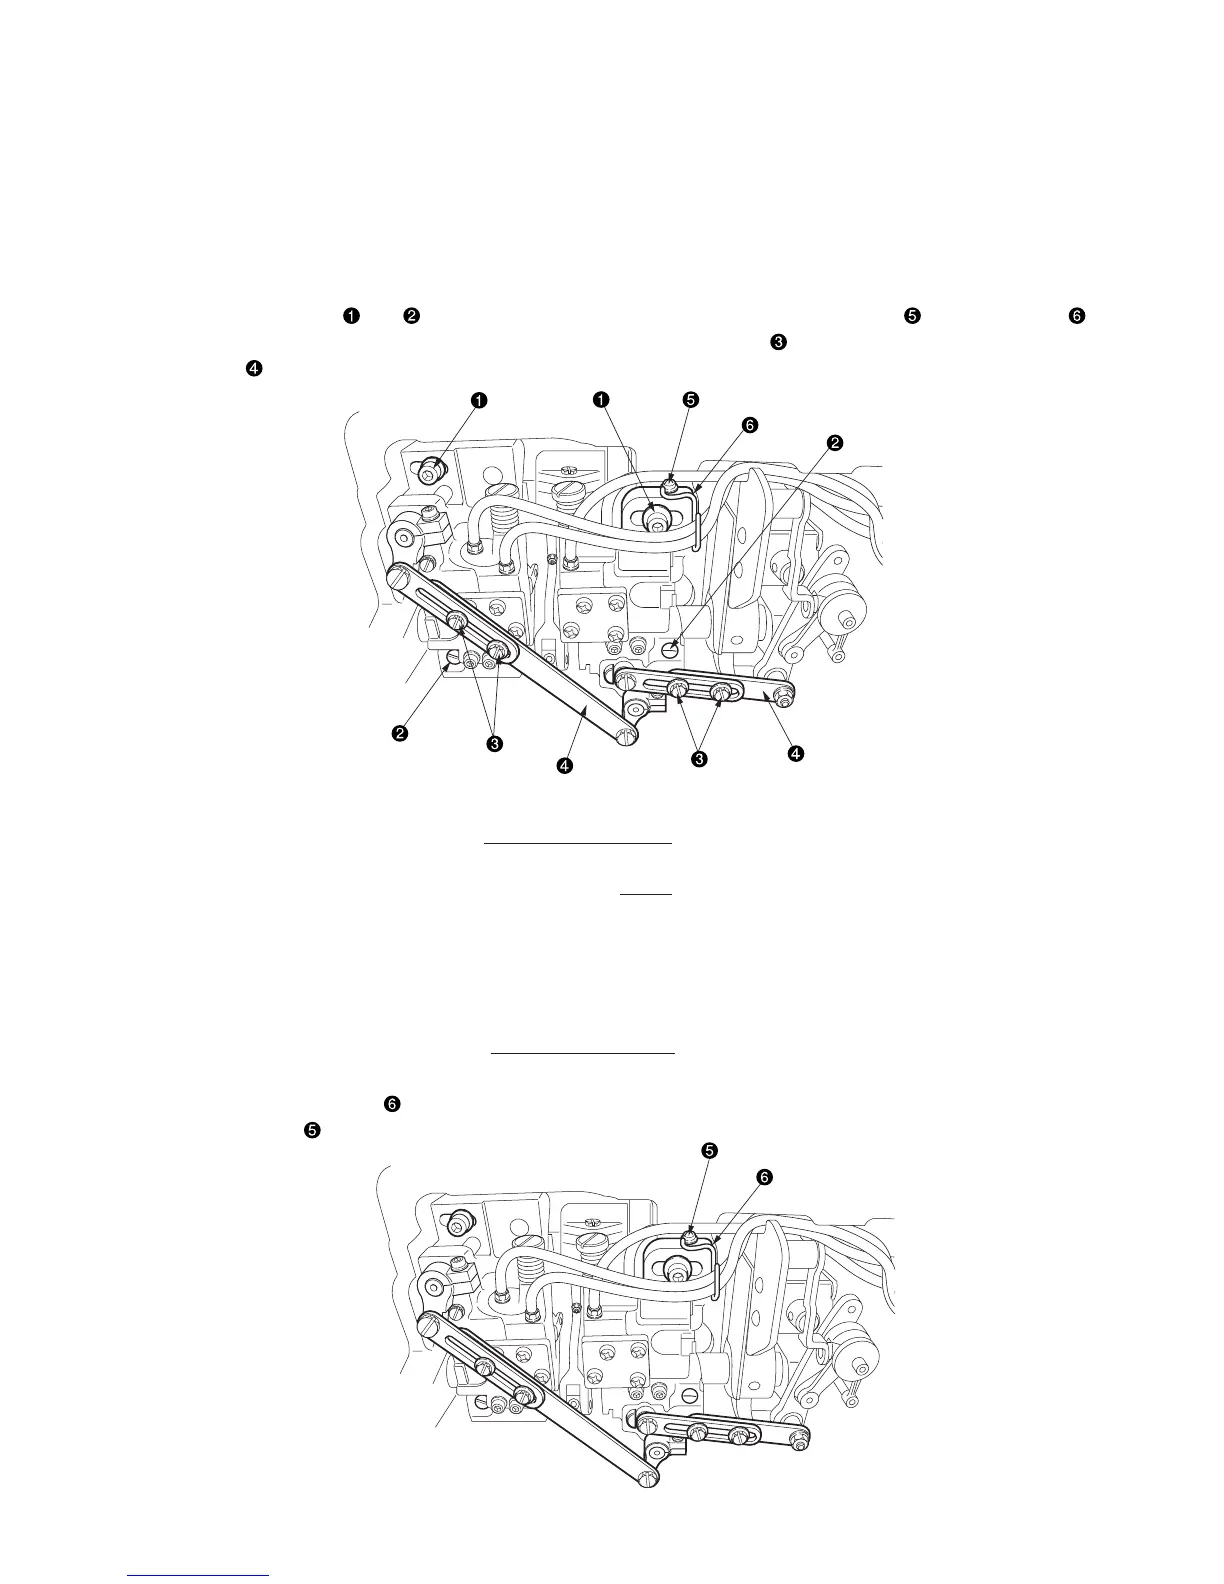
4) Loosen screw and in the hook driving shaft saddle. Then loosen the setscrew of the pipe guide .
* In the case of a thread trimming machine, loosen the setscrews (4 pcs.) of the connecting link (asm.)
. They can be loosened but cannot be removed.
 Loading...