+
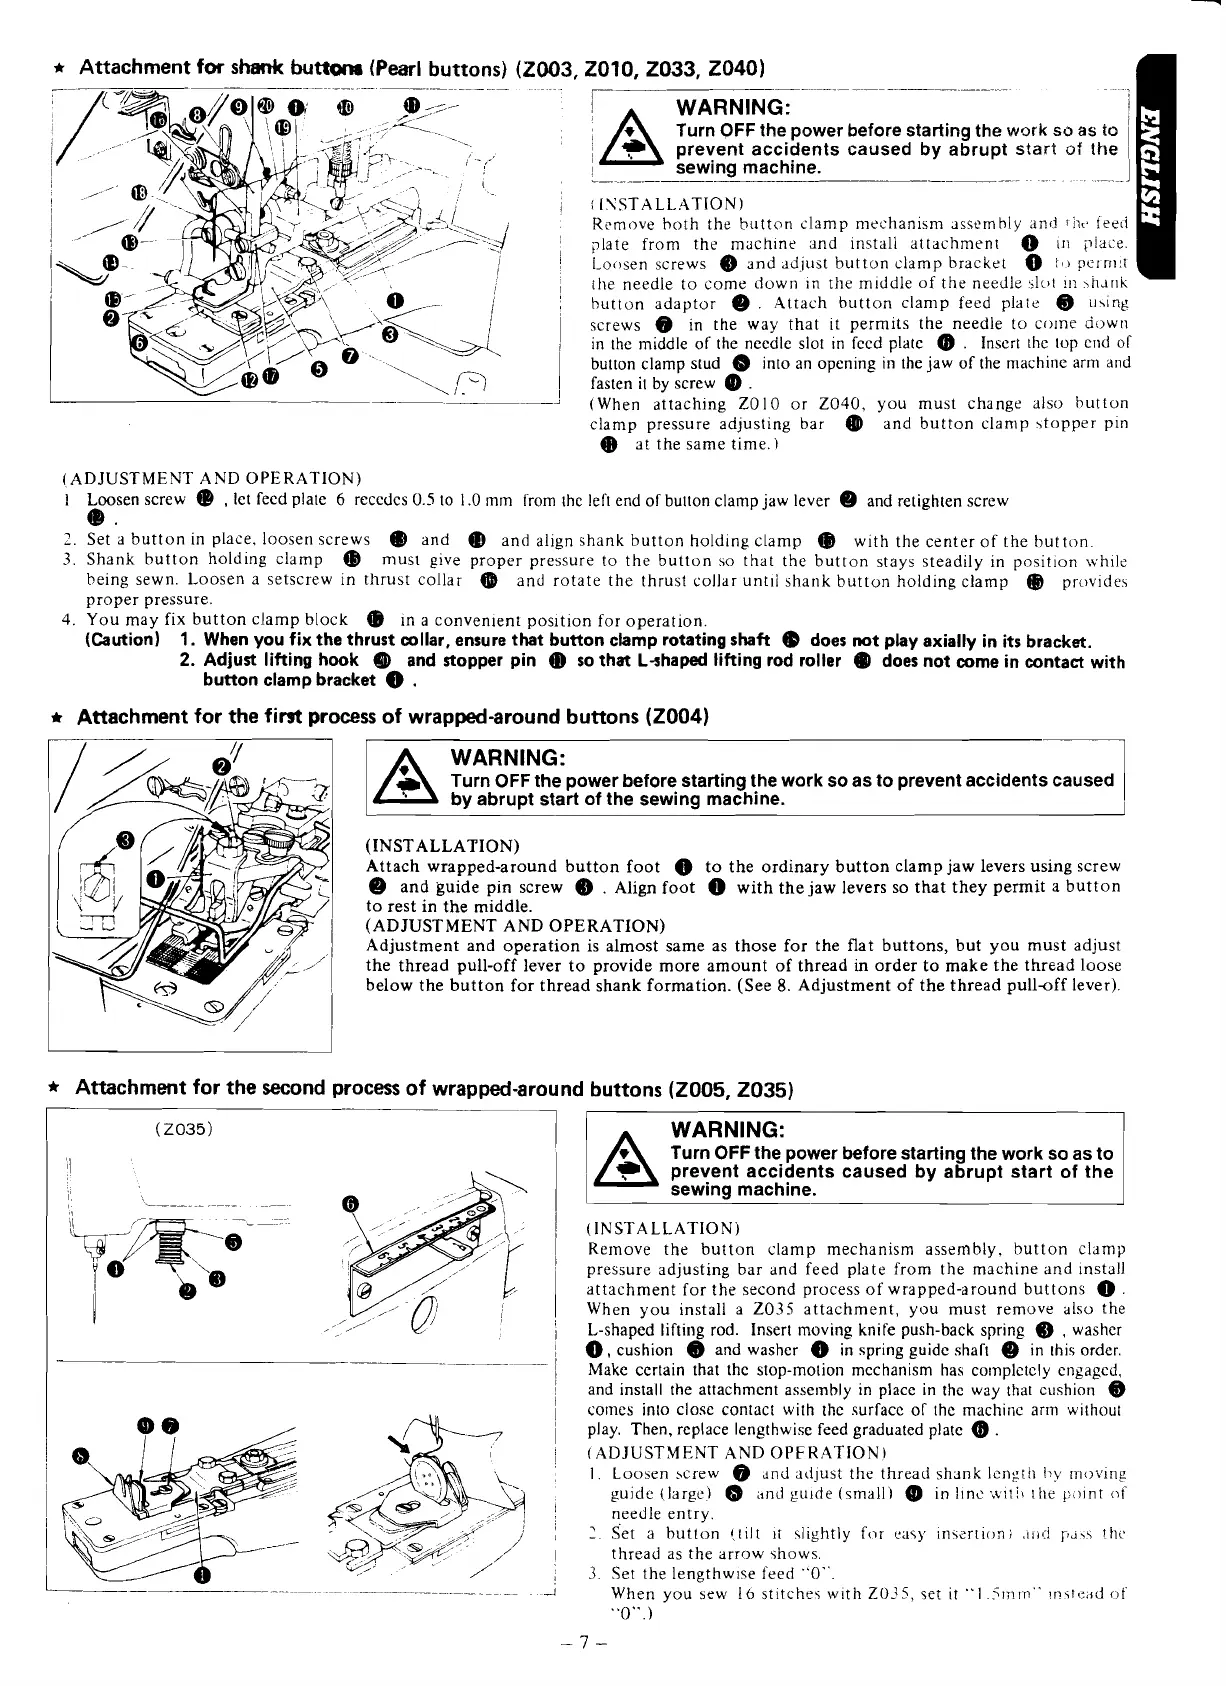
Attachment for
shank
buttor#
(Pearl
buttons)
-
-
-
--
-
-
-
-
-.
-
-
-
A
WARNING:
Turn
OFF the power before starting the
wvrk
so
as
to
prevent accidents caused by abrupt
start
of
the
sewing machine.
--
-.
-
-
--
-
-.
--
--
-
-
:
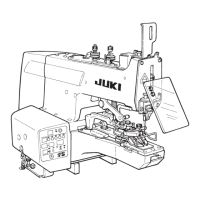
ISSTALLATION)
Rrmove both the button clamp mechanism ~ssemhiy ant!
1
iir.
teed
?late from the mach~ne and install attachment
0
111
plaL:e.
i20i,sen screws
&)
and adjust button clamp brackzt
@
11,
perrn:r
the needle to come dow11 in the middle of the needle slc~t In
hh~r~k
button adaptor
e)
.
Attach button clamp feed plate
6)
uhing
screws in the way that it permits the needle to come a!>wrl
in the middle of the needle slot in feed plate
a)
.
Insert the top end
ol"
button clamp stud
@
into an opening in the jaw of the machine arm and
fasten
it
by screw
8)
.
(When attaching
ZOlO
or
2040,
you must change also button
clamp pressure adjusting bar
@
and button clamp >topper pin
@
a! the same time.)
(,ADJUSTMENT AND OPERATION)
1
Loosen screw
(B
,
let feed plate
6
recedes 0.5 to 1.0 mm from the left end of button clamp jaw lever
@
and retighten screw
(B.
2.
Set a button in place. looser~ screws
@
and
g)
and align shank button holding clamp
@
with the center of the button.
3.
Shank button holding clamp
@
must give proper pressure to the button so that the button stays steadily in posit~on xvhile
being sewn. Loosen a setscrew in thrust collar
@
and rotate the thrust collar until shank button holding clamp
@
provide
proper pressure.
4.
You may fix button clamp block
@
in a
convenient
position for operation.
(Caution)
1.
When you fix the thrust collar, ensure that button clamp rotating shah
@
does not play axially in
its
bracket.
2.
Adjust lifting hook
@
and stopper pin B) so that L-shaped lifting rod roller
@I
does not come in contact with
button clamp bracket
@
.
t
Attachment for the fint process of wrapped-around buttons (2004)
A
WARNING:
Turn OFF the power before starting the work so as to prevent accidents caused
by abrupt start of the sewing machine.
(INSTALLATION)
7
Attach wrapped-around button foot
0
to the ordinary button clamp jaw levers using screw
@
and guide pin screw
6)
.
Align foot
with the jaw levers so that they permit
a
button
to rest
in
the middle.
(ADJUSTMENT AND OPERATION)
Adjustment and operation is almost same as those for the flat buttons, but you must adjust
the thread pull-off lever to provide more amount of thread
in
order to make the thread loose
below the button for thread shank formation. (See
8.
Adjustment of the thread pull-off lever).
i
*
Attachment for the second process of wrapped-around buttons (2005,2035)
--
(2035)
;I
1
Turn OFF the power before starting the work so as to
prevent accidents caused by abrupt start of the
I,
-
~
-
-
I
(INSTALLATION)
E
When you install
a
2035 attachment, you must remove also the
,
,
/,/'
I
L-shaped lifting rod. Insert moving knife push-back spring
6)
,
washer
I
0,
cushion
@
and washer
@
in spring guide shaft
e)
in this order.
-
1
1
Make certain that the stop-motion mechanism has co~npletcly engaged,
!
and install the attachment asseinbly in place in the way that cushion
@
1
corncs into close contact with the surface of the machine arin without
i
play. Then, replace lengthwise feed graduated plate
a)
.
i
(ADJUSTMENT AND OPFKATION!
:
1.
Loosen screw
@
~nd adjust the thread shsnk lcngtli
by
rnovine
guide (large)
snd guide (small)
8)
in Iinc ;vi!ii [he p:)int
of
n.eedle entry.
,
-.
Set a button
(ti1
t
lr
slightly
for
easy inserrion;
.~iiti
~J,S
!tic
thread as the arrow shows.
1
3.
Set the
lengthwise
feed
"0".
.-
~-
.--
--
~
L
When you sew I6 stitches with
ZO35,
~et it
"I
.51n1n"
~v.;r<:;iti
of
"O".)

 Loading...