-
-
[
12.
HEIGHT
~F-THE
1
13.
WORK~RE~~SING~
114.
ADJUSTMENT
OF
I
I
L-
BUTTON
--
CLAMP!
---
L
FORCE
---
I
THE BUTTON
CLAMP
STOP
LEVER!
Turn
OFF
the power before
start~ng
the
WARNING:
I
Turn
OFF
the power before
starting
the
1
9
work
so
as
to
prevent accidents caused
17
I_?
by
abrupt
start
of the sewing machine.
1
--
h
-2
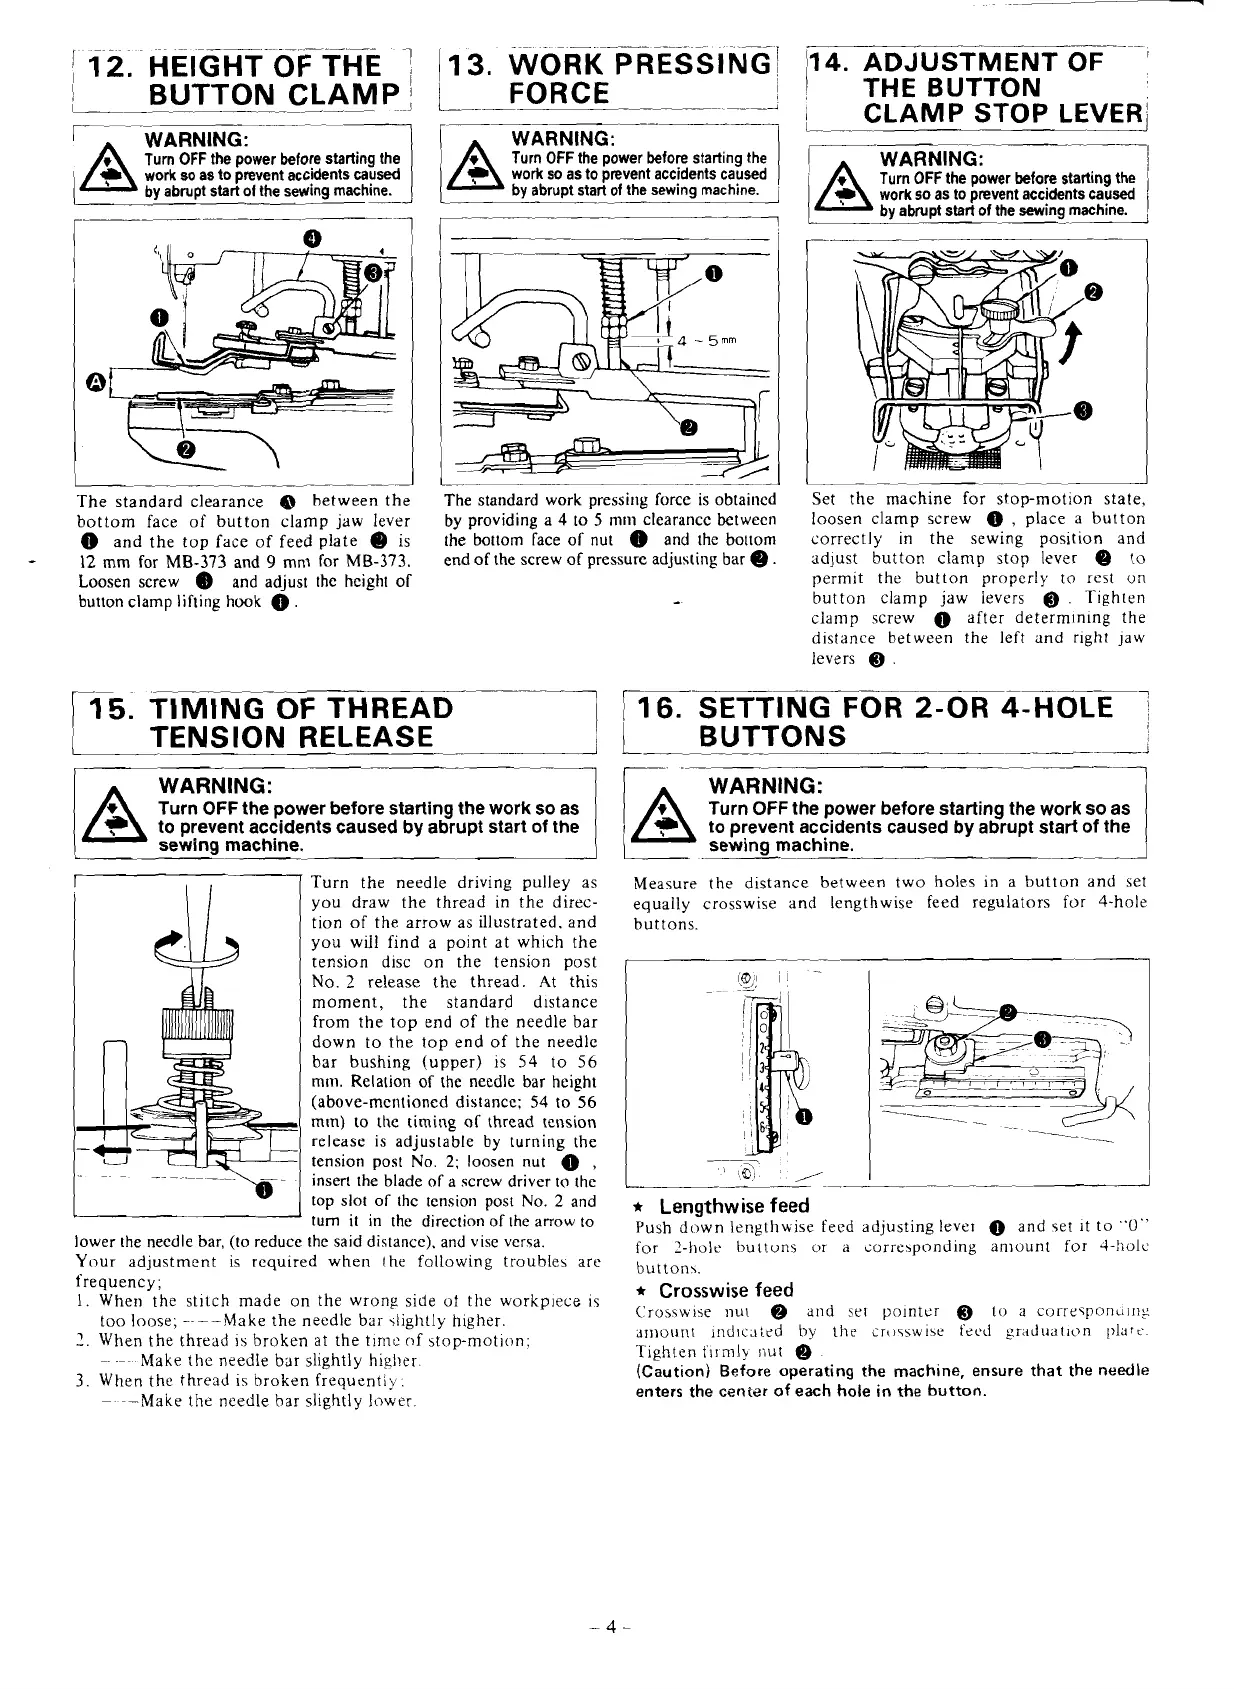
The standard clearance
@
between the
bottom face of button clamp jaw lever
@
and the top face of feed plate
@
is
-
12 mrn for
MB-373
and
9
mn? for
MB-373.
Loosen screw
@
and adjust the height of
button clamp lifting hook
.
The
standard work pressing force is obtaincd
by providing a
4
to
5
mm
clearance between
the bottom face of nut and the bottom
end of the screw of pressure adjusting bar
e.
1
TENSION
RELEASE
I
d
WARNING:
I
Turn
OFF
the power before starting the work so as
to prevent accidents caused by abrupt start of the
sewina machine.
Turn the needle driving pulley as
you draw the thread in the direc-
tion of the arrow as illustrated. and
you will find a point at which the
tension disc on the tension post
No.
2
release the thread. .4t this
moment, the standard
d~stance
from the top end of the needle bar
down to the top end of the needle
bar bushing (upper) is
54
to
56
mm. Relation of the needle bar height
(above-mentioned distance;
54
to
56
mtn) to the timing
ol
thread tension
release is
adjuslable
by
turning the
tension post No.
2;
loosen nut
0
,
insert the blade of a screw driver to the
top slot of
thc tension post No.
2
and
turn it in the direction of the arrow to
lower the needle bar, (to reduce the said
distance). and vise versa.
Your adjustment
is
required when the following troubles are
frequency;
1.
When the stitch made on the wrong side
of
the workp~ece ic
too loose; ----Make the needle bar slightly higher.
2.
When the thread is broken
at
the
time
of stop-motion;
-. .-
~
Make the needle bar slightly
higher.
3.
When the thread is broken frequent!!,
.
-
-Make the needle bar slightly lower.
I
I
Set
the machine for stop-motion state,
loosen clamp screw
,
place a button
correctly in the sewing position and
adjust button clamp
stop
lever
@
to
permit the button properly
to
rest
on
button clamp jaw levers
Q
.
Tighten
clamp screw
@
after determ~ning the
distance between the left and right jaw
levers
Q
.
7
p6
s
ETT~-GFOR-ZO~~H~
L
BUTTONS
J
WARNING:
Turn
OFF
the power before starting the work so as
to prevent accidents caused
by
abrupt start of the
sewing machine.
--
__-_I
1
Measure the distance between two holes in a button and set
equally crosswise and lengthwise feed regulators for 4-hole
buttons.
I
I
-.___-
*
Lengthwise feed
Puhh down Iength~ise feed ddjustlng lever
@
and set it to
'0''
for
2-hole
button5 or
d
iorre5pondlng dnluunt for
.I-!idlc
button\.
*
Crosswise feed
Crusswrse
nut
Q
and
rer
polntcr
Q
to
a
corresponuirig
arnourlr
ind~ca:ed
by
the
crosswise
frcd
graduation
plat^..
'Tighten
flrmly
i~ut
@
(Caution) Before operating the machine, ensure that the needle
enters
the
center
of
each hole in
the
button.

 Loading...