*
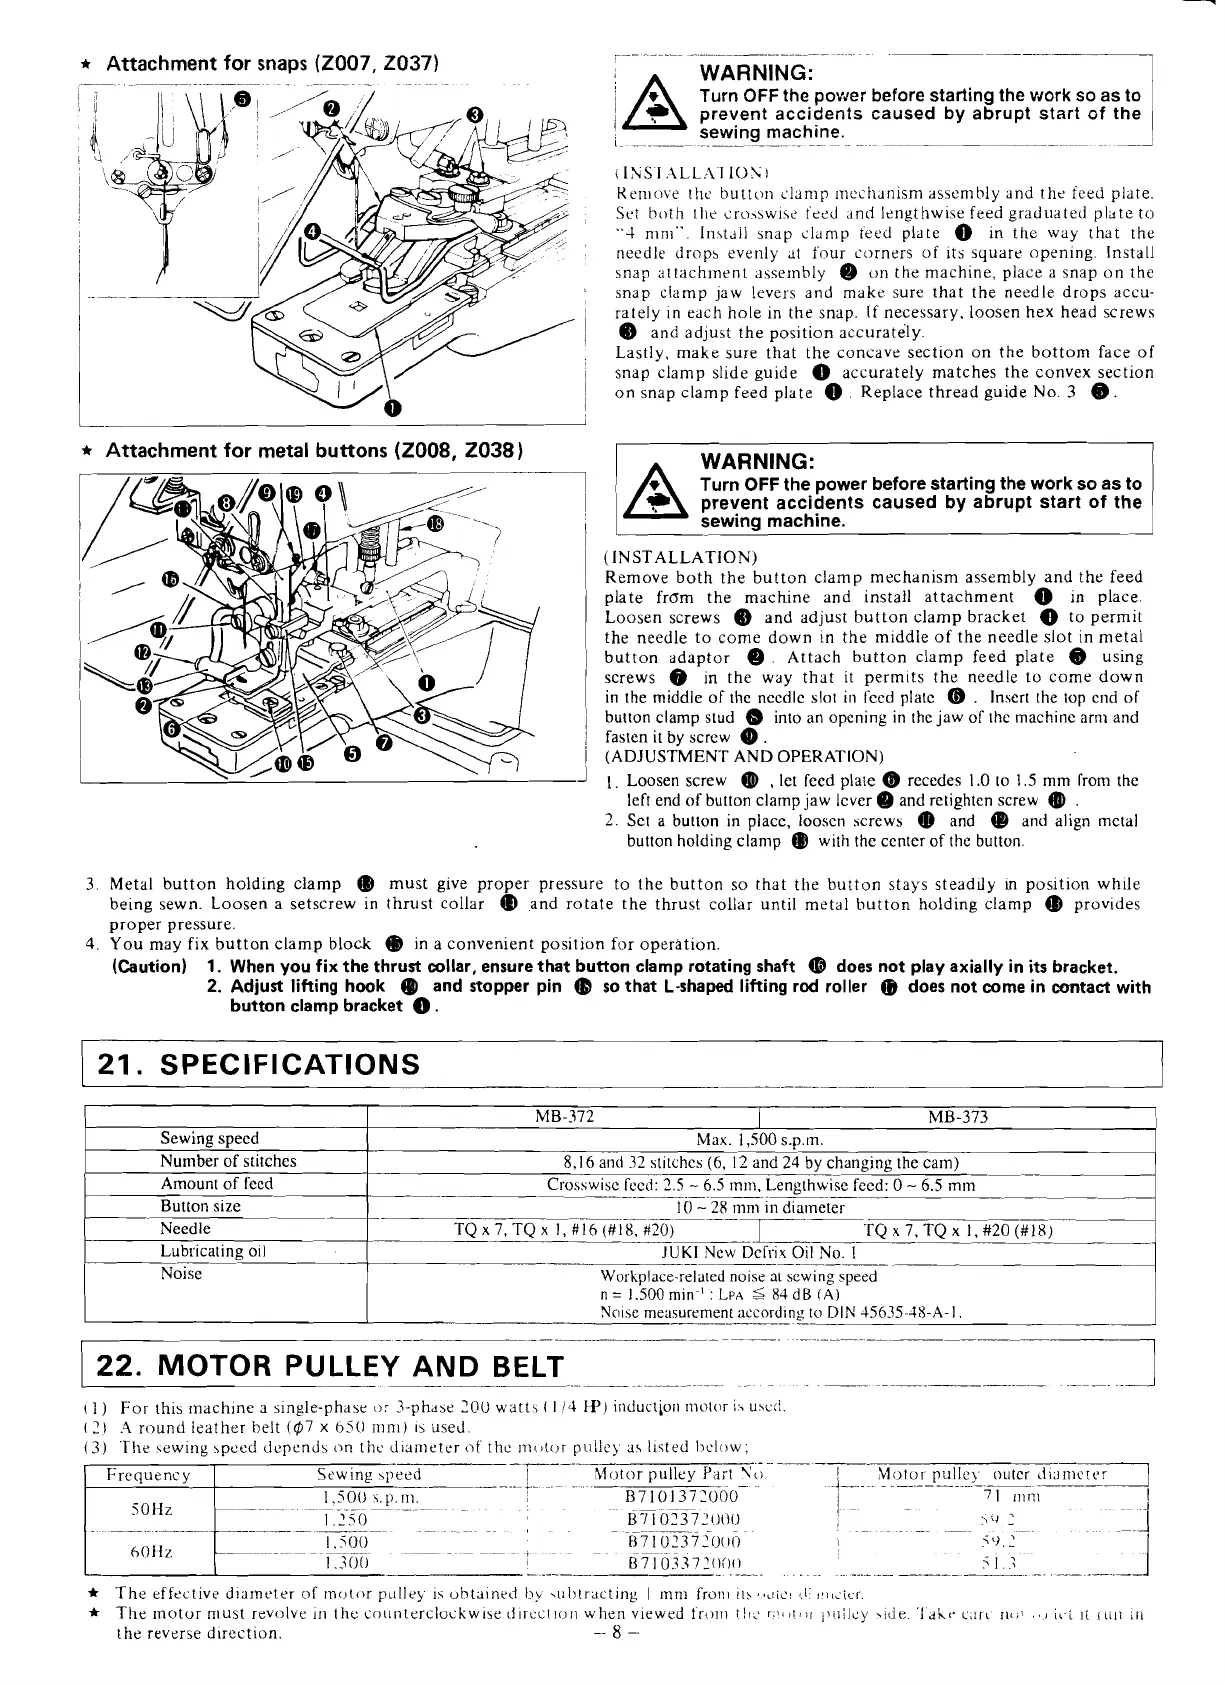
Attachment
for
snaps
(2007,2037)
-
- -
-
--
-
--
--
-
*
Attachment
for
metal
buttons (2008, 2038)
---
~ ~
.
.
-
--
A
WARNING:
Turn
OFF
the power before starting the work so as
to
I
prevent accidents caused by abrupt
start
of
the
sewing machine.
1
-.-
-
2
I
INS1
.ALL?-\I
ION!
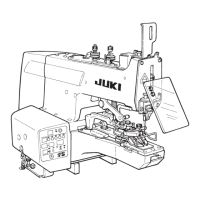
Ken~c~ve rh~ button clamp iricciianism assembly and the feed plate.
Set both
the croswlse teed and lengthwise feed graduated plate to
'.4
ninl". Ir~stdli snap clamp teed plate
@
in the way that the
needle drops evenly
dt
four corners of its square opening. Install
snap attachment assernbly
@
on the machine, place a snap on the
snap clamp jaw levers and make sure that the needle drops accu-
rately in each hole in the snap.
If
necessary. loosen hex head screws
@
and adjust the position accurately.
Lastly, make sure that the concave section on the bottom face of
snap clamp slide guide
0
accurately matches the convex section
on snap clamp feed plate
@
.
Replace thread guide No.
3
@.
WARNING:
Turn
OFF
the power before starting the work so as to
prevent accidents caused by abrupt start of the
in.
sewing machine.
1
(INSTALLATION)
Remove both the button clamp mechanism assembly and the feed
plate
frdm the macfune and install attachment in place.
Loosen screws
@
and adjust button clamp bracket
0
to permit
the needle to come down in the middle of the needle slot in metal
button adaptor
@
.
Attach button clamp feed plate
@
using
screws
@
in the way that it permits the needle to come down
in the middle of the nccdlc slot in
fced plate
@
.
Insert the top cnd of
button clamp stud
@
into an opening in the jaw of the machine arm and
fasten it by screw
@
.
(ADJUSTMENT AND OPERATION)
1.
Loosen screw
@
,
let feed plate
@
recedes 1.0 to
1.5
mm from the
left end of button clamp jaw
lever
@
and retighten screw
@
.
2.
Set a button in place, loosen screws
Q)
and
@
and align metal
button holding
clamp
@
with the center of the button.
3.
Metal button holding clamp
@
must give proper pressure to the button so that the button stays steadlly
in
position while
being sewn. Loosen a setscrew in thrust collar
(b
and rotate the thrust collar until metal button holding clamp
@
provides
proper pressure.
4.
You may fix button clamp block
@
in a convenient position for operation.
(Caution)
1.
When you fix the thrust collar, ensure that button clamp rotating shaft
@
does not play axially in its bracket.
2.
Adjust lifting hook
@
and stopper pin
@
so that L-shaped lifting rod roller
(B
does not come in contact with
button clamp bracket
0.
/
21.
SPECIFICATIONS
p~
-
-
--
Needle
TQx7,TQx 1,#16(#18,#2O)
~___~-.pp
TQ
x 7 TQ
x
I,
#20(#1~)-
Lubricating oil
..
.
JUKl
~
New Deirix
Oil
No.
1
~
Sewing speed
Number of stitches
Amount of
feed
I
No~se
I
Workplace-relared noise
at
sewing speed
I
I--
n
=
1.500 mln
'
LPA
I
8-1
d~
(A)
'
NOI~ measurement
according
to DIN 45635-48-A-
I
-
-
-
Button size
10
-
28
mm in diameter
122.
MOTOR PULLEY AND BELT
I
MB-372
I
I)
For
this rnachlne
3
single-phase
or
3-phase 2OU watts
(
I
!4
W)
inductjun motor
i:,
u\c:~.
(2)
.4
round leather belt ($7
x
bSC1
rl~ni)
15
used.
(3)
The \ewing speed depends on lht. d~airleter
nf
thc lTl<lt(~r puiiey as listed Ijelow;
-
-.
T--------.
.
-
-.
-
--
-
1
Motor p~llcy
Pail
Yo
~.--
~..
~
..
.
.-
.I--.
I
..
Motor
-
.
puIle\.
.-:
outer
~11;-
07
101 372TJG0-
1
7
I
inn1
I
-.
-
~~-
~
.
~
~~~
r
-
.A
1.250
B7
102372!)00
><>
:
I
8,16 and 32 stitches
(6,
I2 and
24
by
changing the cam)
Crosswise fecd:
2.5
-
6.5
mln,
~englhwise feed:
0
-
6.5
mm
-
.-
.
-.
.
--
MB-373
L
I
..
...-.
..
-1
*
The effective d~arneter
of
noto or
pi:llt.y is ohta~nrd
by
yul~tracting
I
rnnt fro111
II\*~LI~C!
:.ii~~ic~icr.
The motor nlust revolve in the co~interclockwise dlrccr1o11 when viewed fro111
;!I:
r;l<,t,i!
ii!iilc.y
yide.
'idi\t-
c,irt
IIC,~
.,,
i,-i
I[
iiili
iri
the reverse direction.
-8-
Max. 1,500 s.p.ln.
-

 Loading...