1
9.
NEEDLE-TO-LOOPER RELATION
i
I
WARNING:
I
Turn OFF !he power before starting the work so as to prevent accidents caused
by
abrupt start of the sewing machine.
i
*
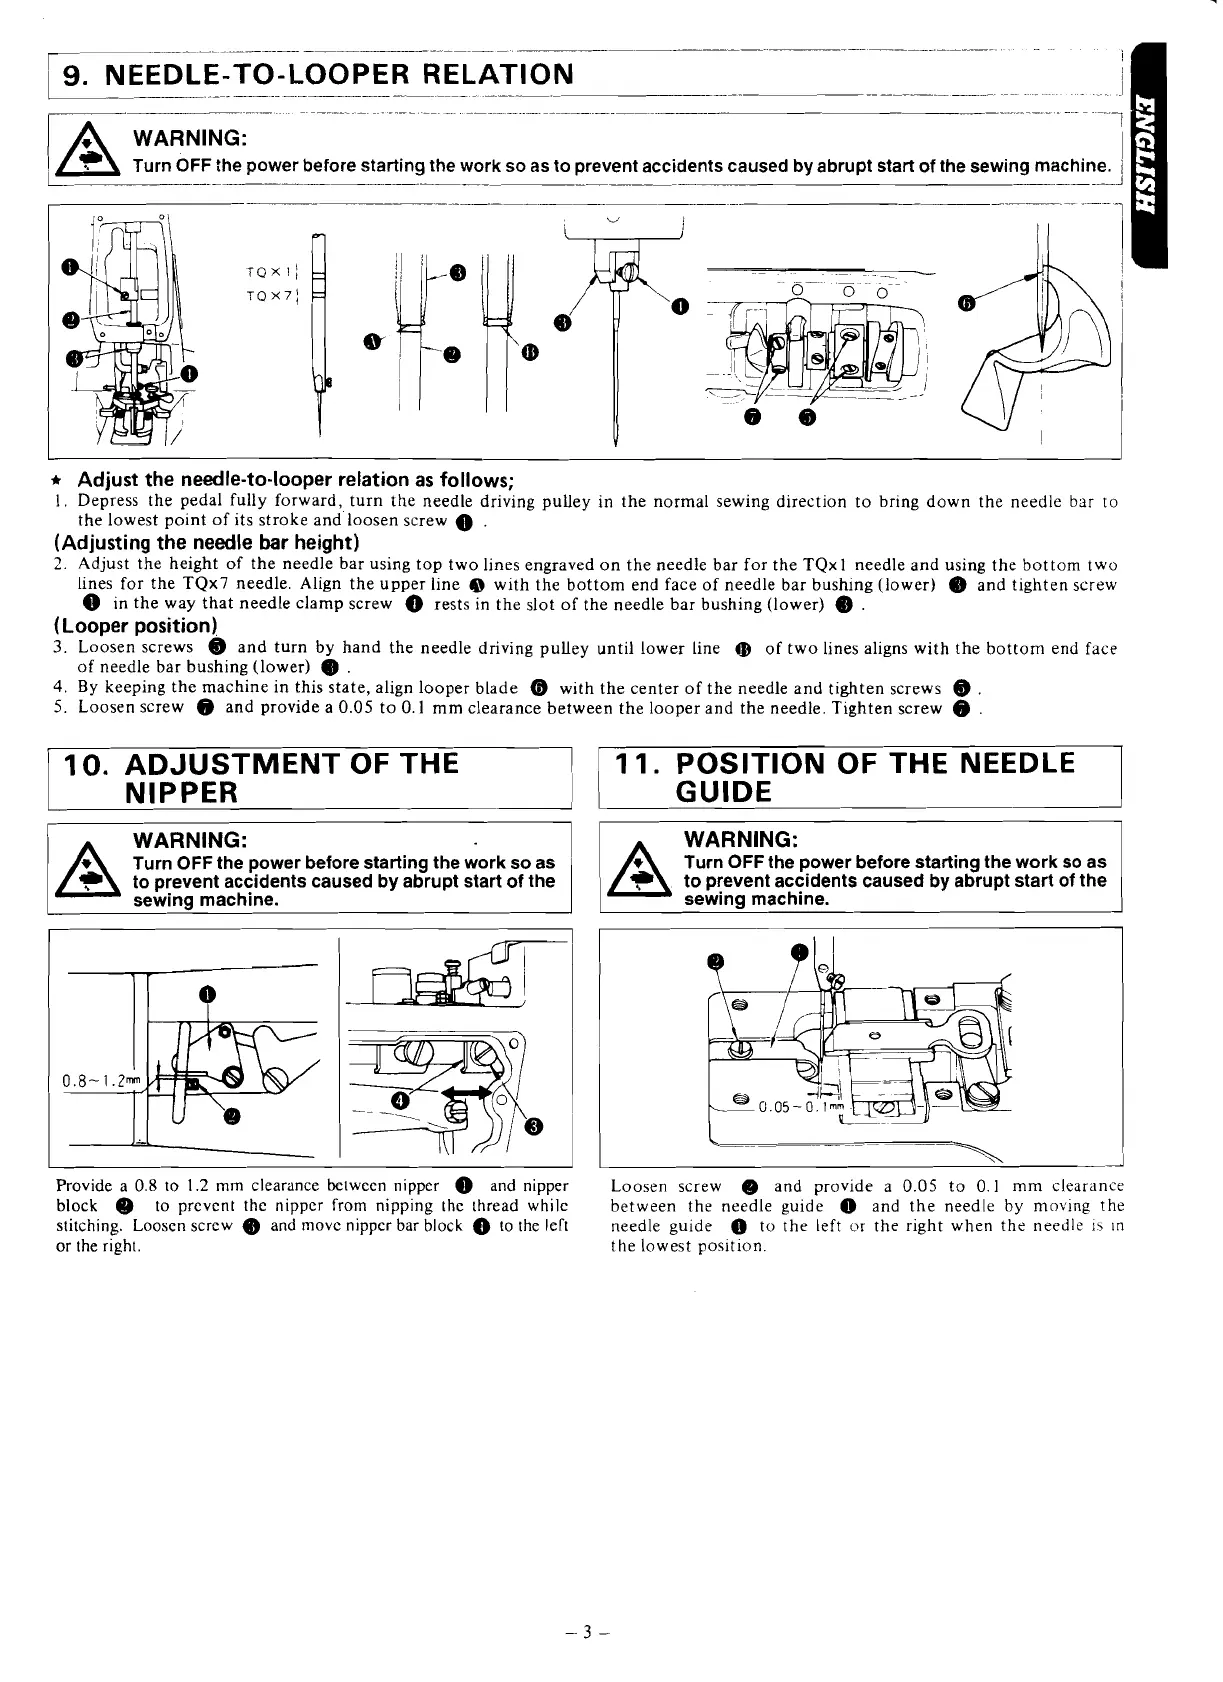
Adjust the needle-to-looper relation as follows;
1. Depress the pedal fully forward, turn the needle driving pulley in the normal sewing direction to bring down the needle
bar
to
the lowest point of its stroke
andloosen screw
.
(Adjusting the needle bar height)
2.
Adjust the height of the needle bar using top two lines engraved on the needle bar for the
TQx
1
needle and using the bottom two
lines for the
TQx7
needle. Align the upper line
Q
with the bottom end face of needle bar bushing (lower)
8)
and tighten screw
in the way that needle clamp screw
rests in the slot of the needle bar bushing (lower)
6)
.
(Looper position),
3.
Loosen screws
@
and turn by hand the needle driving pulley until lower line
(D
of two lines aligns with the bottom end face
of needle bar bushing (lower)
6)
.
4.
By keeping the machine in this state, align looper blade
(b
with the center of the needle and tighten screws
@
.
5.
Loosen screw
8
and provide a 0.05 to 0.1 mm clearance between the looper and the needle. Tighten screw
8
.
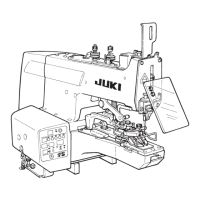
Provide a 0.8 to
1.2
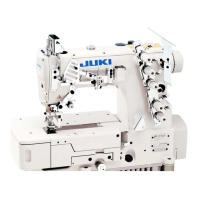
mm clearance between nipper and nipper Loosen screw
@
and provide a 0.05 to 0.1
mm
clearance
block
@
to prevent the nipper from nipping the thread while between the needle guide
0
and the needle by moving the
stitching. Loosen screw
6)
and movc nipper bar block to the lert
needle guide
0
to the left or the right when the needle
15
in
or the right.
the lowest position.
10.
ADJUSTMENT OF THE
!
NIPPER
Turn OFF the power before starting the work so as
to prevent accidents caused by abrupt start of the
sewing machine.
11.
POSITION OF THE NEEDLE
GUIDE
Turn
OFF
the power before starting the work so
as
to prevent accidents caused by abrupt start of the
sewing machine.