• A management host such as a laptop or desktop PC
• A serial-to-USB adapter (if your laptop or desktop PC doesn’t have a serial port)
• A grounding cable: 6 AWG, 90°C stranded copper wire
• A 12 AWG and 75°C temperature-rated or 14 AWG and 90°C temperature-rated stranded copper wire to connect
the DC source to the router.
• A customer-site 2-pole circuit breaker rated for 30A and 80V, or as required by local electrical code.
Rack It
Before you start the installaon, be sure to review the General Safety Guidelines and Warnings.
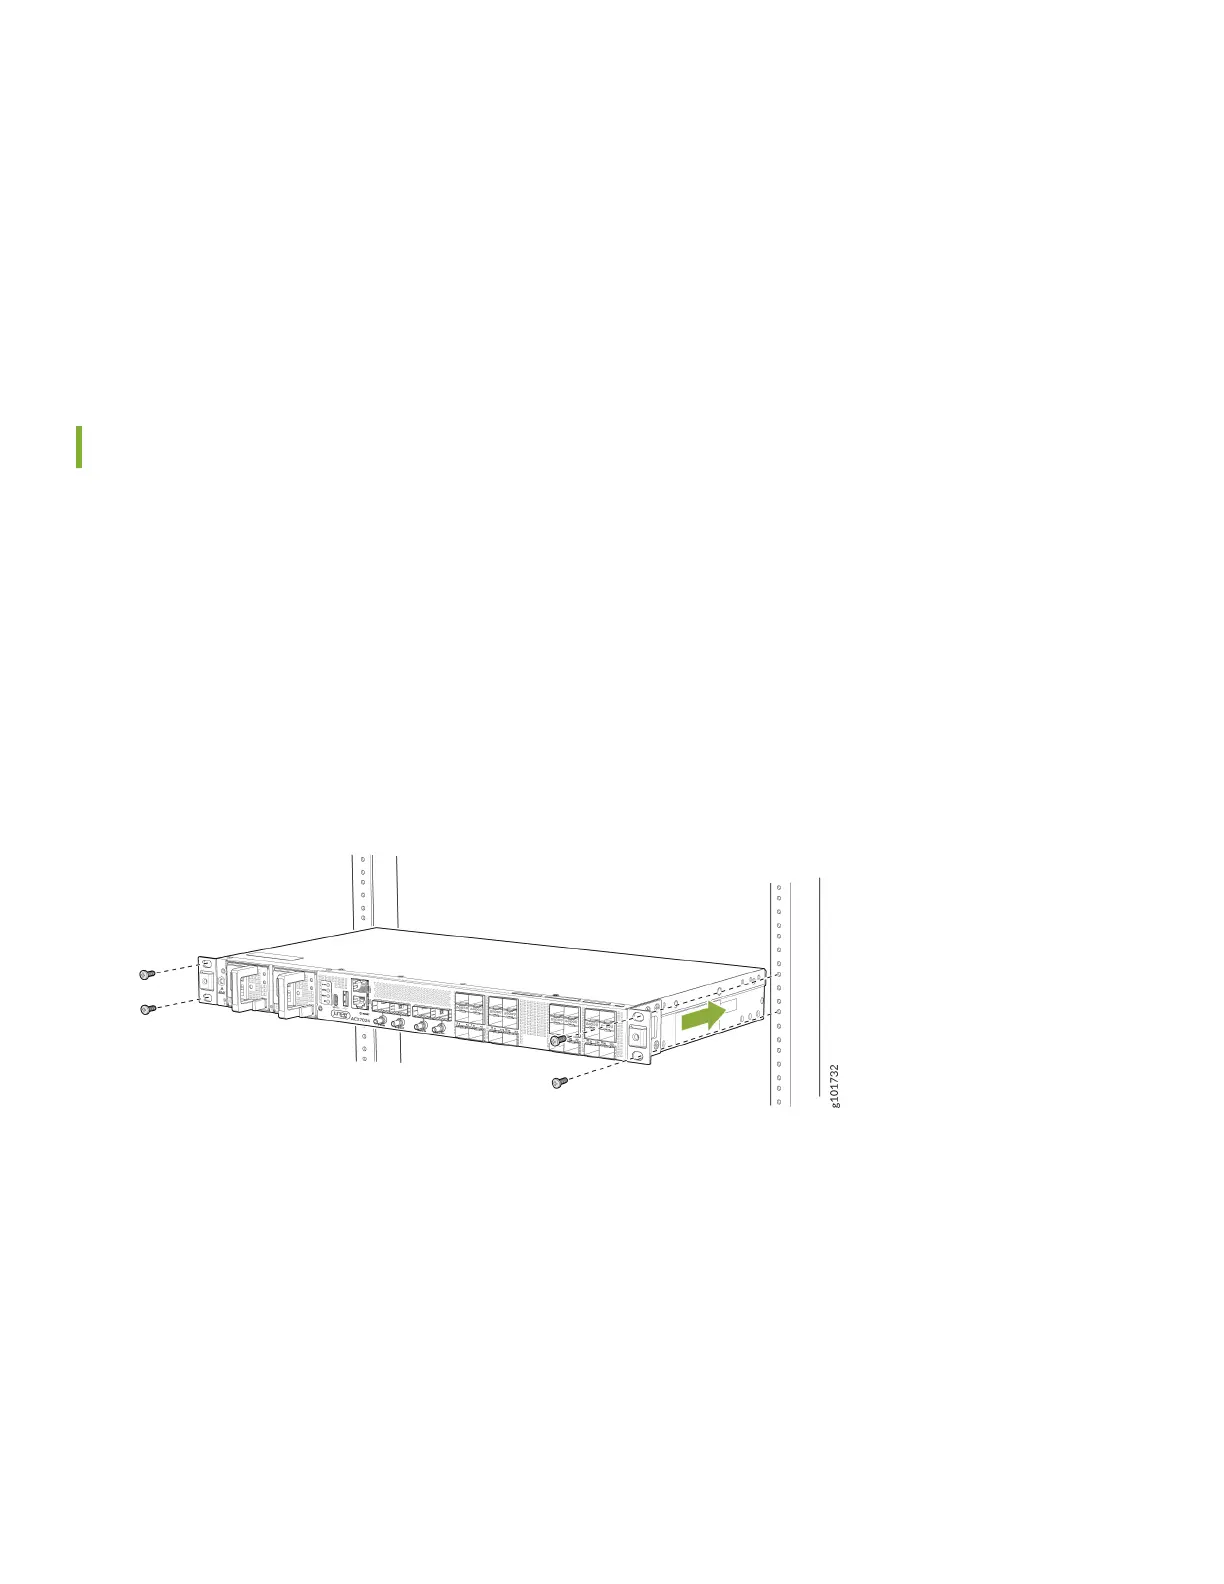
Here’s how to install the ACX7024 in a two-post rack:
1. Wrap and fasten one end of the ESD grounding strap around your bare wrist, and connect the other end of the strap
to a site ESD point.
2. Posion the router in front of the rack.
The mounng brackets are preinstalled on the ACX7024 router.
3. Li the ACX7024 router and posion it in the rack. Line up the boom hole in each mounng bracket with a hole in
each rack rail, making sure the ACX7024 router is level.
4. Secure the chassis to the rack using the rack mount screws (not provided). Tighten the screws on the boom rst,
then ghten the screws on the top.
5. Check to see that the mounng screws on each side of the rack are lined up and the router is level.
3

 Loading...