24 EN
Using Menus For Detailed Adjustment
This camcorder is equipped with an easy-to-use,
on-screen menu system that simplifies many of the more
detailed camcorder settings.
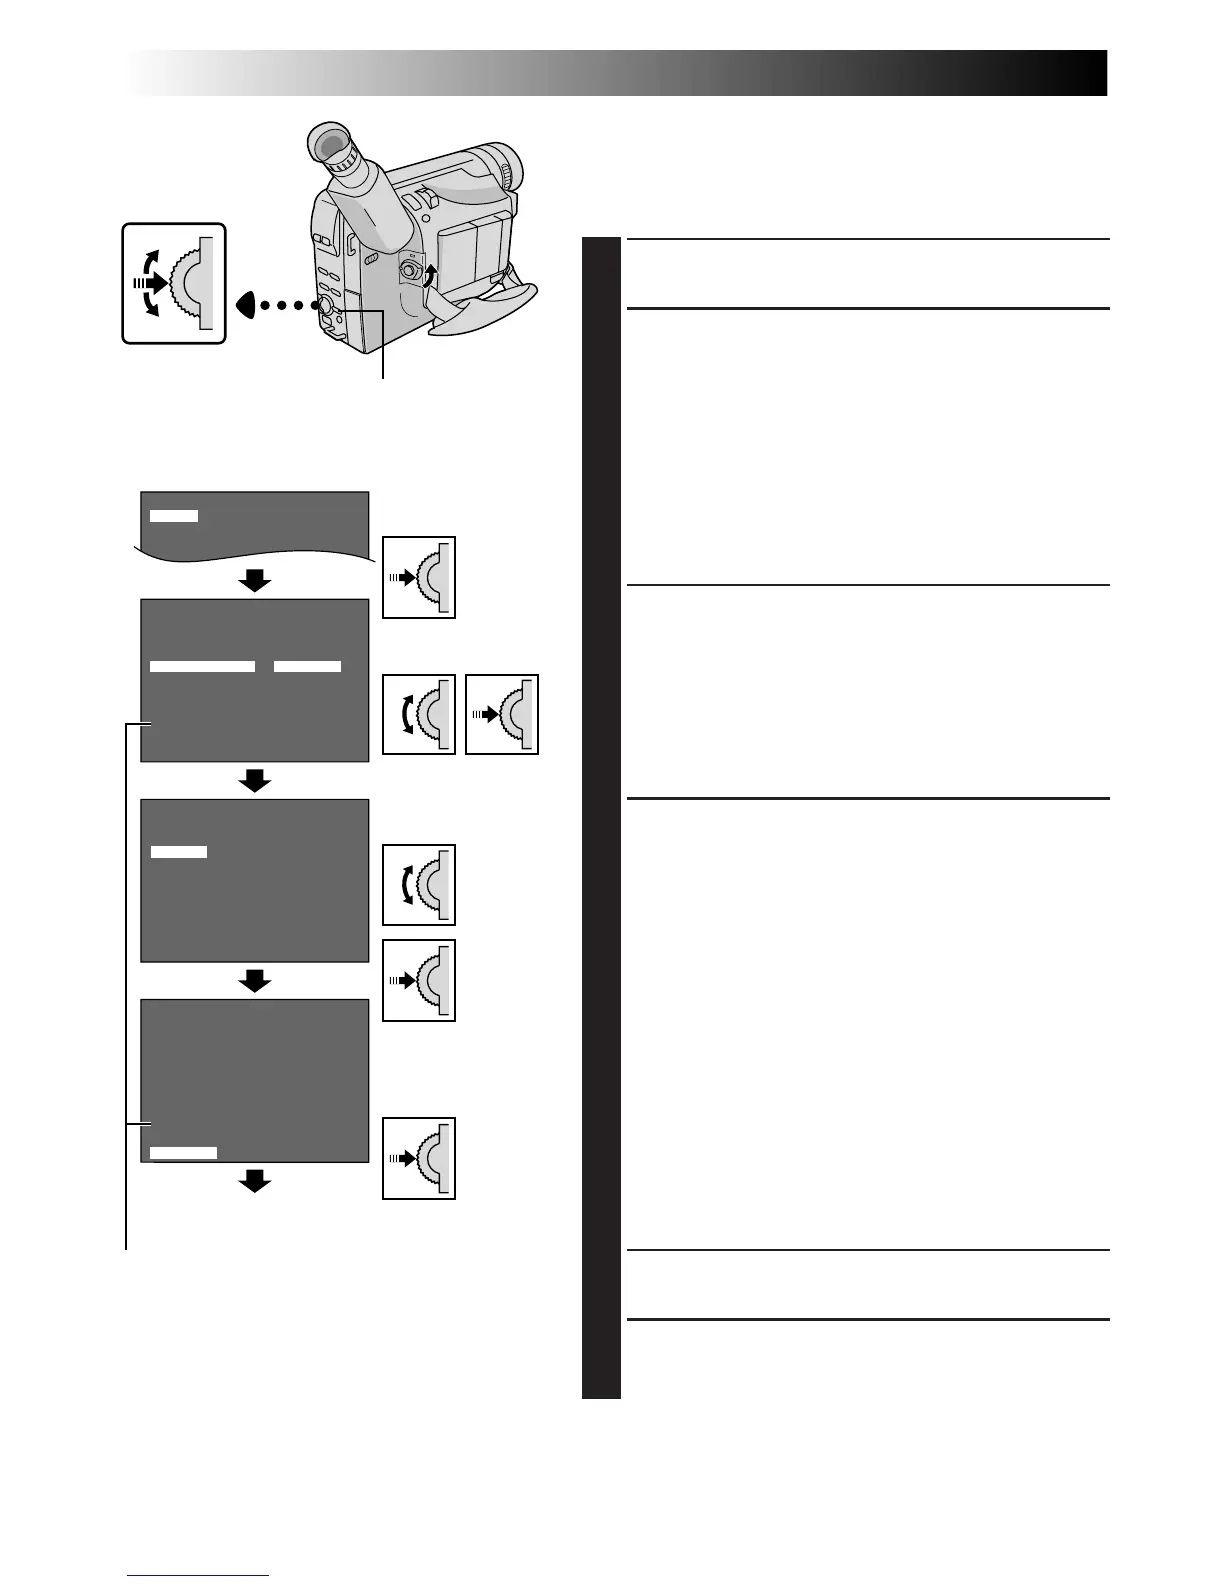
1
Set the Power Switch to “PRO.”.
2
Menu access depends on the function you select.
If you select the functions from the “Menu Screen
Available Using The Select Wheel” described on
pg. 25 . . .
.... press the Select Wheel. The Menu Screen
appears.
If you select the functions from the “Menu Screen
Available Using The MENU Button” described on
pg. 25 and 26 . . .
.... press MENU. The Menu Screen appears.
3
Rotate the Select Wheel to place the highlight bar on
the desired function.
•To go from Menu Screen 1 to Menu Screen 2, rotate
the Select Wheel to “NEXT” and press it. To go back
to Menu Screen 1 from Menu Screen 2, rotate the
Select Wheel to “BACK”, and press it.
•To return to the previous setting, place the highlight
bar on “RETURN”, then go to step 6.
4
Press the Select Wheel. The setting procedure
depends on the function you select.
If you select “FOCUS”, “EXPOSURE”, “M.W.B.” or
“DATE/ TIME”. . .
.... see respective pages (FOCUS: Z pg. 31,
EXPOSURE: Z pg. 30, M.W.B.: Z pg. 32,
DATE/TIME: Z pg. 9) and perform each
procedure from step 4.
If you select “JLIP ID NO.” . . .
.... rotate the Select Wheel until the desired number
appears, and press it. Then rotate the Select
Wheel to move the highlight bar to “EXIT”.
If you select any other functions . . .
.... rotate the Select Wheel to move the highlight bar
to the desired setting.
•To return to the previous setting, place the
highlight bar on “EXIT”.
5
Press the Select Wheel. The Menu Screen reappears
with the highlight bar on “RETURN”.
6
Press the Select Wheel. The normal screen reappears.
NOTE:
No menu functions except “FOCUS” and “EXPOSURE”
are available while in the Record mode.
RECORDING
Advanced Features (cont.)
 Loading...