31
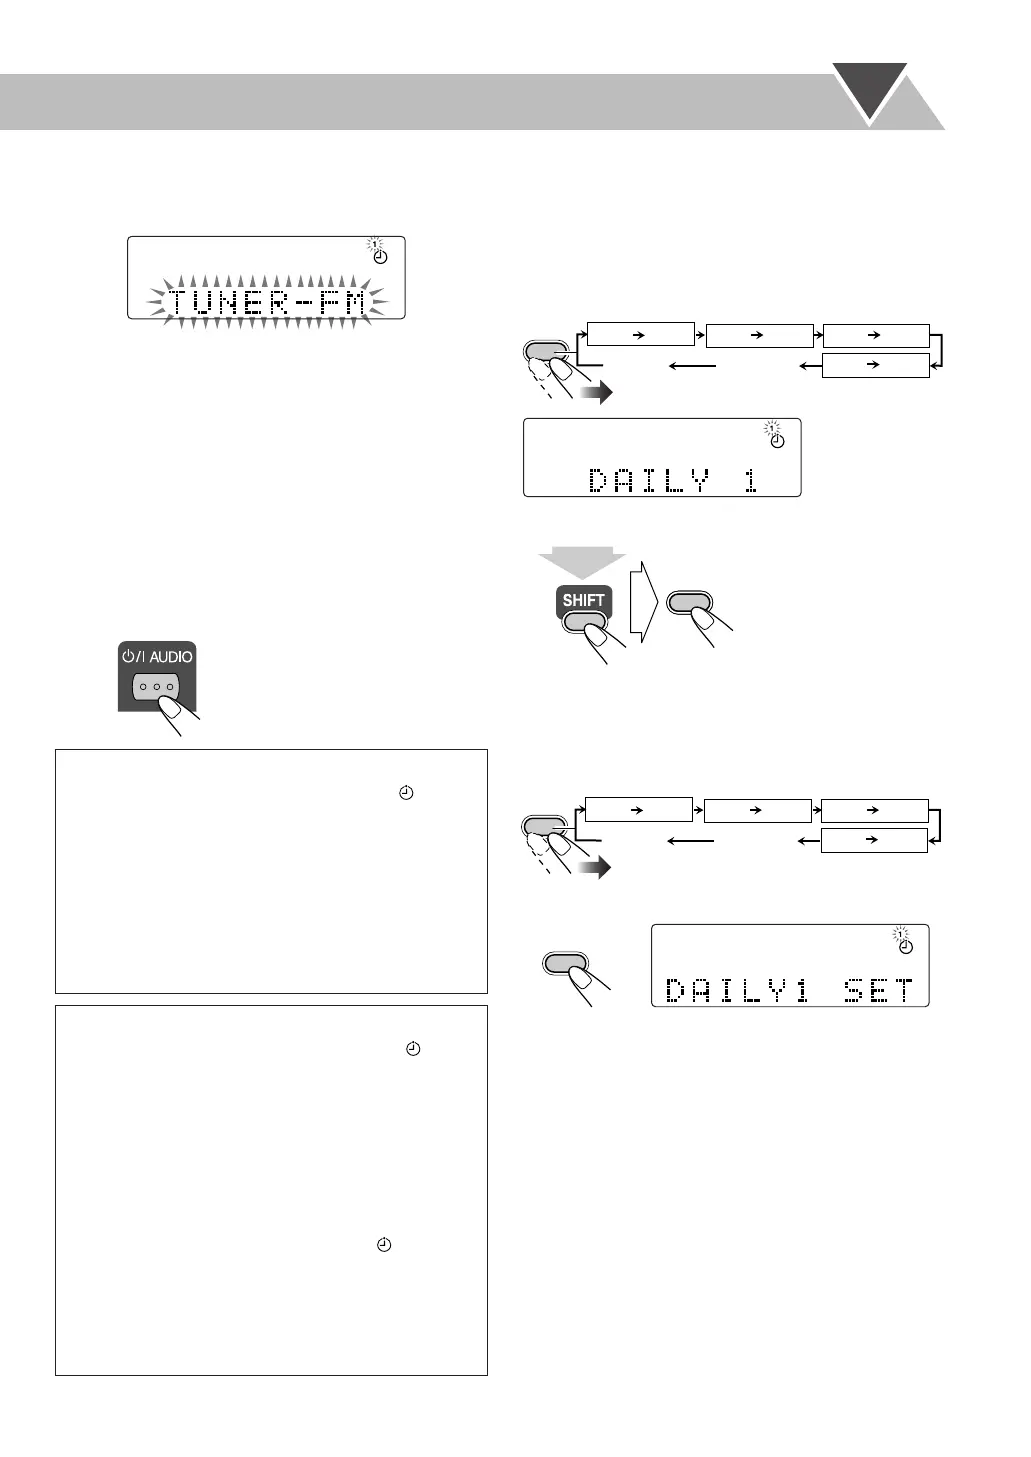
3 Select the playback source—“TUNER-FM,”
“TUNER-AM,” “DISC,” “TAPE,” “AUX 1,” or
“AUX 2.”
4
For “TUNER-FM” and “TUNER-AM”: Select a
preset channel.
For “DISC”: Select the disc tray number, group
number (G), and then the track number (T).
5
Select the volume level.
• You can select the volume level (“0” to “40” and
“VOLUME – –”).
If you select “VOLUME – –,” the volume is set to
the last level when the unit has been turned off.
Once settings are complete, the Timer setting information
appears in sequence.
3 Turn off the unit (on standby) if you have set the timer
with the System turned on.
To turn off the Timer after its setting is done
Since Daily Timer is activated at the same time everyday,
you may need to cancel it on some particular days.
• Recording Timer can also be canceled temporarily.
1 Select the Timer you want to cancel.
2 Turn off the selected Timer.
To turn on the Timer
1 Select the Timer (REC TIMER, and DAILY 1/2/3)
you want to activate.
2 Activate the selected Timer.
3 Wait until the indication goes off and turn off the unit
(on standby).
How Recording Timer actually works
When Recording Timer has been set, Timer ( )
indicator and the REC indicator are lit on the display.
Recording Timer works only once.
When the on-time comes
The System turns on, tunes in to the specified station and
starts recording after about 30 seconds.
When the off-time comes
The System stops recording, and turns off (stands by).
• The timer setting remains in memory until you change it.
How Daily Timer actually works
Once the Daily Timer has been set, the timer ( )
indicator and timer number indicator (1/2/3) are lit on the
display. Daily Timer is activated at the same time
everyday until the timer is turned off manually (see the
next column) or another timer is activated.
When the on-time comes
The System turns on, starts playing the specified source
(except “AUX 1” and “AUX 2”), and sets the volume
level gradually to the preset level after about 30 seconds.
• While Daily Timer is working, the timer ( ) indicator
and timer number indicator (1/2/3) flash on the display.
When the off-time comes
The System stops playback, and turns off (stands by)
automatically.
• The timer setting remains in memory until you change it.
CLOCK/
TIMER
Clock setting
(see page 15)
Canceled
DAILY 1
ON (Time)
Daily 1 Timer
ON (Time)
DAILY 2
Daily 2 Timer
ON (Time)
DAILY 3
Daily 3 Timer
ON (Time)
REC TIMER
Recording Timer
Ex.To cancel Daily
Timer 1
(While holding...)
CANCEL
SET
CLOCK/
TIMER
Clock setting
(see page 15)
Canceled
DAILY 1
ON (Time)
Daily 1 Timer
ON (Time)
DAILY 2
Daily 2 Timer
ON (Time)
DAILY 3
Daily 3 Timer
ON (Time)
REC TIMER
Recording Timer
CANCEL
SET
Ex. When Daily Timer 1 (DAILY 1) is
activated
UX-AD8[A].book Page 31 Tuesday, November 22, 2005 1:59 PM

 Loading...