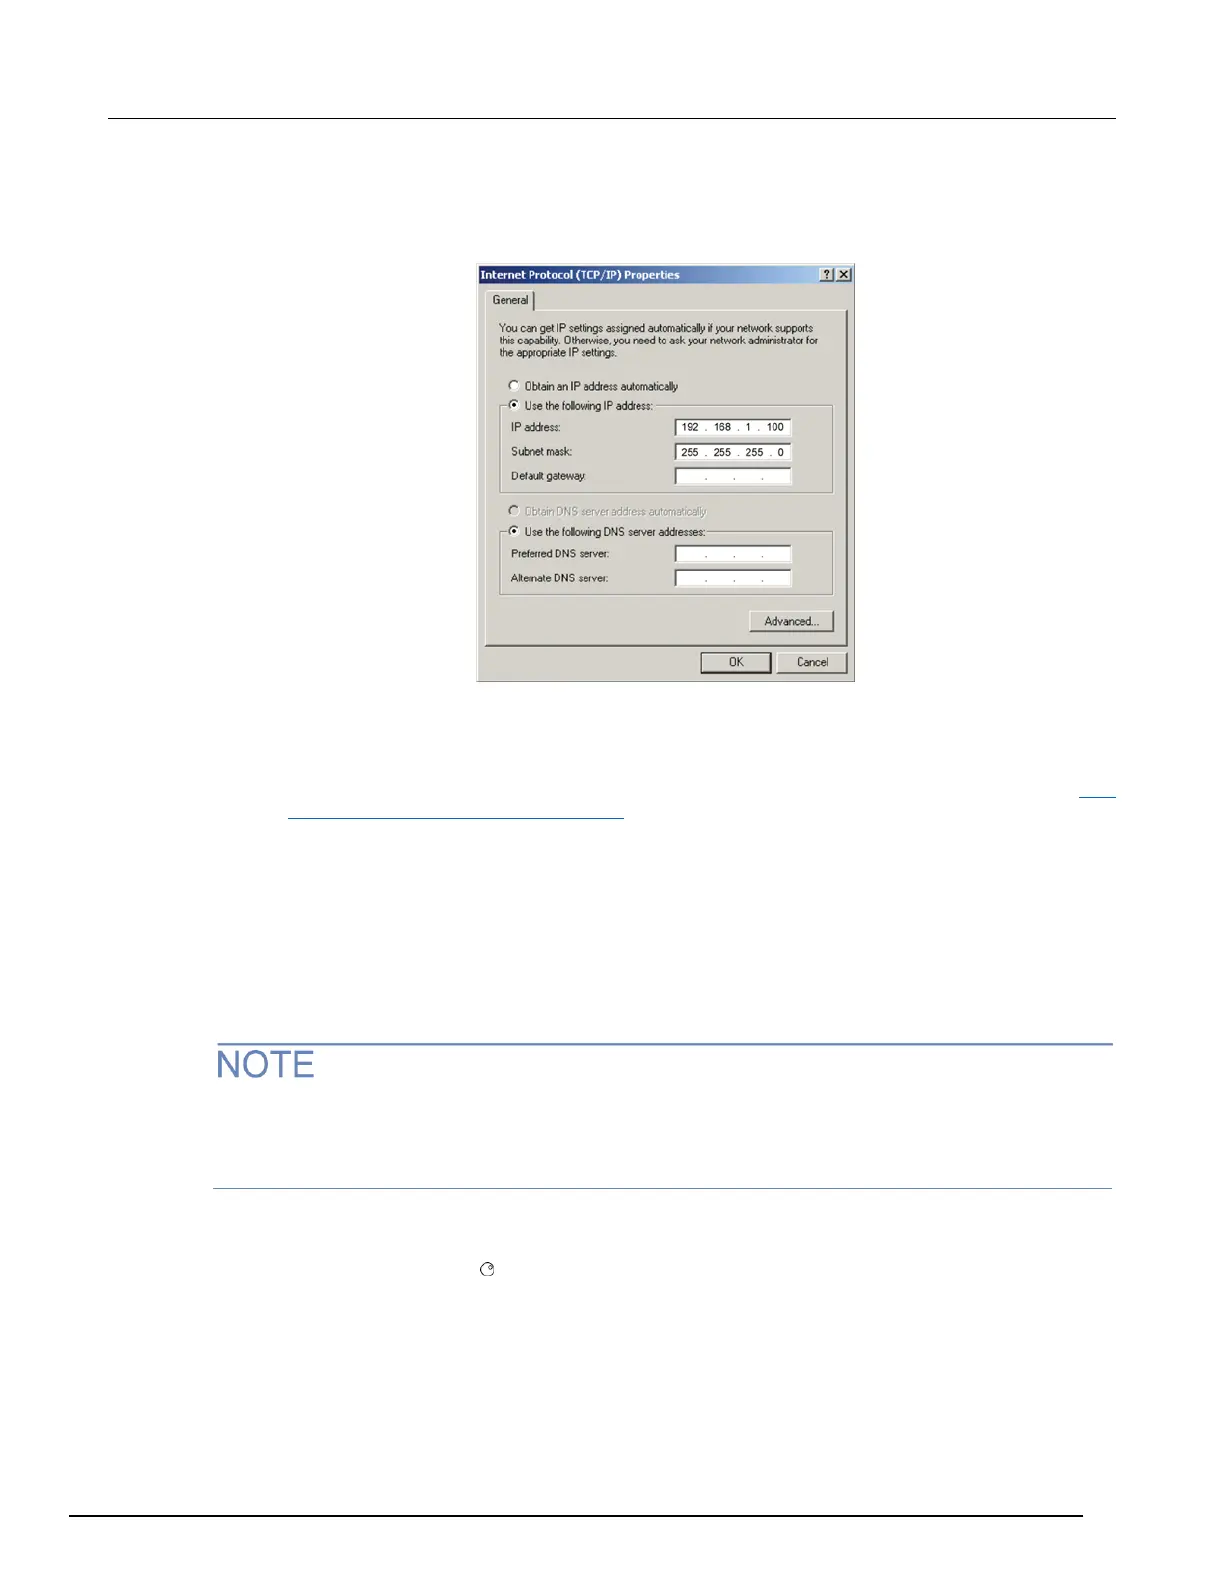
4. In the items list, double-click Internet Protocol Version 4 (TCP/IPv4). The Internet Protocol
Version 4 (TCP/IPv4) Properties dialog box is displayed.
Figure 150: Internet Protocol (TCP/IP) Properties dialog box
5. Select Use the following IP address. The option for "Use the following DNS server addresses"
is automatically selected.
6. Set the IP address. If the IP address and subnet mask fields:
▪ Contain values: Record the IP address, subnet mask, default gateway, and DNS servers to use in Step
3: Configure the instrument's LAN settings (on page A-7).
▪ Are blank: In the IP address field, enter 192.168.1.100. In the subnet mask field, enter
255.255.255.0. These will be used to configure the LAN settings of the instrument.
7. Click OK to close the Internet Protocol Version 4 (TCP/IPv4) Properties dialog box.
8. Click OK to close the Local Area Connection Properties dialog box.
9. Close the Network Connections window.
Step 3: Configure the instrument's LAN settings
These steps assume that you are making all the settings in the order shown here. If you only change
one or a few settings, be aware that you need to apply the settings before they will be in effect. To
apply the settings, from the LAN CONFIG menu, select APPLY_SETTINGS > YES, and then press
the ENTER key.
To configure the Series 3700A using the front panel:
1. Press the MENU key to display the MAIN MENU.
2. Use the navigation wheel to select LAN. The LAN CONFIG menu is displayed.
3. Change the IP address assignment method:
a. Select CONFIG > METHOD > MANUAL, and then press the ENTER key.
b. Press the EXIT (LOCAL) key once to return to the LAN CONFIG menu.

 Loading...