@
O
O
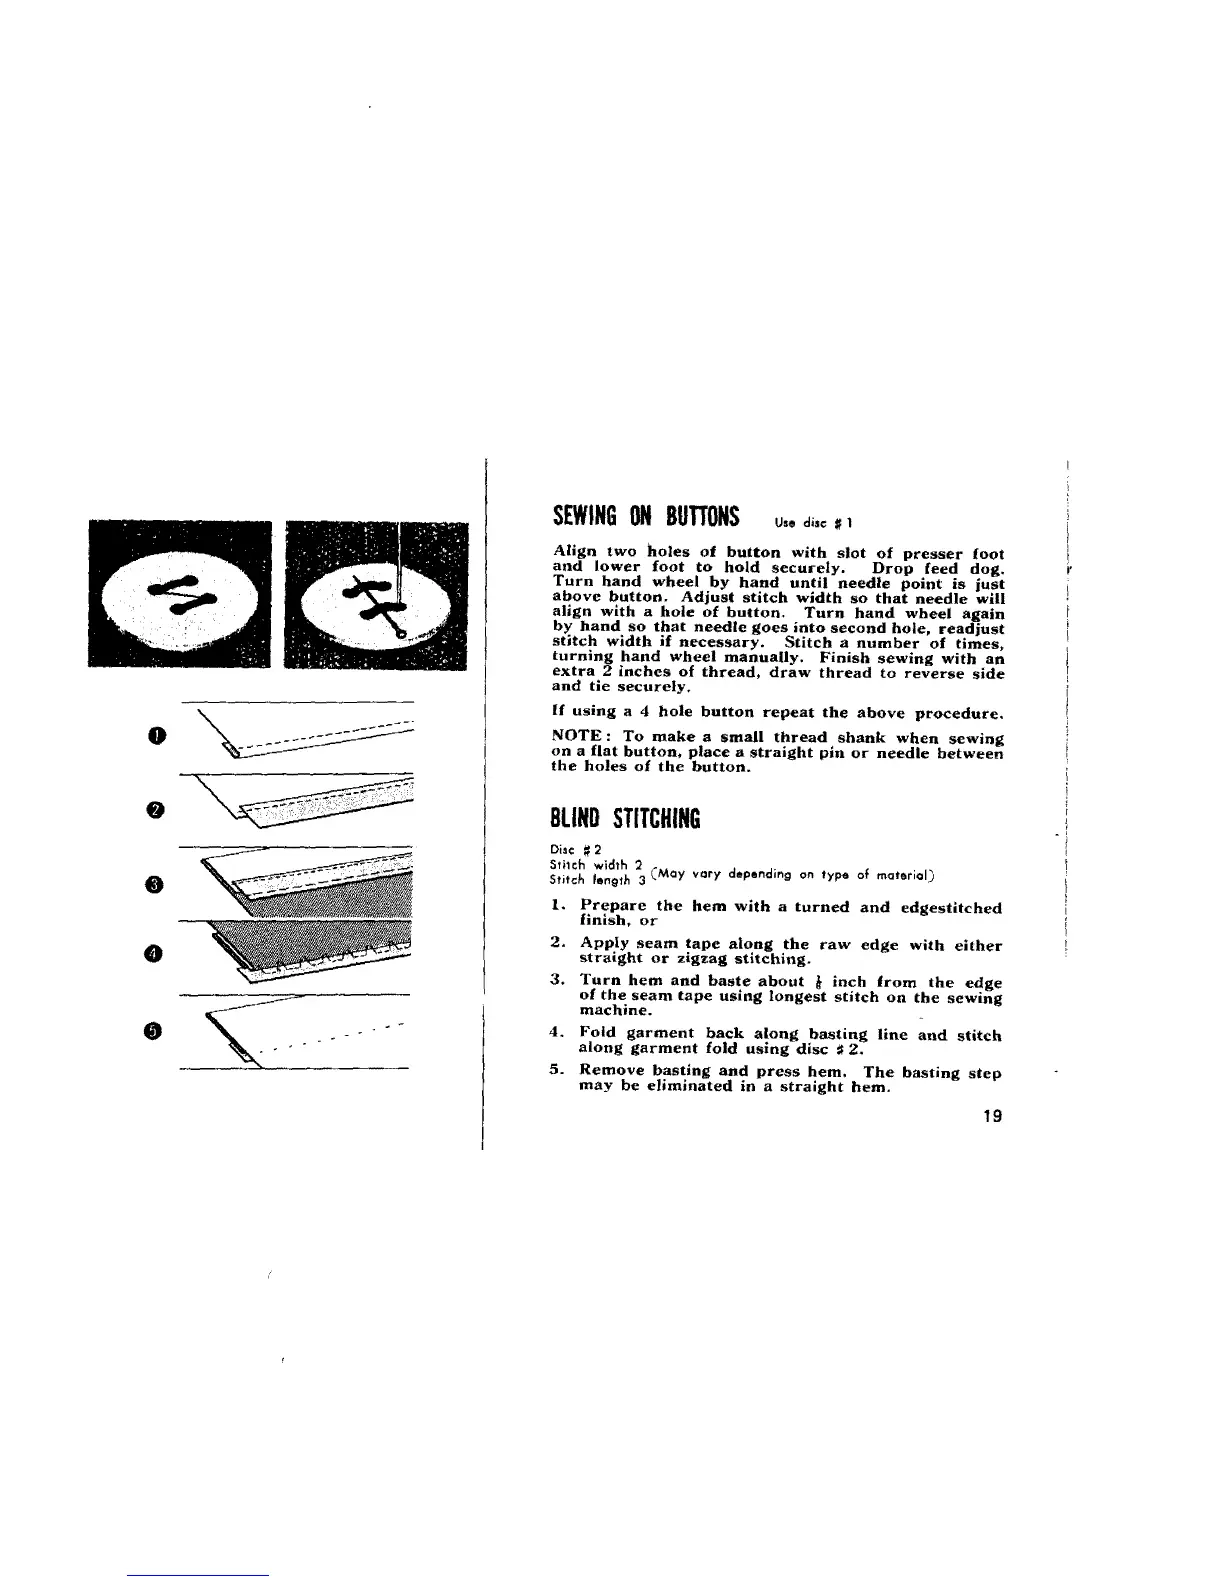
SEWINGONBUTTONSu..d,.o
Align two holes of button with slot of presser foot
and lower foot to hold securely. Drop feed dog.
Turn hand wheel by hand until needle point is just
above button. Adjust stitch width so that needle will
align with a hole of button. Turn hand wheel again
by hand so that needle goes into second hole, readjust
stitch width if necessary. Stitch a number of times,
turning hand wheel manually. Finish sewing with an
extra 2 inches of thread, draw thread to reverse side
and tie securely.
li using a 4 hole button repeat the above procedure.
NOTE: To make a small thread shank when sewing
on a flat button, place a straight pin or needle between
the holes of the button.
BLINDSTITCHING
Disc _ 2
Stilch width 2 _May vQry depending on type of materiol]
Stitch length 3
1. Prepare the hem with a turned and edgestitched
[inlsh, or
2. Apply seam tape along the raw edge with either
straight or zigzag stltching.
3. Turn hem and baste about _ inch from the edge
of the seam tape using longest stitch on the sewing
machine.
4. Fold garment back along basting llne and stitch
along garment fold using disc _ 2.
5. Remove basting and press hem. The basting step
may be eliminated in a straight hem.
19
 Loading...