ToStore Attachments:
Remove dusting brush or upholstery tool. Snap into
appropriate storage location.
Remove crevice tool from the wand by twisting.
Lay aside.
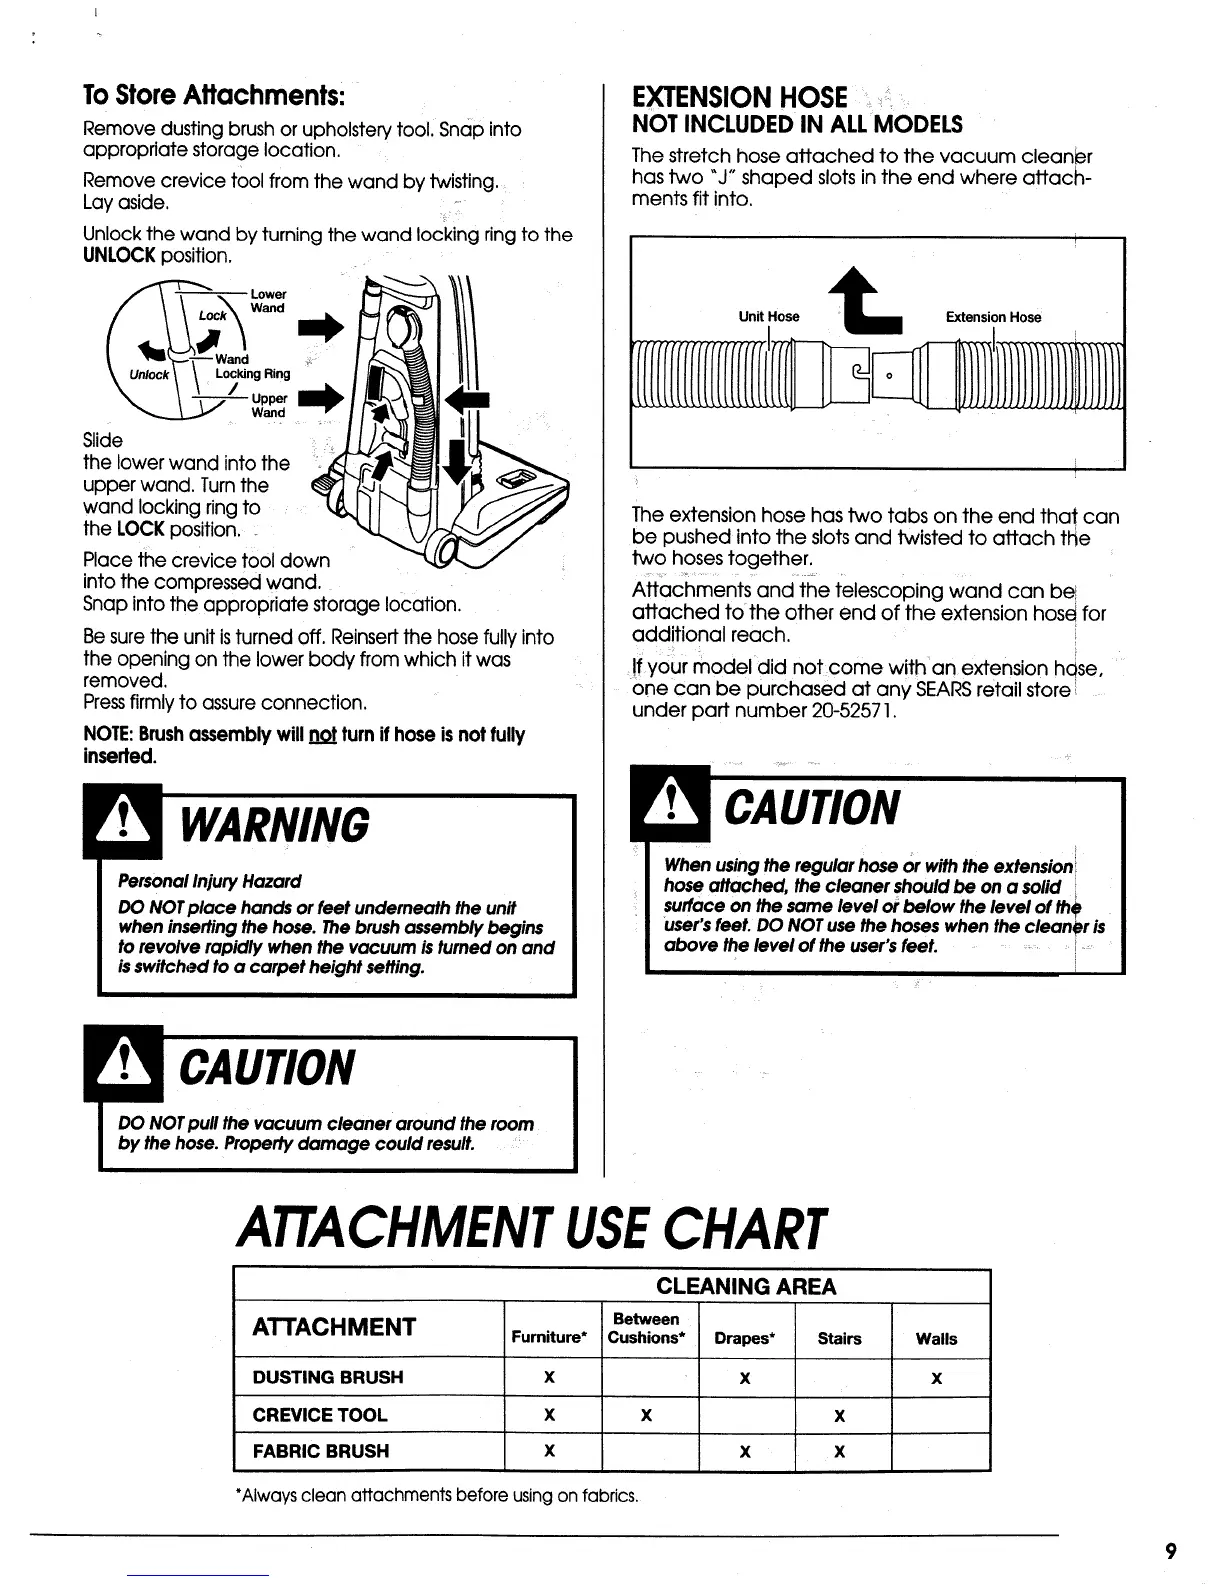
Unlock the wand by turning the wand locking ring to the
UNLOCKposition.
___ Lower
//'-.\ w"°
nlock_ i LockingRing r
\ \ / Upper
Wand
Slide
the lower wand into the
upper wand. Turnthe
wand locking ring to
the LOCK position.
Place the crevice tool down
into the compressed wand.
Snap into the appropriate storage location.
Be sure the unit isturned off. Reinsert the hose fully into
the opening on the lower body from which it was
removed
Pressfirmly to assure connection.
NOTE:Brushassembly willnot turn if hose isnot fully
inserted.
Personal Injury Hazard
DO NOT place hands or feet underneath the unit
when inserting the hose. The brush assembly begins
to revolve rapidly when the vacuum isturned on and
isswitched to a carpet height setting.
EXTENSION HOSE
NOT INCLUDED IN ALL MODELS
The stretch hose attached to the vacuum cleanler
has two "J" shaped slots in the end where attach-
ments fit into.
Unit Hose
Extension Hose
The extension hose has two tabs on the end that can
be pushed into the slots and twisted to attach the
two hoses together.
Attachments and the telescoping wand can be
attached to the other end of the extension hose for
additional reach.
!f your mode did not come with an extension hose,
one can be purchased at any SEARSretail store
under part number 20-52571.
CAUTION
When using the regular hose or with the extension
hose attached, the cleaner should be on a solid
surface on the same level or below the level of the
user's feet. DO NOT use the hoses when the cleaner is
above the level of the user's feet.
ATTACHMENTUSECHART
CLEANING AREA
Between
ATTACHMENT Furniture* Cushions* Drapes* Stairs Walls
DUSTING BRUSH X X X
CREVICE TOOL X X X
FABRIC BRUSH X X X
*Always clean attachments before using on fabrics.
9
 Loading...