4
Étape 2
Insérez les boulons
et serrez-les.
Étape 3
Branchez le tuyau d'arrosage
à l'ENTRÉE d'eau. Serrez-le
à la main.
Étape 4
Branchez le tuyau à haute
pression à la SORTIE
d'eau. Serrez-le à la main.
Étape 5
Branchez le tuyau à haute
pression au pistolet.
Serrez-la à la main.
Étape 6
Branchez la lance au pistolet.
Serrez-la à la main.
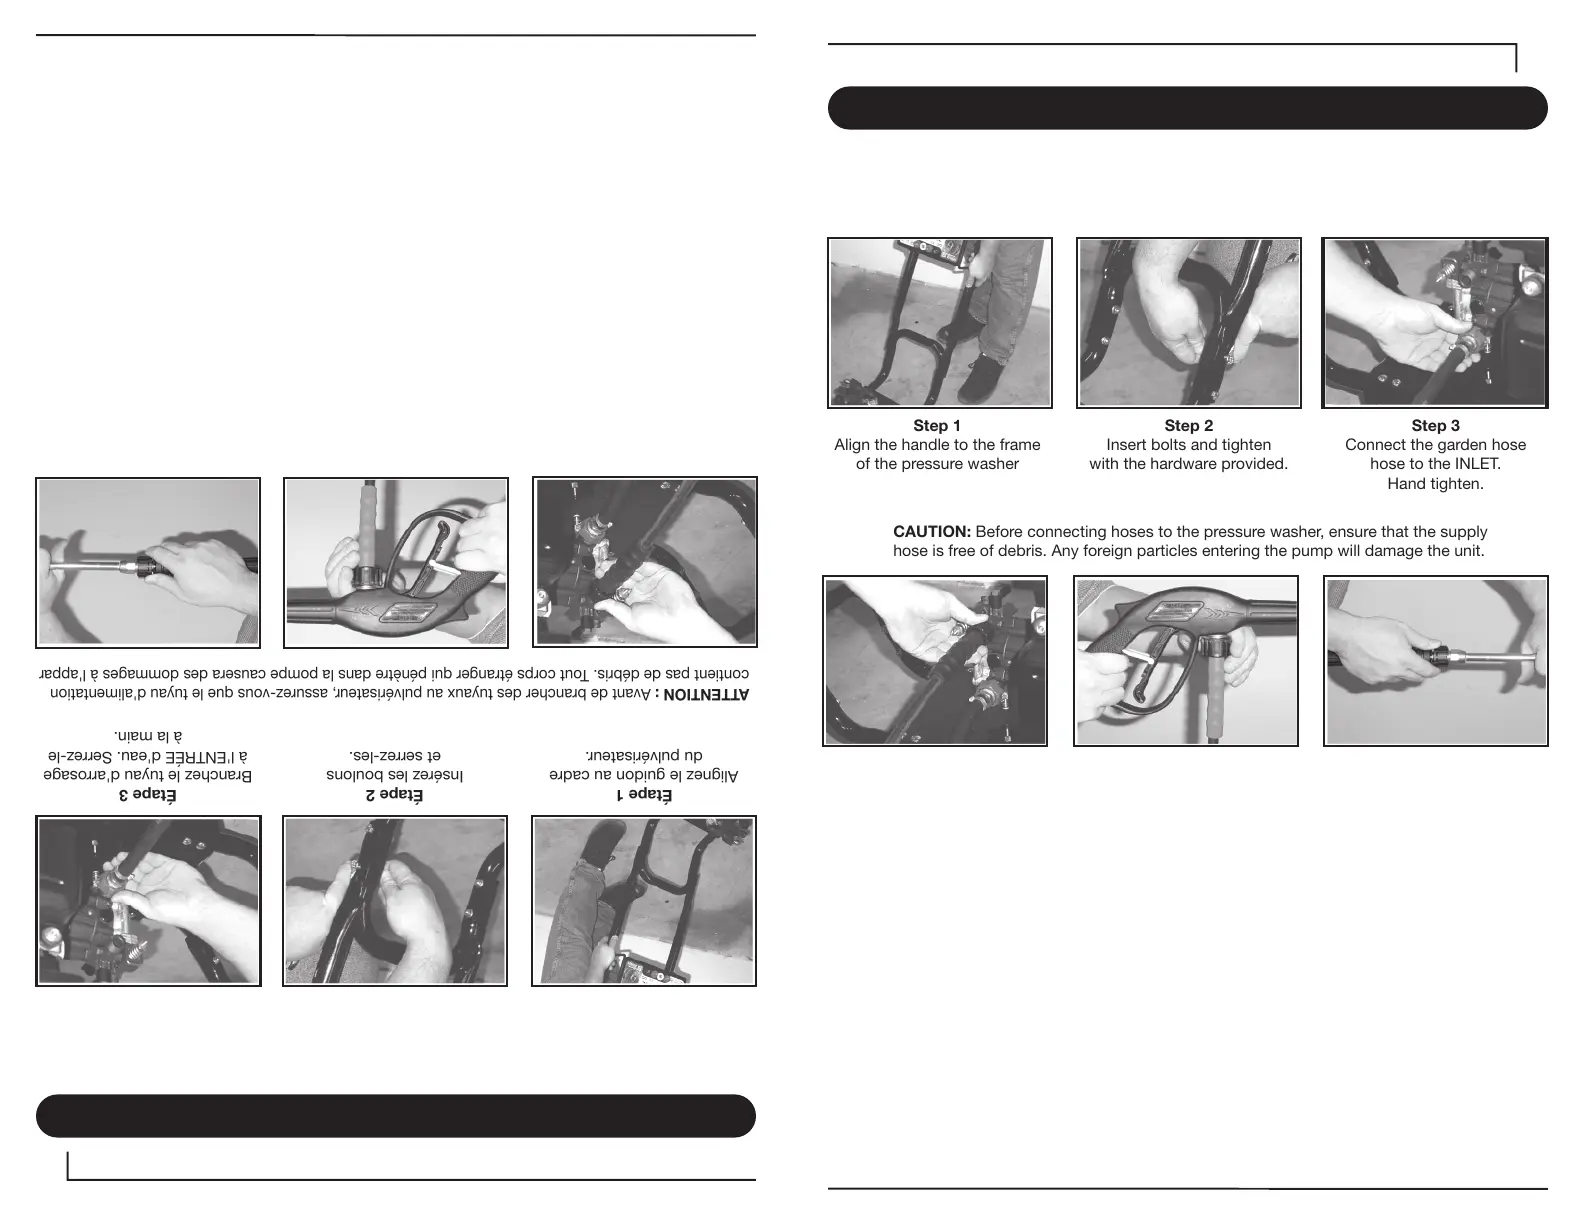
Assemblage
Étape 1
Alignez le guidon au cadre
du pulvérisateur.
Remarque : Vérifiez si l'appareil comporte des dommages dus à l'expédition, qui peuvent nuire à
son fonctionnement. Si des pièces sont manquantes ou endommagées, communiquez immédiate-
ment avec le service à la clientèle. NE RETOURNEZ PAS cet appareil au magasin.
ATTENTION : Avant de brancher des tuyaux au pulvérisateur, assurez-vous que le tuyau d'alimentation ne
contient pas de débris. Tout corps étranger qui pénètre dans la pompe causera des dommages à l'appareil.
ATTENTION : Si la lance n'est
pas fixée solidement, elle pourrait être éjectée par la haute pression du
pistolet et causer des blessures
ou des dommages.
4
Step 2
Insert bolts and tighten
with the hardware provided.
Step 4
Connect the high-pressure
hose to the OUTLET.
Hand tighten.
Step 3
Connect the garden hose
hose to the INLET.
Hand tighten.
Assembly Instructions
Step 1
Align the handle to the frame
of the pressure washer
Note: Check for visible shipping damage. Shipping damage will cause problems in the operation
of this unit. Contact the Customer Service Hotline immediately if there are missing or damaged
parts. DO NOT return this product to the store.
CAUTION: Before connecting hoses to the pressure washer, ensure that the supply
hose is free of debris. Any foreign particles entering the pump will damage the unit.
CAUTION: If the lance is not securely locked into place, it could be ejected under high-pressure
when operating the gun, possibly causing injury or damage.
Step 5
Connect the high pressure
hose to the gun assembly.
Hand tighten.
Step 6
Connect the lance
to the gun assembly.
Hand tighten.
 Loading...