49
Reassembly
14 690 01 Rev. G KohlerEngines.com
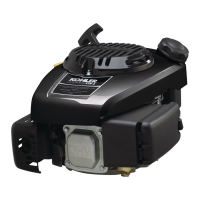
Install Cylinder Head
Torque Sequence
2
4
1
3
NOTE: Do not reuse cylinder head gasket. Always
replace with new gasket.
1. Examine sealing surfaces of cylinder head and
crankcase for nicks or burrs.
2. Using cylinder head dowels as a guide, install a new
head gasket.
3. Match sides of head together and nger tighten
screws.
4. Torque screws in two stages; rst to 14 N·m
(123 in. lb.), nally to 27.8 N·m (246 in. lb.), following
sequence shown.
Install Push Rod Assembly
NOTE: Installation and seating of push rods into tappet
recesses during this sequence is critical. To aid
with proper installation of push rods and rocker
arms, and for adjusting valve lash, position
engine with cylinder head up. When properly
installed, push rods extend approximately 1 in.
(25.4 mm) above guide plate.
1. With tabs on guide plate facing down, install rocker
studs.
2. Tighten rocker studs to 13.6 N·m (120 in. lb.).
3. Install push rods into intake and exhaust positions,
as previously marked.
4. Apply grease to contact surfaces of rocker arms and
pivots.
5. Install rocker arms onto rocker studs. Match rocker
arm dimples with round push rod ends.
6. Loosely install pivots and jam nuts onto rocker studs.
7. With piston at top dead center of compression
stroke, insert a 0.1 mm (0.004 in.) at feeler gauge
between 1 valve stem and rocker arm.
Valve Clearance Specications:
Intake Valve 0.0762-0.127 mm (0.003-0.005 in.)
Exhaust Valve 0.0762-0.127 mm (0.003-0.005 in.)
8. Tighten rocker pivot with a wrench until a slight drag
is felt on feeler gauge. Hold nut in position and
tighten jam nut to 9.5 N·m (84 in. lb.). Recheck lash.
Perform same adjustment procedure on opposite
valve.
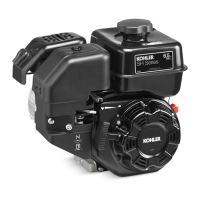
Install Valve Cover
Torque Sequence
2
4
1
3
Valve Cover with Gasket
1. Position a new valve cover gasket on cylinder head.
2. Install valve cover and nger tighten screws.
3. Using sequence shown, tighten cover screws to
8 N·m (71 in. lb.).
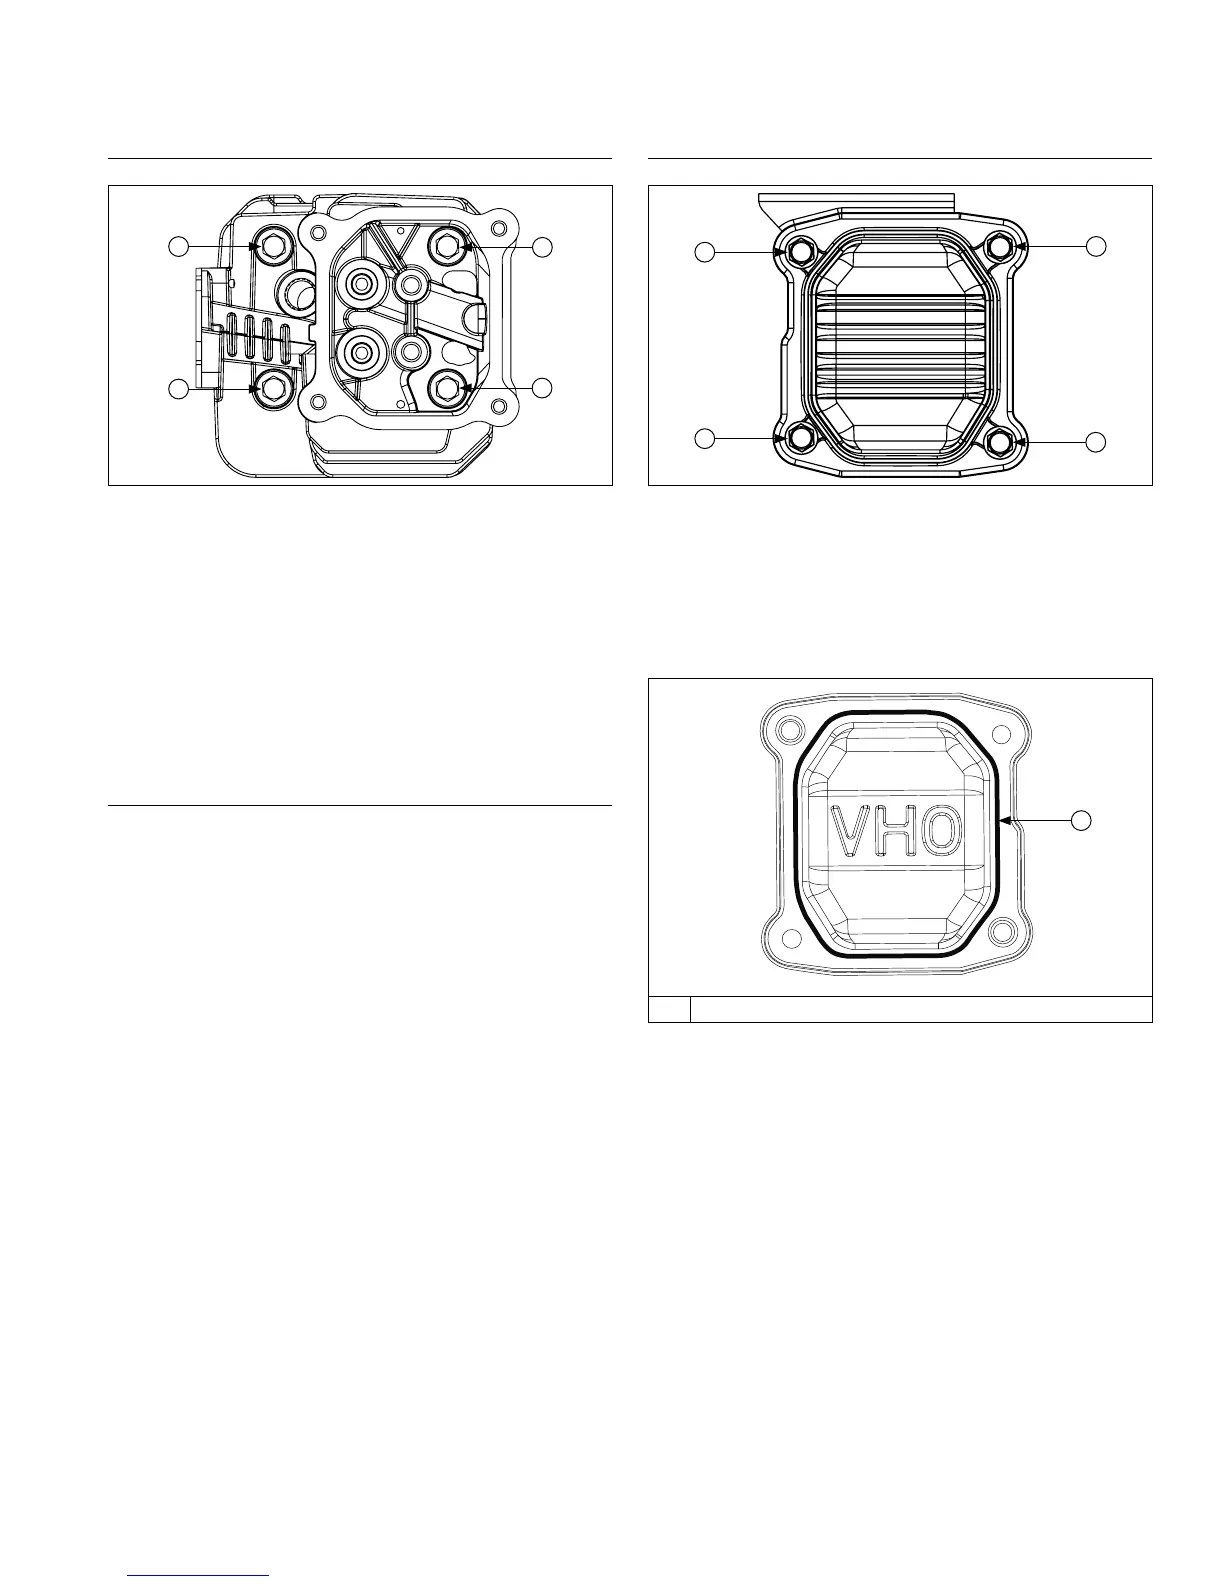
Valve Cover with RTV
A
A RTV Sealant
NOTE: Always use fresh sealant. Using outdated
sealant can result in leakage. Refer to Tools and
Aids for important information on sealant
dispenser.
NOTE: To ensure proper adhesion of sealant to both
sealing surfaces, perform step 3 immediately (5
minutes maximum) after application of RTV.
1. Prepare sealing surface of cylinder head and valve
cover.
2. Apply a 1.5 mm (1/16 in.) bead of sealant to valve
cover as shown.
3. Install valve cover and nger tighten screws.
4. Using sequence shown, tighten cover screws to
8 N·m (71 in. lb.).
 Loading...