Chapter 6: Maintaining the Protector Filtered Hood
Product Service 1-800-522-7658
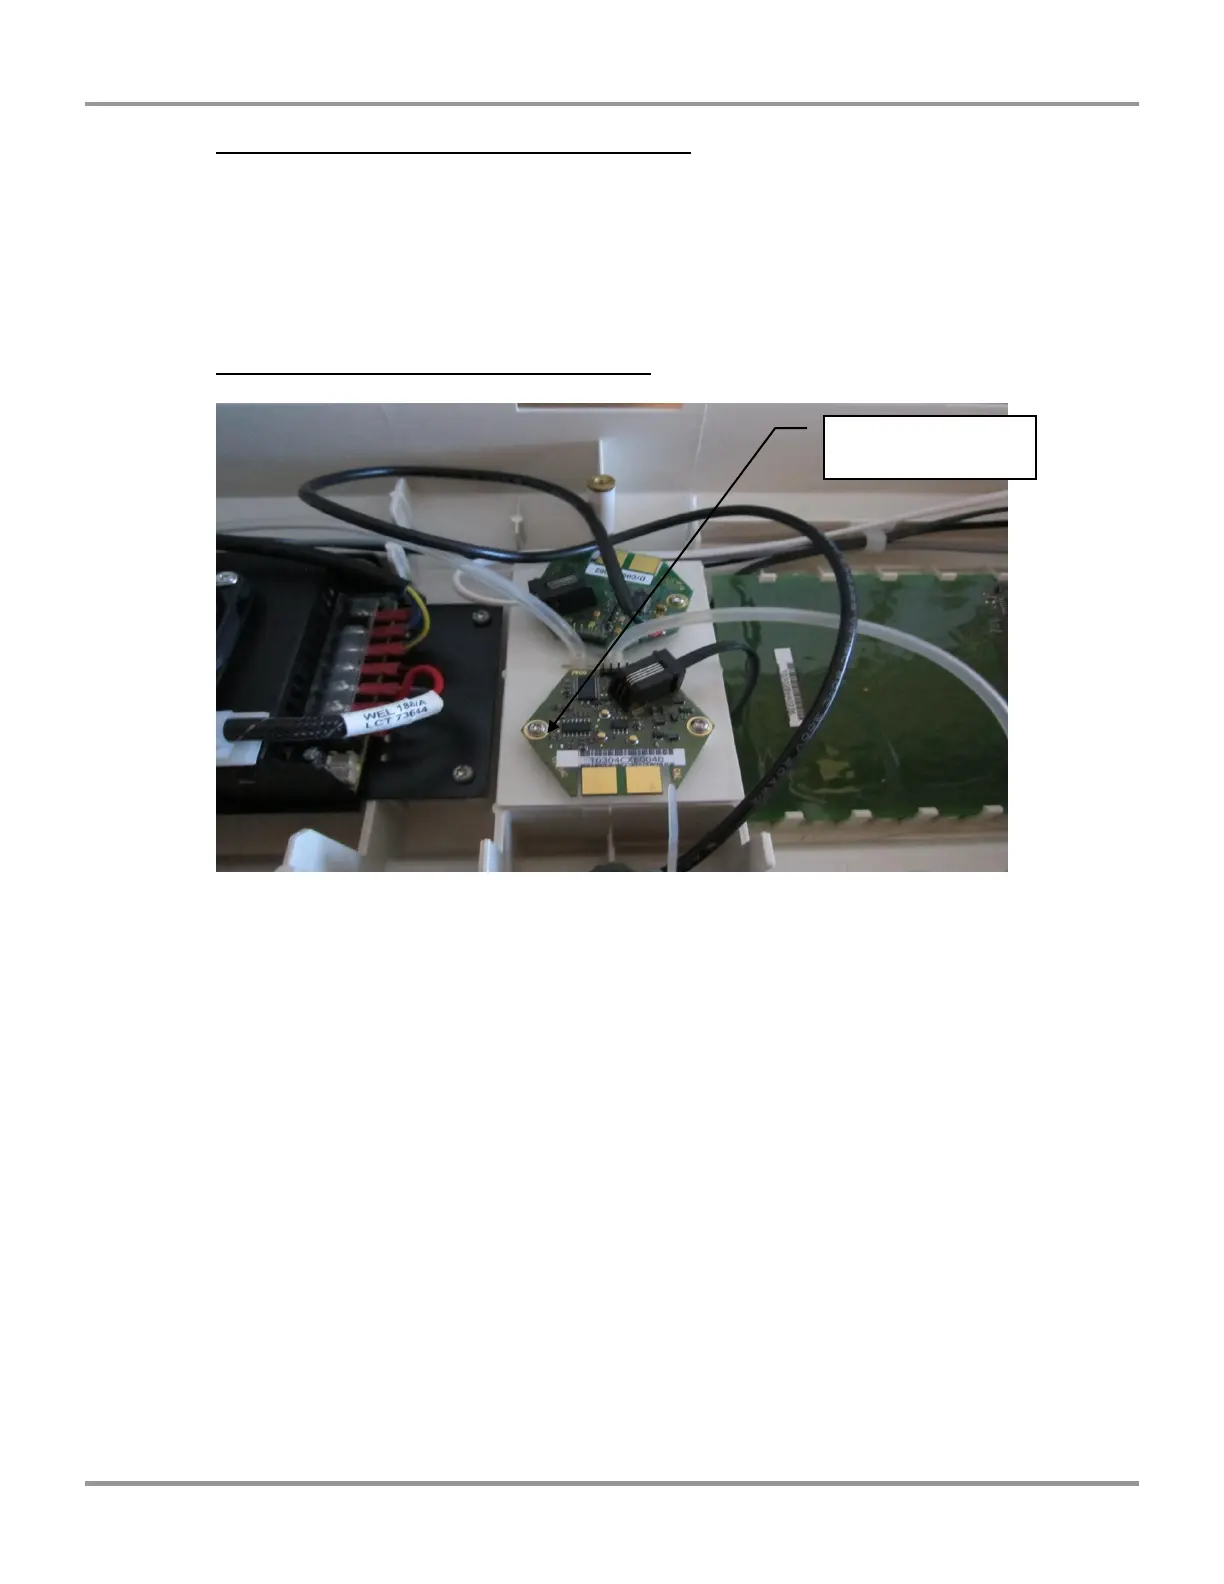
Step 7 – Remove back panel to control module
Using your TX 20 Torx or Phillips screwdriver depending on your model,
unscrew the six screws that hold the back panel on the control module.
Once you have the six screws out of the back panel you can slide it to one side of
the control module giving you access to the Electro (acid) sensor board.
Step 8 – Disconnect and remove old sensor
First unplug the RJ9 connector from the board. It is similar to a phone cord, push
the tab in on the crystal and then gently pull on the cord to release it.
Next you need your TX 10 Torx or Phillips screwdriver to remove the two screws
that are holding the board to the control module housing. You should now have
the board free from the controller housing.
***Do not discard the old board and sensor as it needs to be sent back to
Labconco for a refund of the core charge.***
Electro
(Acid Sensor) Board