13
NOTE: DIAGRAMS & ILLUSTRATIONS ARE NOT TO SCALE.
LENNOX HEARTH PRODUCTS • MERIT PLUS
®
DIRECT VENT GAS FIREPLACES (MPDP35/40) • INSTALLATION INSTRUCTIONS
Vent Restrictor Installation
The fireplace ships with the following:
• (1) rear solid cover plate (ships installed
over rear vent hole; similar to top solid
cover plate shown in Figure 16)
• (1) top solid cover plate (ships installed
over top vent hole; refer to Figure 16)
• (1) rear vent restrictor plate (square
plate with two rectangular holes; ships
uninstalled in literature bag)
• (1) U-shaped vent restrictor (ships
uninstalled in literature bag)
• (1) top vent flue restrictor (ships
uninstalled and taped to log set in firebox)
Vent Restrictor Installation in Rear Vent
Systems
IF REAR VENT HORIZONTAL VENT
LENGTH IS 7 INCHES OR SHORTER:
MPDP35 models: Install the rear vent
restrictor plate as shipped (see Figure
15, View A; do NOT bend back the
perforated tab) over the rear vent hole
using the 4 previously removed screws,
as shown in Figure 16.
MPDP40 models: Hand-bend the per-
forated tab on the rear vent restrictor
plate back 90 degrees (as shown in
Figure 15, View B), and then install
it over the rear vent hole using the 4
previously removed screws, as shown
in Figure 16.
IF REAR VENT HORIZONTAL VENT
LENGTH IS LONGER THAN 7 INCHES:
All models: Reinstall the 4 previously
removed screws only, into the rear
cover plate screw holes. Do NOT install
the rear vent restrictor plate.
KNOCKOUT
CAP AND
GASKET
CROSS SECTION
REAR VENT
COVER PLATE
SECURING SCREWS
CABINET BACK
(INSIDE UNIT)
(OUTSIDE UNIT)
REAR VENT SEAL AND COVER PLATE REMOVAL
WHEN USING THE REAR VENT
When rear venting, remove the outer wrapper
knockout, cover plate, and gasket from outside
the unit (Figure 17).
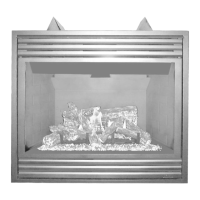
Figure 15
A. Rear Vent Restrictor Plate
as shipped from factory.
(Use in this position on MPDP35 only.)
B. Rear Vent Restrictor Plate
with perforated tab bent 90 degrees.
(Use in this position on MPDP40 only.)
Perforated
Tab
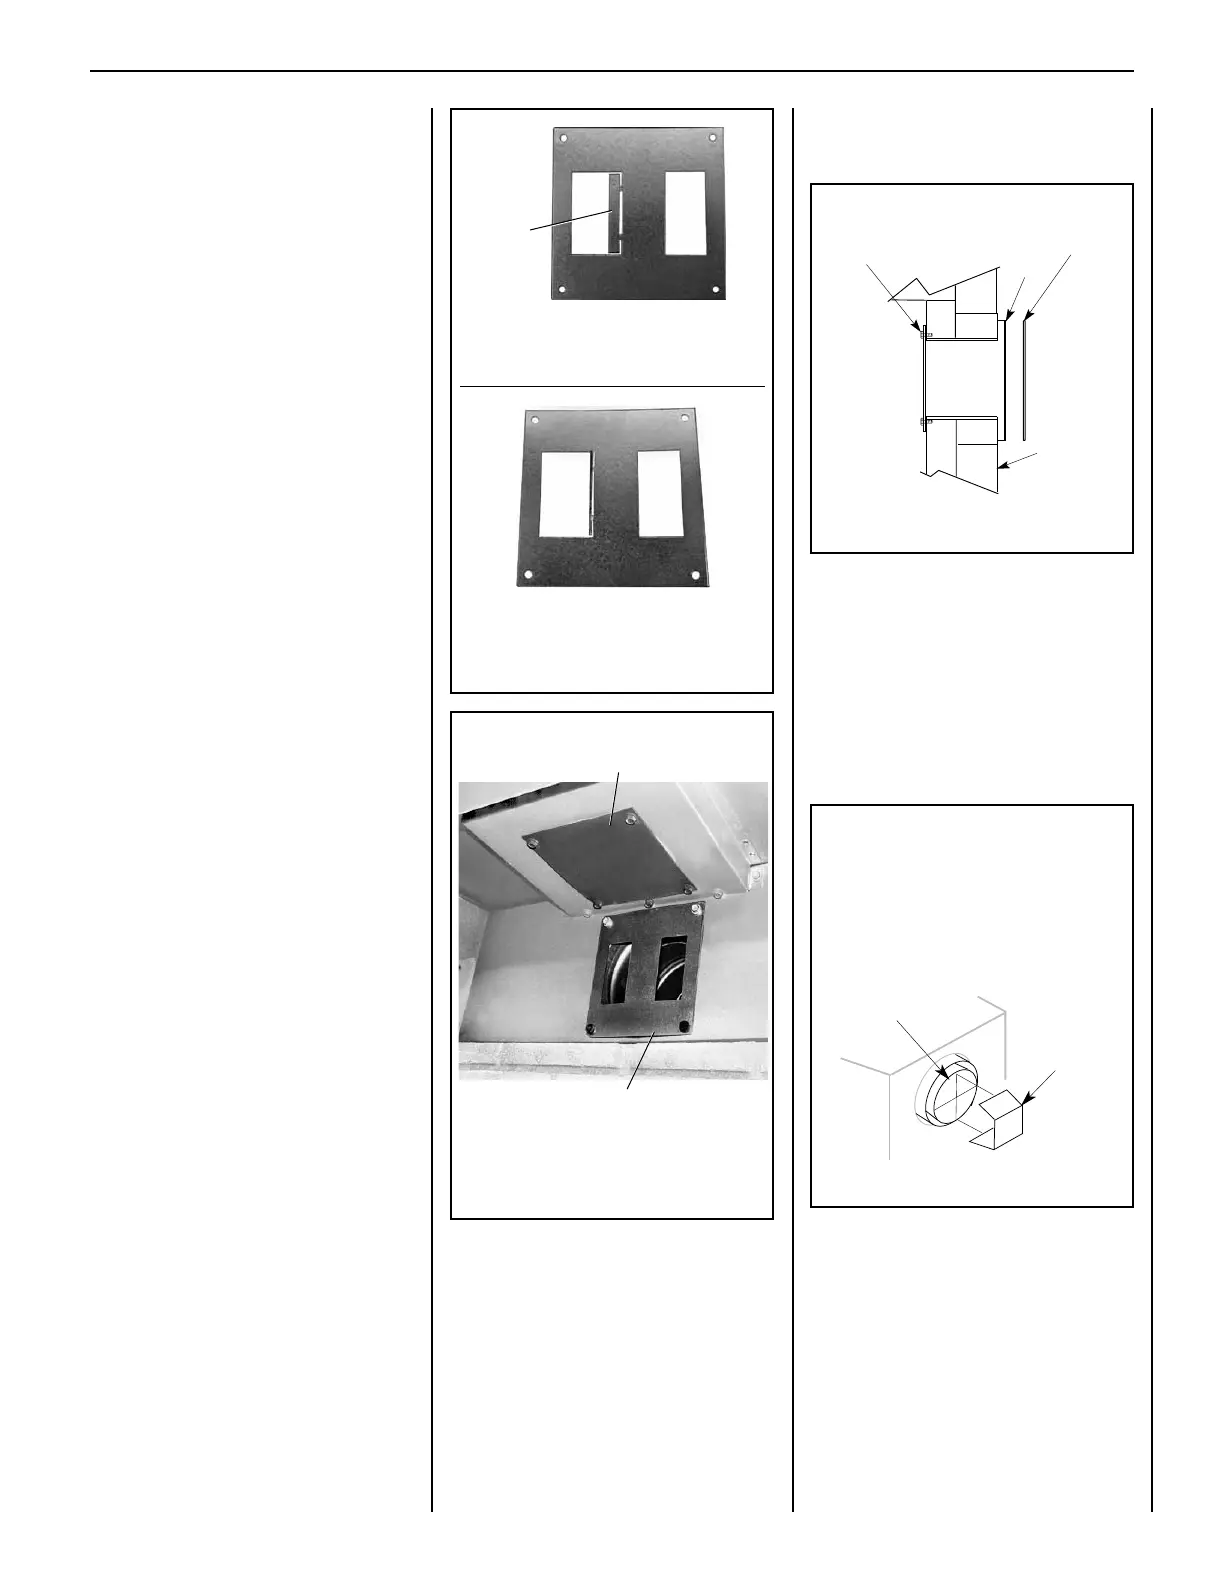
Figure 16
Top Solid Cover Plate (shown
installed over top vent hole)
Rear Vent Restrictor Plate
(shown installed over rear vent hole
after Rear Solid Cover Plate was
removed)
Figure 17
U-SHAPED VENT
RESTRICTOR
APPLIANCE REAR
VENT OUTLET
INNER FIREPLACE
COLLAR
Installation of the U-shaped vent restrictor is
required in rear vent applications with vertical
vent runs over 8 feet.
Install the vent restrictor from outside the unit
in the inner fireplace collar of the rear vent outlet,
oriented as shown below.
U-SHAPED VENT RESTRICTOR INSTALLATION
(REAR VENT)
IF REAR VENT VERTICAL VENT LENGTH
IS 8 FEET OR LONGER:
All models: Before attaching the first
piece of venting pipe or elbow, install the
U-shaped vent restrictor into the rear vent
collar from outside the unit (Figure 18).
The U-shaped vent restrictor is held in
place by friction.
Figure 18
 Loading...