7
UniqUe fielD-sUpplieD installation items
The following items are recommended to have on-hand for
installation of the unit.
• Cotton gloves and cloth (to remove nger prints from
UVA lamp)
• Aluminum foil tape or water-based mastic (NOT sili-
cone) to be applied as a sealant.
Installation
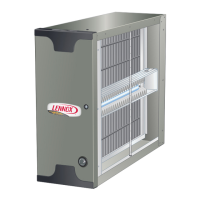
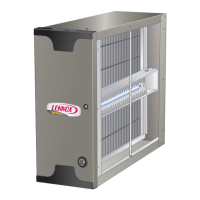
selecting location
The unit must be installed in the return air duct upstream of
the supply blower. Allow a 30” (76cm) service clearance in
front of the access panel as shown in gure 4. The air lter
and UVA Lampholder / PCO cartridge must be removable.
Allow Approximately
30” (76cm) of Clearance
Figure 4. Service Clearance
installing cabinet
The cabinet may either be installed on a level installation
deck or platform adjacent to the air handler or it may be
suspended from the rafters using metal strapping. If straps
are used, take care when attaching straps to the cabinet.
Ensure fasteners do not interfere with internal components
of the cabinet. The air lter and UVA Lampholder / PCO
cartridge must be able to slide freely into the cabinet.
1. Locate and remove the UVA Lampholder / PCO cartridge
from the cabinet.
NOTE: Oil on metal surfaces may cause odors. Use mild
soap and water solution to wash all new duct and
transition surfaces.
2. Use the air ow directional label on the inside of the UVA
Lampholder / PCO cartridge to orient the unit.
3. Properly position the cabinet next to the return air
opening of the air handling unit. Use sheet metal screws
1” (25mm) maximum length, rivets or other appropriate
fasteners to secure cabinet to the return air side of the
air handling unit.
4. Use eld-provided sheet metal screws 1” (25mm)
maximum length to fasten the return air duct to the other
side of the cabinet. Attachment holes are provided in
housing.
5. Use eld-provided aluminum foil tape or water-based
mastic to seal all joints between the cabinet, air handler
and duct.
6. In high humidity applications, wrap cabinet with eld-
provided 2” (50mm) foil-faced insulation (foil on the
outside) to prevent condensation.
installing UVa lamp
Use cotton gloves or a cotton cloth to protect the lamp and
your hands during unpacking and installation.
1. Remove cabinet access panel.
2. The UVA Lampholder / PCO cartridge is shipped in a
protective packaging. Packaging must be removed
prior to installation. Take care to prevent damage while
removing from packaging.
3. Locate the UVA lamp box, which is taped to the inside of
cabinet and carefully remove. Set UVA lamp box aside
while preparing cabinet for UVA lamp installation.
4. Remove (slide out) Healthy Climate
®
Carbon Clean 16
®
Filter from cabinet.
5. Disconnect the lampholder cable assembly from the
UVA lamp ballast connector.
6. Carefully remove lamp from UVA lamp box and secure
the UVA lamp electrical connector to the UVA lamp by
sliding the UVA lamp pins into the slot. Proper connection
will make a snapping sound.
DEPRESS RED BUTTON
ONLY TO RELEASE UVA
LAMP FROM SOCKET.
Figure 5. Releasing UVA Lamp from Socket
7. Slide the UVA lamp into UVA Lampholder / PCO
cartridge. Verify that the UVA lamp is secure to the one
metal UVA lamp clamp located mid-way on the UVA
lamp reector.
METAL UVA LAMP
CLAMP
UVA LAMP REFLECTOR
Figure 6. UVA Lamp Metal Clamp
 Loading...