Installing the keyboard in the console unit
To install the keyboard in the console unit, complete the following steps:
Step 1. Place the console unit on a table or other flat surface and make sure that the right side of the unit
extends approximately 76 mm (3 in.) over the edge of the surface. This will help you route the
keyboard-and-mouse cable more easily later in the procedure.
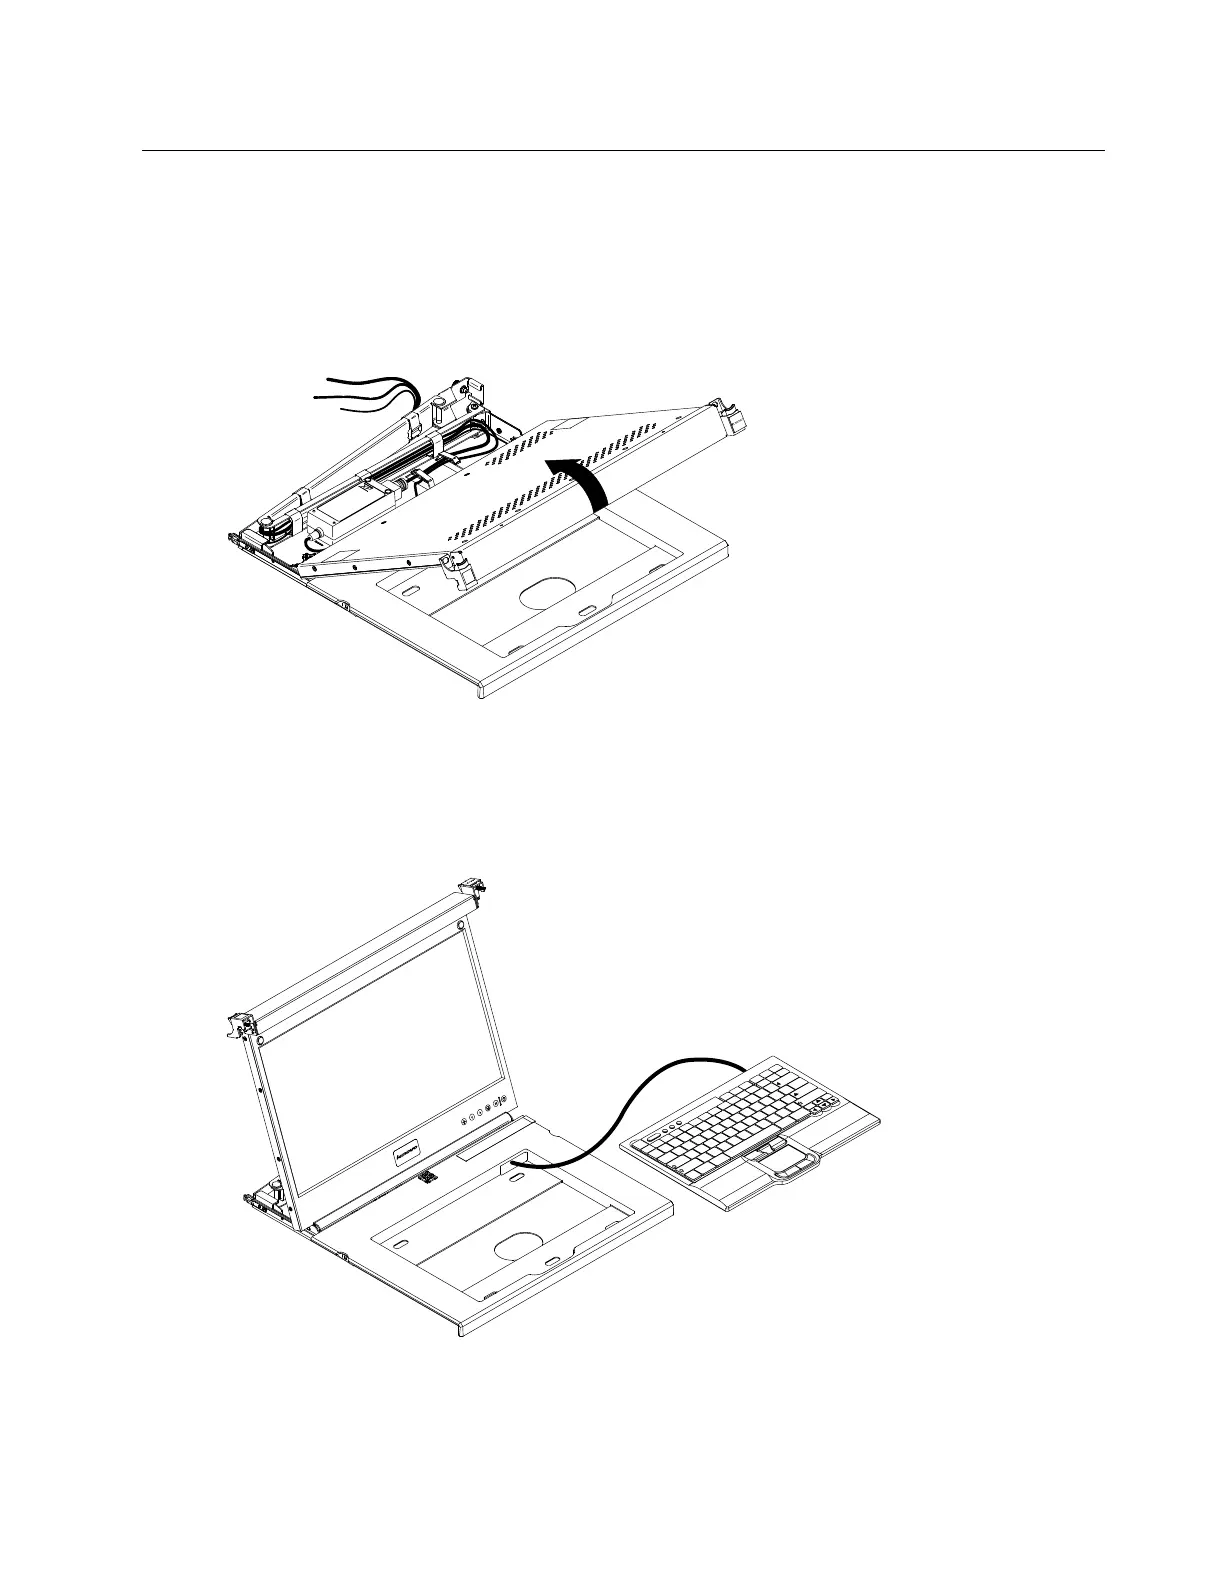
Step 2. Carefully lift the front of the flat-panel display to the full upright position.
Attention: Do not extend the keyboard feet. The flat-panel display screen might be damaged if the
feet are extended when the display is closed.
Step 3. Hold the keyboard near the keyboard tray and carefully route the keyboard-and-mouse cable down
through the keyboard tray cutout and up through the cutout that is behind the flat-panel display.
(See the following illustration.) Carefully pull the cable through the cutouts.
Fn Ctrl
Ctr
lAlt Alt
A
Z
S
X
D
C
F
V
G
B
H
N
J
M
K
<
,
L
>
.
:
;
?
/
“
‘
Enter
ShiftShift
Caps Loc
k
Esc
F1 F2 F3 F4 F5 F6 F7 F8 F9 F10 F11
F12
Delete
Inser
t
Pr
tSc
End
Home
ScrLk
PgDn
PgUp
P
ause
1
Q
2
W
3
E
4
R
5
T
6
Y
7
U
8
I
9
O
0
P
{
[
}
]
|
\
Bac
kspace
Tab
~
`
_
-
+
=
Step 4. Peel the backing of the double-sided foam tape that is preinstalled on the front of the console tray.
Step 5. Place the keyboard in the tray and exert a small amount of pressure on the keyboard to secure it to
the double-sided tape.
Chapter 2. Installing the console unit in the rack 7
 Loading...