Chapter2.Installingthekeyboard
Thischapterprovidesinformationaboutinstallingthekeyboardandthedevicedriver.
Notes:
•BesuretoinstalltheThinkPadUSBKeyboardwithTrackPointdriver(hereaftercalledthedevicedriver).
Otherwise,somefunctionsofthekeyboardwillnotworkcorrectly.
•Forthelatestversionofthedevicedriver,goto:
http://www.lenovo.com/support
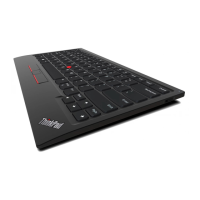
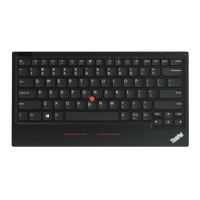
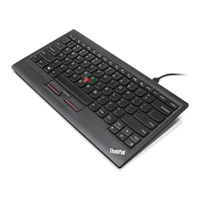
Installingthekeyboard
ToinstalltheThinkPadUSBKeyboardwithTrackPoint,dothefollowing:
1.Adjustthetiltfeettosetthekeyboardnearyourcomputertoyourpreference.
2.ConnectthekeyboardcabletoanavailableUSBconnectoronyourcomputer.
Note:Routethekeyboardcableintothecableslotifnecessary.
Aftertheoperatingsystemidentiesthekeyboard,thekeyboardwillbereadyforuse.
Foradditionalinformationonthisproduct,gototheLenovoWebsiteat:
http://www.lenovo.com/support
InstallingthedevicedriveronWindowsoperatingsystems
ToinstallthedevicedriverontheWindowsXP,WindowsVista,Windows7,Windows8,orWindows8.1
operatingsystem,dothefollowing:
1.Saveanyopendocumentsandexitallapplications.
2.InserttheSoftwareandUserGuideDiscintotheopticaldrive.Thediscstartsautomatically.Ifthedisc
doenotstartautomatically,dooneofthefollowing:
•Iftheautoplaywindowopens,clickRunViewHtml.exe.
•Iftheautoplaywindowdoesnotopen,dooneofthefollowing:
–FortheWindowsXP,WindowsVista,orWindows7operatingsystem,gointoMyComputeror
Computer,thendouble-clicktheCD/DVDdriveicon.
–FortheWindows8orWindows8.1operatingsystem,openFileExplorerandclickComputeror
ThisPC,thendouble-clicktheCD/DVDdriveicon.
3.Selectyourlanguage.
4.ClickSoftwareintheleftpaneofthewindow.
5.Followtheinstructionsonthescreentoinstallthedevicedriver.
©CopyrightLenovo2009,2013
7
 Loading...