2. Current and New: (Visual / Part number & Name etc)
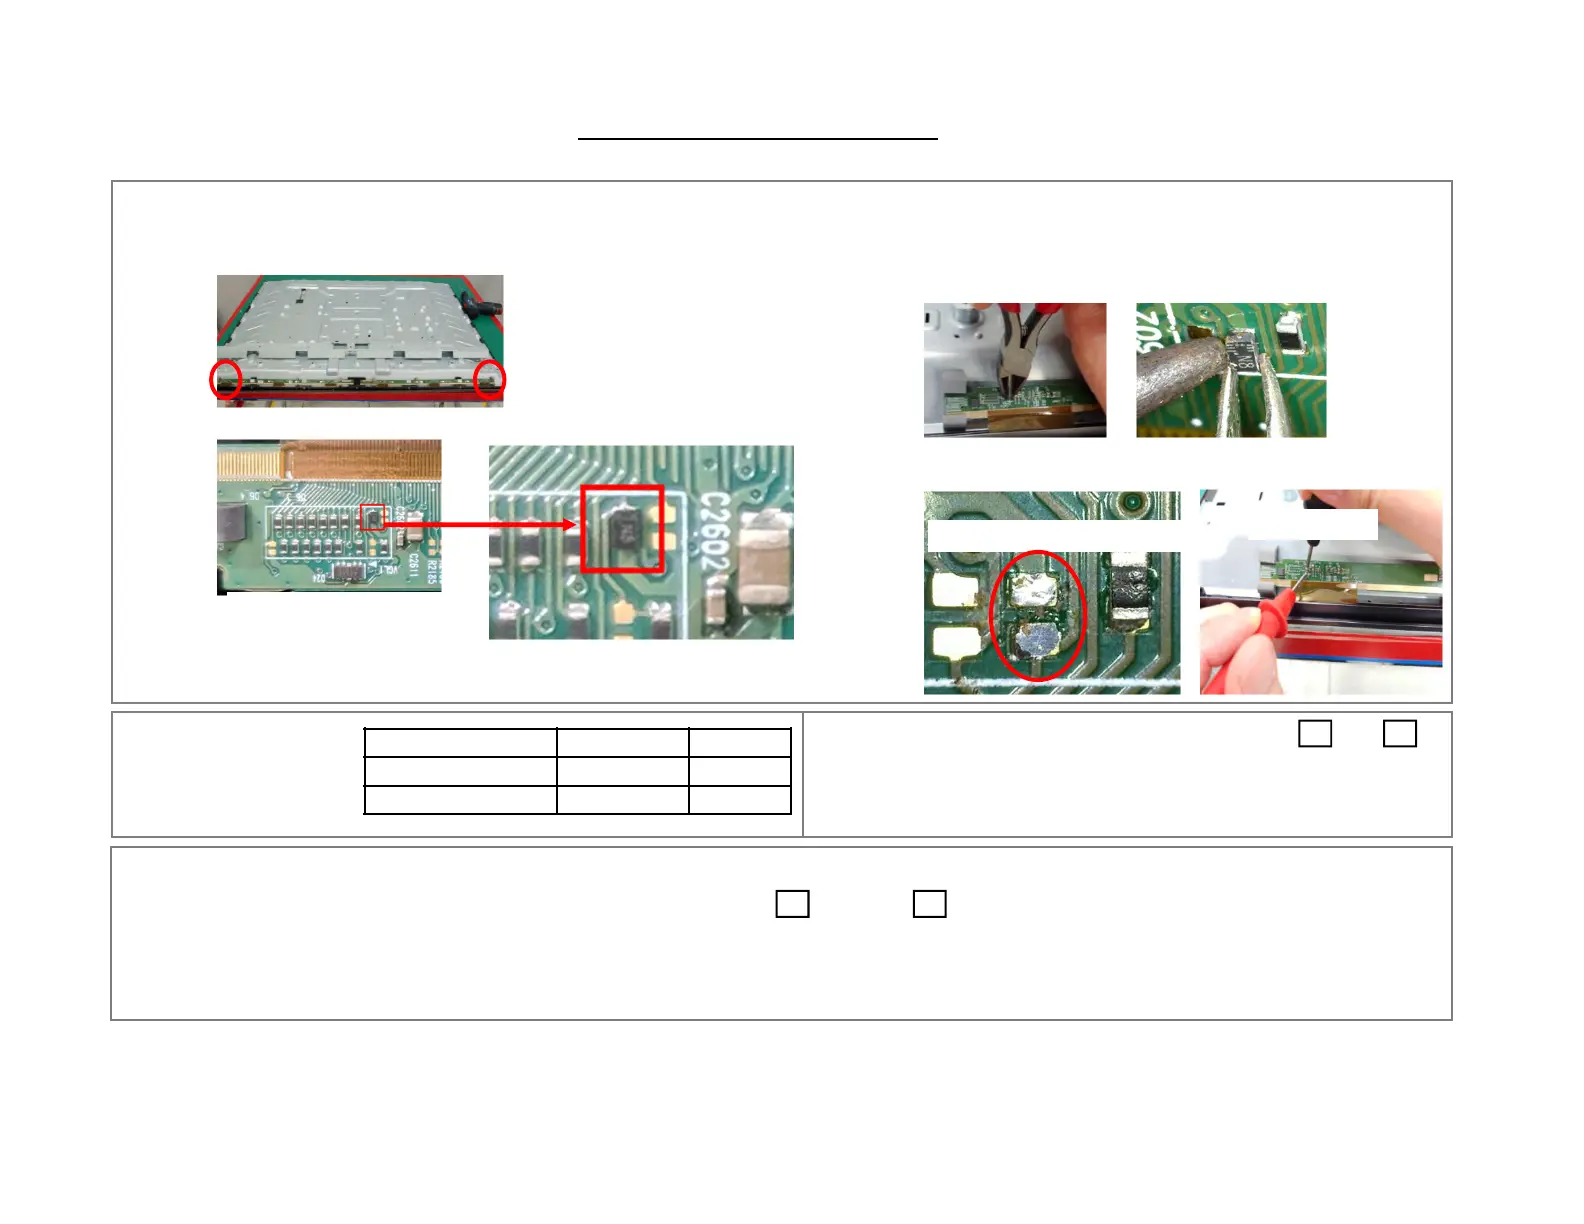
Step 1. Check the diode location at S-PCB (See attached table)
① The diode location is the both ends of S-PCB
② Check the location that printed on S-PCB
Page 2
Extended Warranty:
This service is covered by an extended warranty Yes No
- If Yes, Parts for ( ) years and Labor for ( ) years by LG.
- If No, Parts and labor are charged to the customer if outside warranty period.
•
The warranty period, including any extended warranty above, starts from the original date of purchase.
Part
Interchangeable:
Scrap Current Part in LG Warehouse: Yes No
Current Part New Part
Current Product Yes Yes
New Product Yes Yes
• The information is available through “https://gsfsplus-america.lge.com” with a valid ID.
• The information is intended tor experienced technicians, not for customer .
• The information is subject to change or update without notice.
“N8” is printed at the Diode
※ Remove the diode that printed as “N8”,
if the diode location are not printed on S-PCB
Step 2. Remove the diode
① Check the diode remove point: Please refer to the next page.
② Remove the diode by nipper by breaking or soldering iron.
③ Check the removed point by Multimeter whether it was removed
OK or not: OK is “Open” (if shorted, must be re-worked)
The measurement point of Multimeter
Open case : OK
Service Bulletin
Product: LED TV
Bulletin #: GLZ201900163-02
Release Date : May. 09. 2019
 Loading...