13
ENGLISH
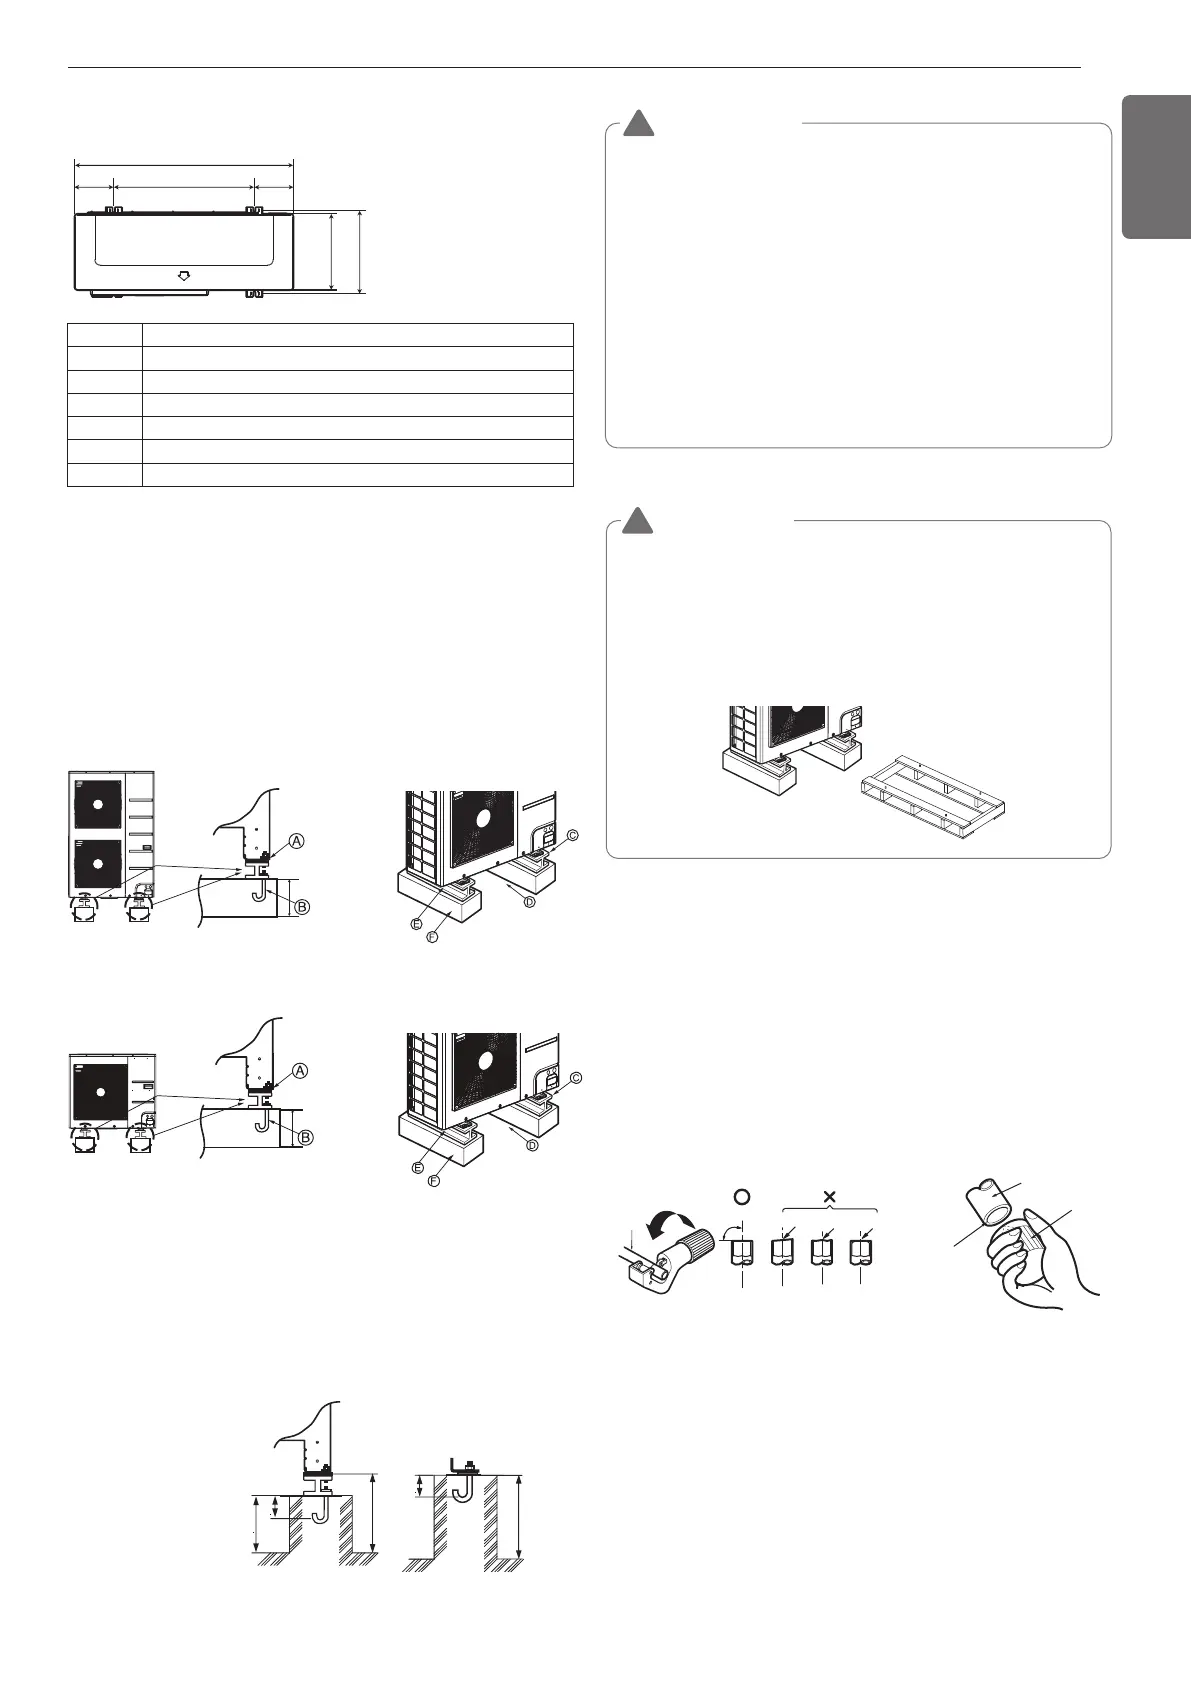
• Fix the unit tightly with bolts as shown below so that unit will not fall
down due to earthquake or gust.
• Use the H-beam support as a base support.
• Noise and vibration may occur from the floor or wall since vibration is
transferred through the installation part depending on installation
status. Thus, use anti-vibration materials (cushion pad) fully (The base
pad shall be more than 200 mm).
Ⓐ The corner part must be fixed firmly. Otherwise, the support for the
installation may be bent.
Ⓑ Get and use M10 Anchor bolt.
Ⓒ Put Cushion Pad between the outdoor unit and ground support for
the vibration protection in wide area.
Ⓓ Space for pipes and wiring (Pipes and wirings for bottom side)
Ⓔ H-beam support
Ⓕ Concrete support
• Be sure to remove the Pallet(Wood Support) of the bottom
side of the outdoor unit Base Pan before fixing the bolt. It
may cause the unstable state of the outdoor settlement,
and may cause freezing of the heat exchanger resulting in
abnormal operations.
• Be sure to remove the Pallet(Wood Support) of the bottom
side of the outdoor unit before welding. Not removing
Pallet(Wood Support) causes hazard of fire during welding.
WARNING
• Install where it can sufficiently support the weight of the
outdoor unit.
If the support strength is not enough, the outdoor unit may drop
and hurt people.
• Install where the outdoor unit may not fall in strong wind or
earthquake.
If there is a fault in the supporting conditions, the outdoor unit
may fall and hurt people.
• Please take extra cautions on the supporting strength of the
ground, water outlet treatment(treatment of the water flowing
out of the outdoor unit in operation), and the passages of the
pipe and wiring, when making the ground support.
• Do not use tube or pipe for water outlet in the Base pan. Use
drainage instead for water outlet. The tube or pipe may freeze
and the water may not be drained.
Pallet(Wood Support)
- Remove before Installation
!
Main cause of gas leakage is defect in flaring work. Carry out correct
flaring work in the following procedure.
Cut the pipes and the cable
- Use the accessory piping kit or the pipes purchased locally.
- Measure the distance between the indoor and the outdoor unit.
- Cut the pipes a little longer than measured distance.
- Cut the cable 1.5 m longer than the pipe length.
- Use the de-oxidised copper as piping materials to install.
Copper
tube
90°
Slanted Uneven Rough
Preparation of Piping
Foundation for Installation
R410A
5HP
R32
3HP, 4HP, 5HP, 6HP
a 920
b 618
c 330
d 360
e 151
[Unit : mm]
The location of the Anchor bolts
CAUTION
!
- U60A
- U36A

 Loading...