5. Software Control – Lightware Device Controller DA2DVI-HDCP-Pro – User's Manual 15
5.4. EDID Menu
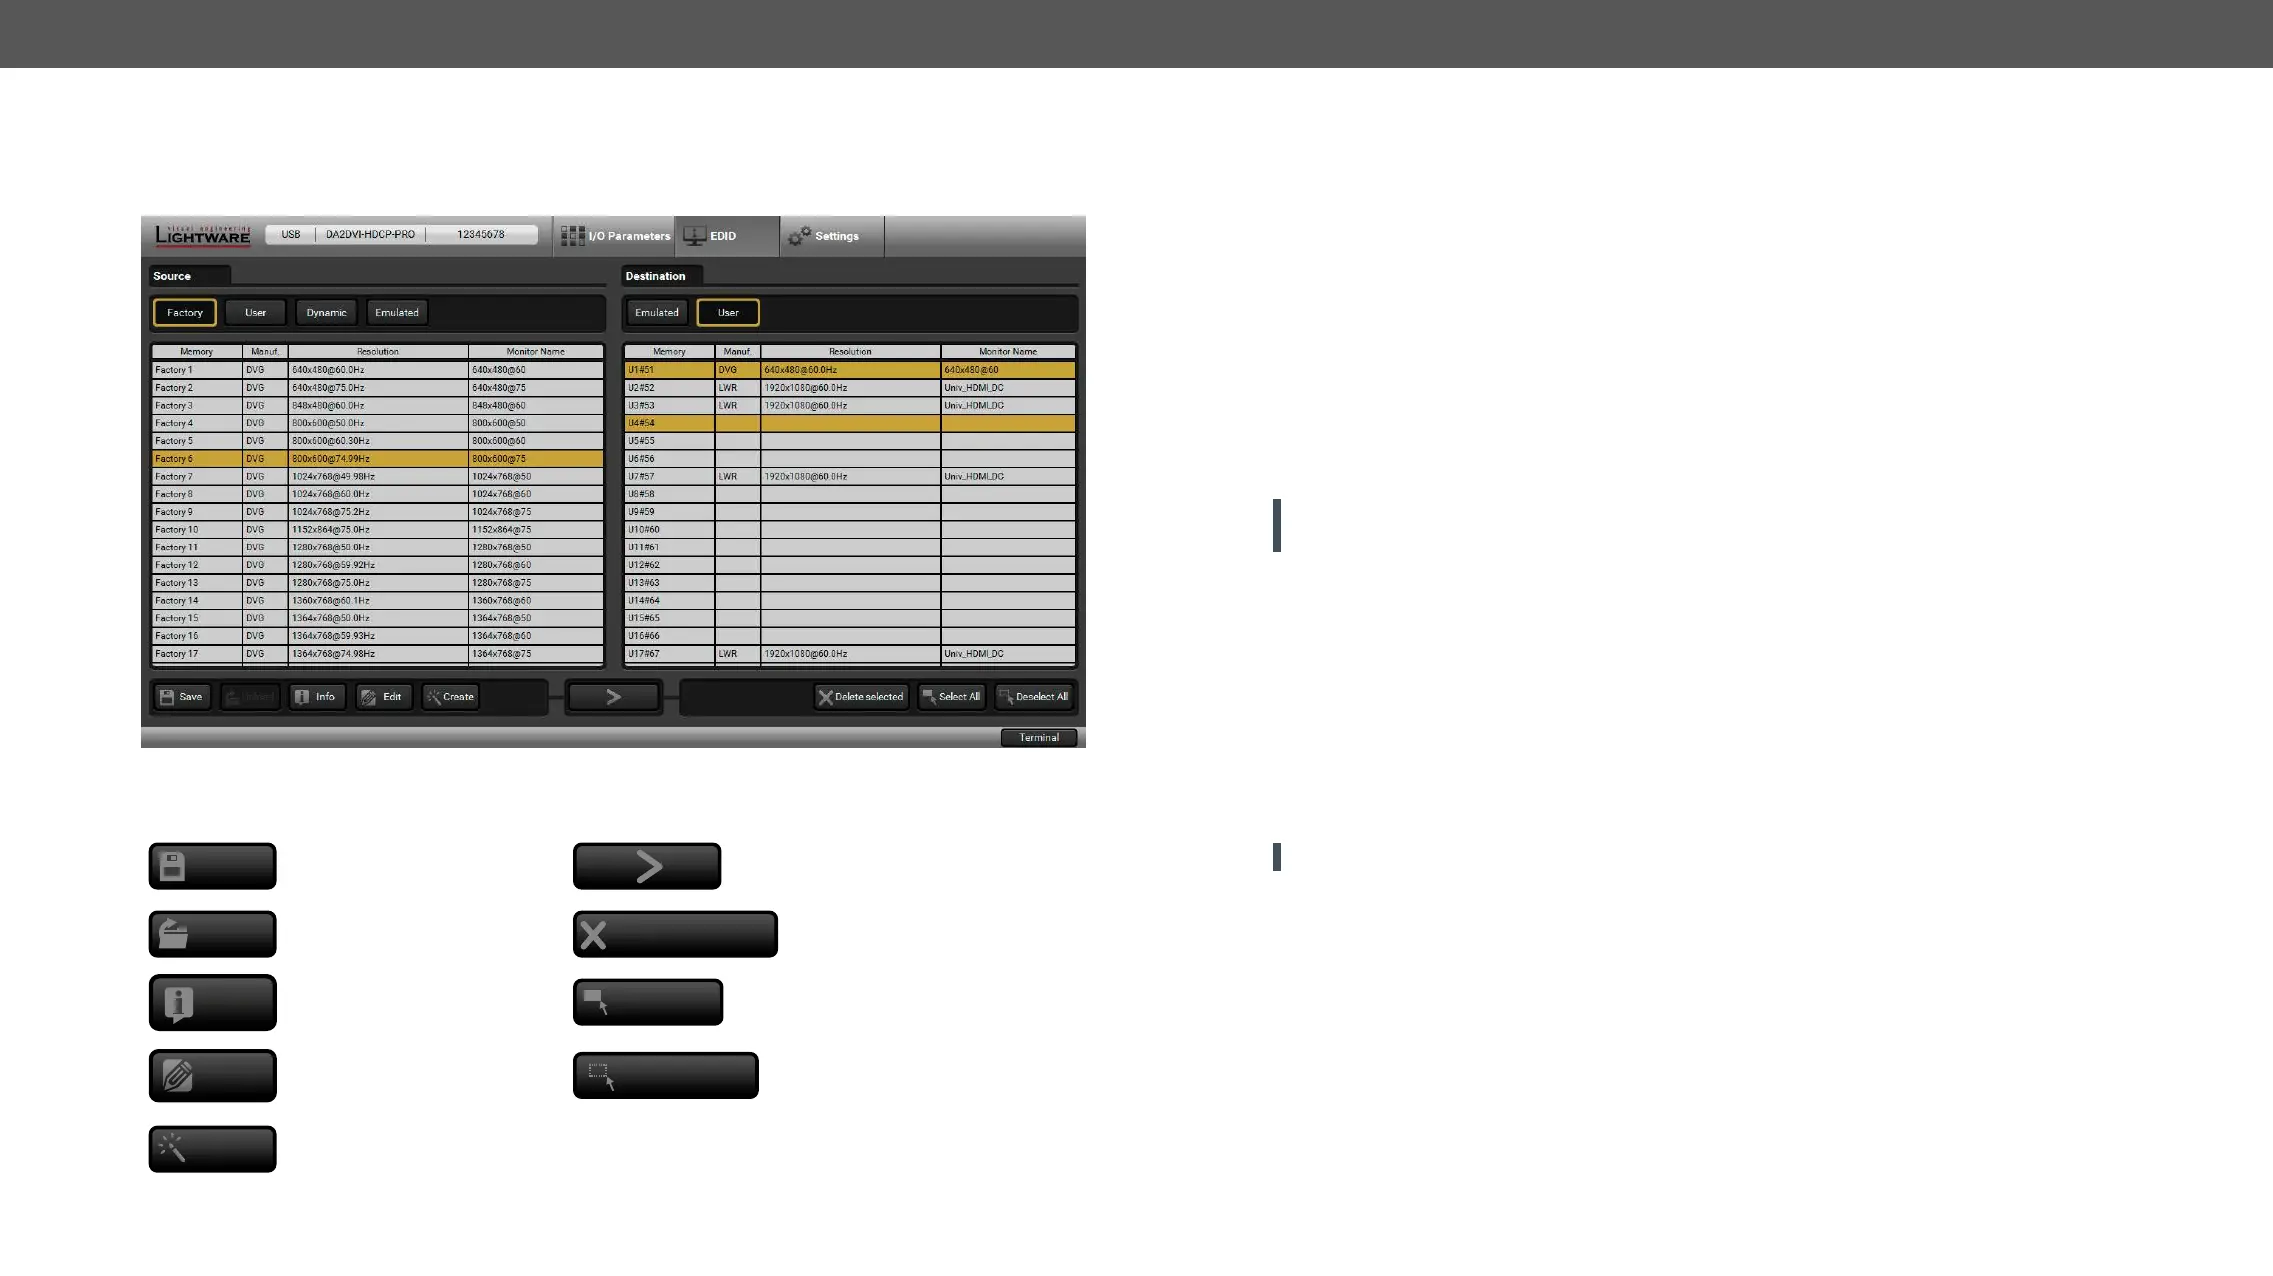
Advanced EDID Management can be accessed by selecting the EDID menu. There are two panels: left one
contains Source EDIDs, right one contains Destination places where the EDIDs can be emulated or copied.
EDID Menu
Control Buttons
Save
Exporting an EDID
Executing EDID emulation or
copying (Transfer button)
Upload
Importing an EDID
Delete selected
Deleting EDID
(from User memory)
Info
Display EDID Summary
window
Select All
Selecting all memory places
in the right panel
Edit
Opening Advanced EDID
Editor with the selected EDID
Deselect All
Selecting none of the
memory places in the right
panel
Create
Opening Easy EDID Creator
5.4.1. EDID Operations
Changing Emulated EDID
Step 1. Choose the desired EDID list on the source panel and select an EDID.
Step 2. Press the Emulated button on the top of the Destination panel.
Step 3. Select the desired port on the right panel (one or more ports can be selected); the EDID(s) will be
highlighted with a yellow cursor.
Step 4. Press the Transfer button to change the emulated EDID.
Learning an EDID
The process is the same as changing the emulated EDID; the only difference is the Destination panel: press
the User button. Thus, one or more EDIDs can be copied into the user memory either from the factory memory
or from a connected sink (Dynamic).
Exporting an EDID
ATTENTION!
Chrome web browsers only.
Step 1. Select the desired EDID from the Source panel (line will be highlighted with yellow).
Step 2. Press the Export
Importing an EDID
Step 1. Press the User button on the top of the Source panel and select a memory slot.
Step 2. Press the Upload button below the Source panel.
Step 3. Open button. Browsed EDID is imported into the
selected User memory.
ATTENTION! The imported EDID overwrites the selected memory place even if it is not empty.
Deleting EDID(s)
The EDID(s) from User memory can be deleted as follows:
Step 1. Press User button on the top of the Destination panel.
Step 2. Select the desired memory slot(s); one or more can be selected (“Select All” and “Select None” buttons
can be used). The EDID(s) will be highlighted with yellow.
Step 3. Press the Clear selected button to delete the EDID(s).
 Loading...