2. Installation DA2DVI-HDCP-Pro – User's Manual 7
2
Installation
The chapter is about the installation of the device and connecting to other
appliances, presenting also the mounting options and further assembly steps:
Ý
Ý
2.1. Mounting Options
accessory 1U high rack shelf. The device has two mounting holes
with inner thread on the bottom side. Fasten the device by the screws
enclosed to the accessory.
WARNING! Always use the supplied screws. Using different (e.g.
longer) ones may cause damage to the device.
Mounting with 1U-high Rack Shelf
1U-high rack shelf provides mounting holes for fastening four quarter-
rack sized units. To order mounting accessories please contact
sales@lightware.eu.
DDAA22DDVVII--HHDDCCPP--PPrroo
POWER
SIGNAL
PRESENT
MONITOR 1
HOTPLUG
EDID
STATUS
MONITOR 2
HOTPLUG
LEARN
PRESS
00: EDID COPY
FROM OUT 1
HDCP
ACTIVE
2 OUTPUT HDCP AND HDMI1.3 COMPLIANT DISTRIBUTION AMPLIFIER
USB
CONTROL
SOURCE
+5V
00
11
22
33
44
55
66
77
88
99
00
11
22
33
44
55
66
77
88
99
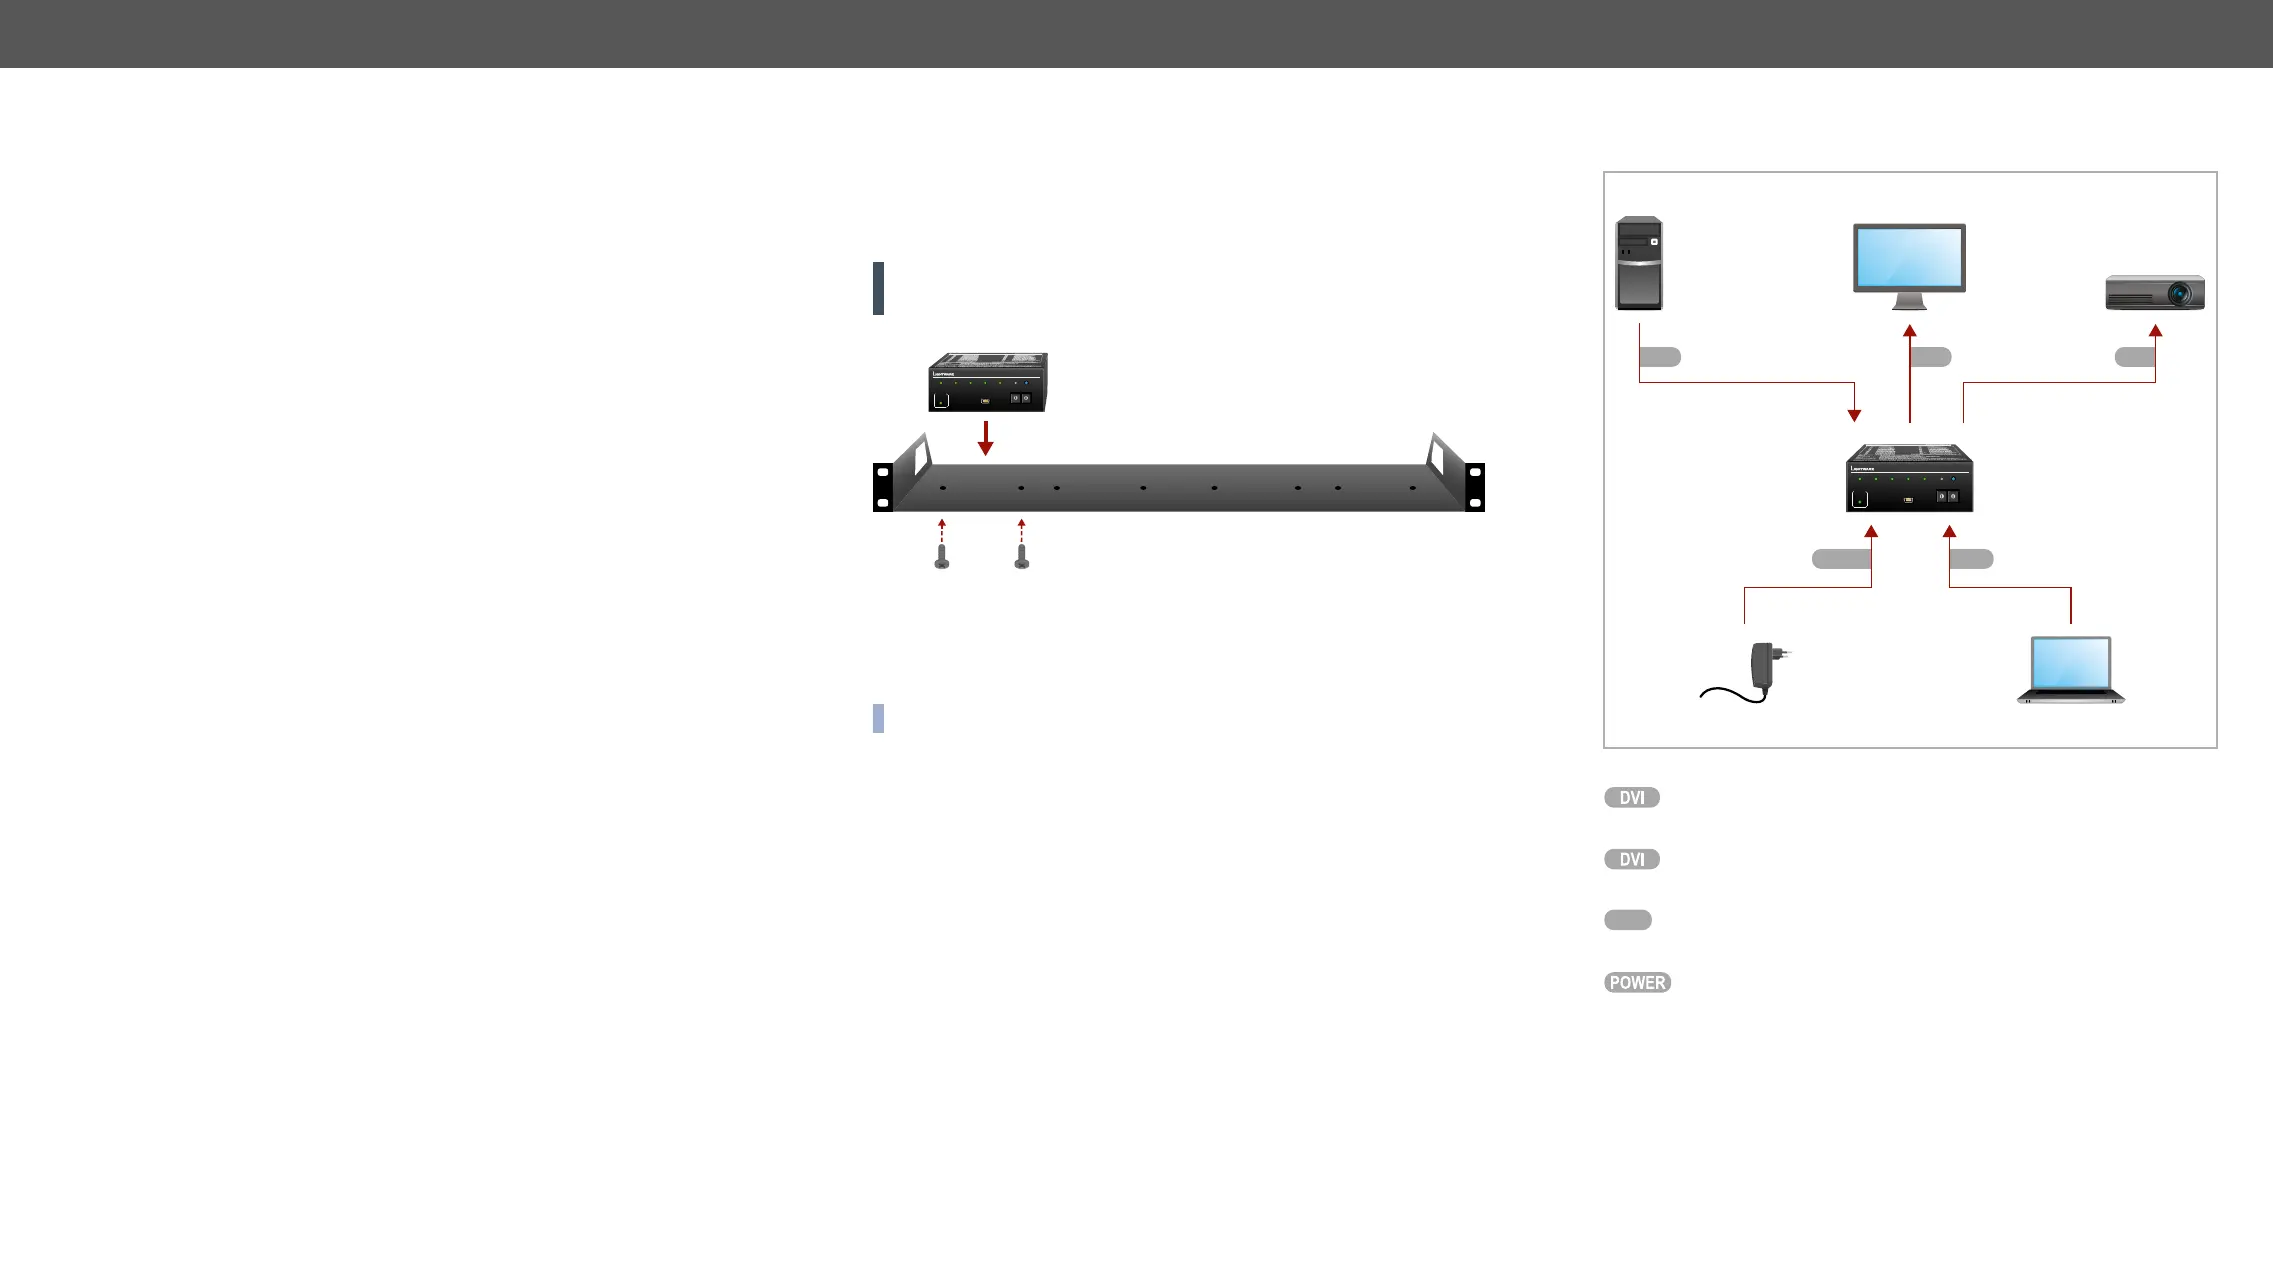
2.2. Connecting Steps
DDAA22DDVVII--HHDDCCPP--PPrroo
POWER
SIGNAL
PRESENT
MONITOR 1
HOTPLUG
EDID
STATUS
MONITOR 2
HOTPLUG
LEARN
PRESS
00: EDID COPY
FROM OUT 1
HDCP
ACTIVE
2 OUTPUT HDCP AND HDMI1.3 COMPLIANT DISTRIBUTION AMPLIFIER
USB
CONTROL
SOURCE
+5V
00
11
22
33
44
55
66
77
88
99
00
11
22
33
44
55
66
77
88
99
DA2DVI-HDCP-Pro
USB
Power
DVI DVI DVI
Connect the source device (e.g. a PC) to the distribution
output port(s) by a DVI cable.
a laptop) by a USB cable.
Firstly connect the power adaptor to the DC input on the
device, then to the AC power socket.
 Loading...