5
FUNCTIONAL
DESCRIPTION
CAUTION:
• Always be sure that the tool is switched off and unplugged before
adjusting or checking function on the tool.
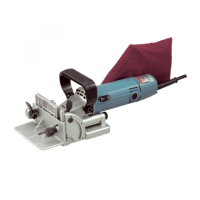
Adjusting the depth of cut
6 cutting depths can be preset according to the size of biscuit to be used or if
trimming the wall or ceiling panels as explained later. Rotate the stopper until
the pointer points to the appropriate size marked on the stopper.
Refer to the table below for the correspondence between the sizes marked on
the stopper and the biscuit size. Fine adjustments to the cutting depth can be
made by turning the adjusting screw after loosening the hex nut. This may
become necessary after the blade has been resharpened a few times.
C00084
Angle guide
The angle guide can be moved up and down to adjust the position of the blade
in relation to the top of the workpiece.
To adjust the angle guide height, loosen the lock lever down and rotate the
knob until the pointer points to the desired scale graduation marked on the
angle guide. Then tighten the lock lever up to secure the angle guide.
The scale on the angle guide indicates the distance from the top of the work-
piece to the center of the blade thickness.
1. Pointer
2. Stopper
3. Adjusting screw
1
2
3
004574
Size on stopper 0 10 20 S D MAX
Biscuit size 0 10 20 - - -
Depth of cut 8 mm 10 mm 12.3 mm 13 mm 14.7 mm 20 mm
1. Lock lever
2. Angle guide
3. Knob
4. Scale
5. Pointer
1. Knob
2. Down
3. Up
4. Center of blade thickness
1
2
3
4
5
004575
2
3
1
4
004576
 Loading...