12 ENGLISH
Plastic blade
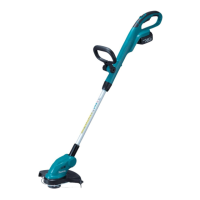
NOTICE: Be sure to use genuine Makita plastic
blade.
While holding down the spindle lock button, place the
plastic blade onto the spindle and tighten it securely by
hand.
1
2
3
4
5
Fig.13
►1. Plastic blade 2. Spindle 3. Spindle lock button
4. Loosen 5. Tighten
To remove the plastic blade, loosen the plastic blade
while holding down the spindle lock button.
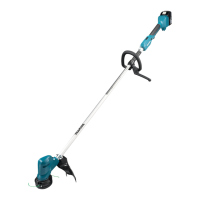
NOTE: You can also use the supplied hex wrench to
install/remove the cutting tool. Insert the hex wrench
totheholeasshownintheguretolockthespindle.
1
2
Fig.14
►1. Hex wrench 2. Hole
CAUTION: Always use the supplied wrenches
to install/remove the cutting tool.
CAUTION: Be sure to remove the hex wrench
inserted into the tool head after installing the
cutting tool.
Hex wrench storage
CAUTION: Be careful not to leave the hex
wrench inserted in the tool head. It may cause
injuryand/ordamagetothetool.
When not in use, store the hex wrench as shown in the
guretokeepitfrombeinglost.
1
2
Fig.15
►1. Loop handle 2. Hex wrench
FUNCTIONAL DESCRIPTION
WARNING: Always be sure that the tool is
switched o and the battery cartridge is removed
before adjusting or checking function on the tool.
Failuretoswitchoandremovethebatterycartridge
mayresultinseriouspersonalinjuryfromaccidental
start-up.
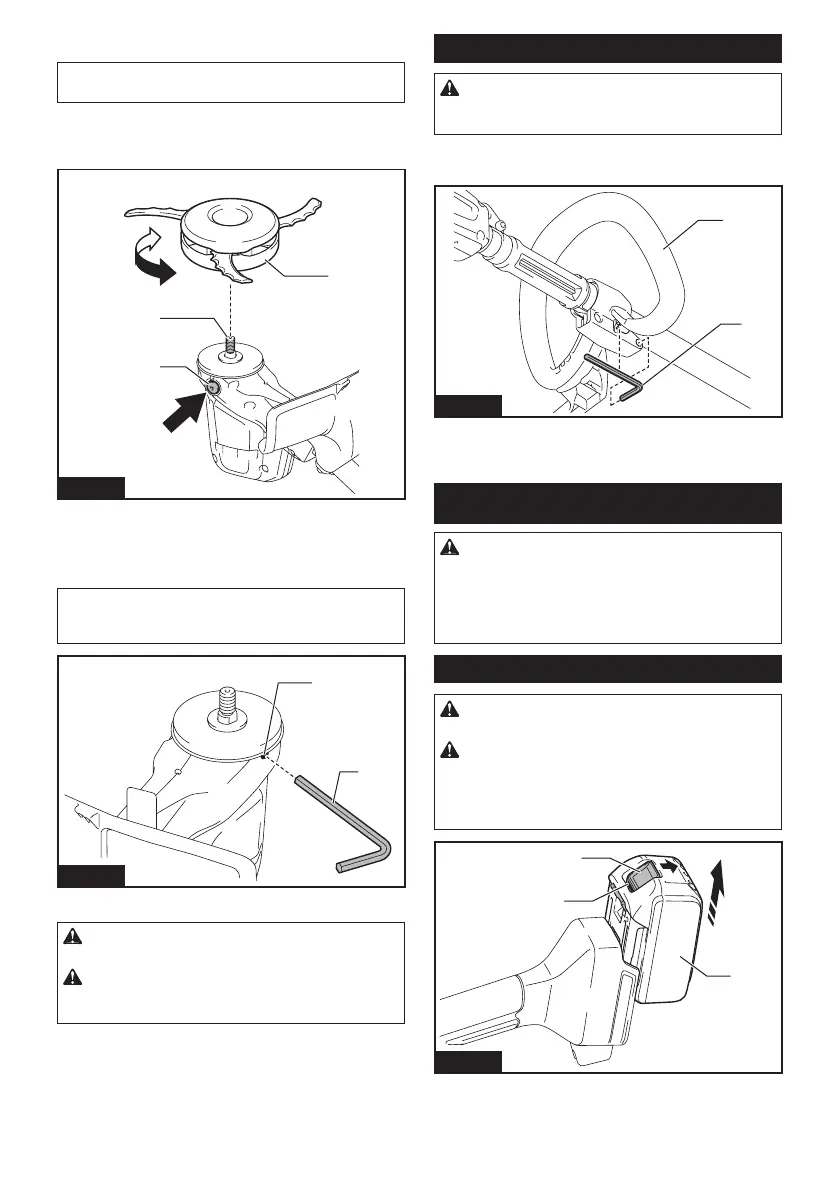
Installing or removing battery cartridge
CAUTION: Always switch o the tool before
installing or removing of the battery cartridge.
CAUTION:
Hold the tool and the battery cartridge
rmly when installing or removing battery cartridge.
Failuretoholdthetoolandthebatterycartridgermlymay
causethemtoslipoyourhandsandresultindamageto
thetoolandbatterycartridgeandapersonalinjury.
3
1
2
Fig.16
►1. Red indicator 2. Button 3. Battery cartridge
To remove the battery cartridge, slide it from the tool
while sliding the button on the front of the cartridge.
 Loading...