P 3/ 15
(1) Remove Sprocket guard, Guide bar and Saw chain from machine.
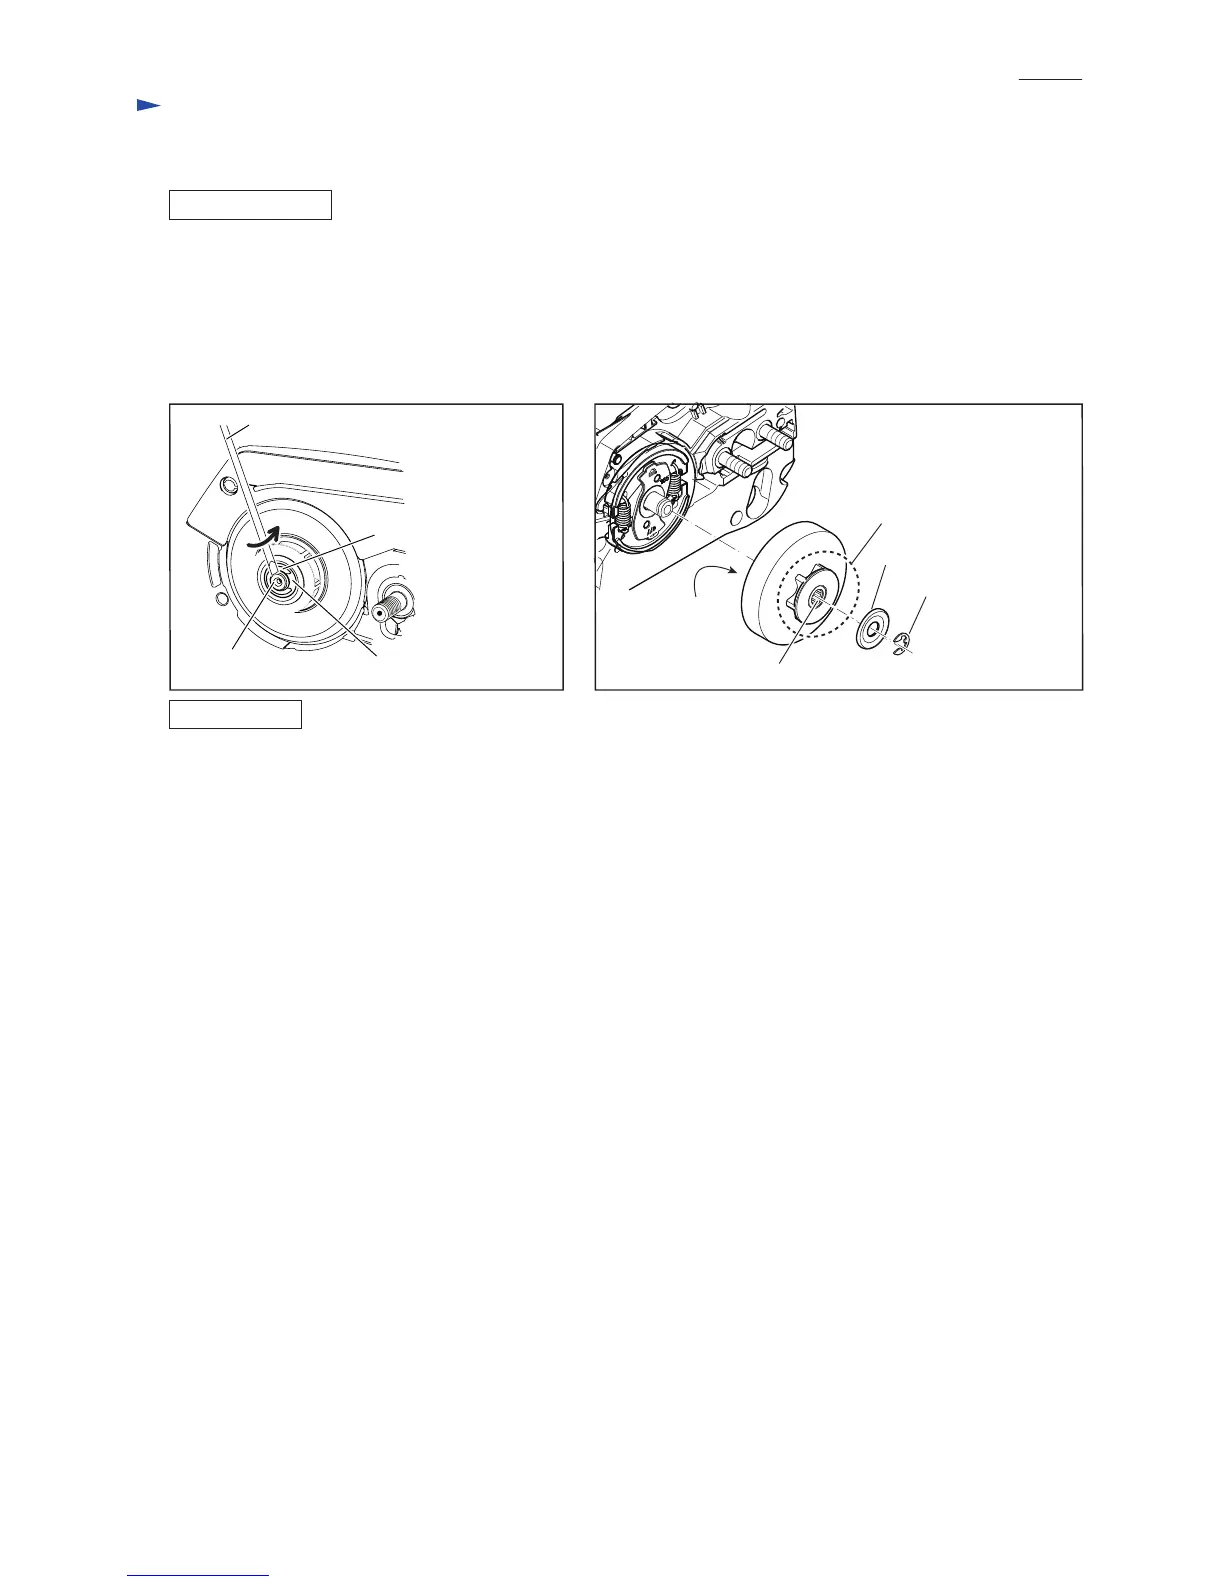
(2) Insert Small-slotted screwdriver into the gap between Crank shaft and Retaining ring E type 6, and then twist Retaining
ring E type 6 using the slotted blade. (Fig. 4)
(3) Remove Flat washer 8 and Retaining ring E type 6 from Crank shaft.
(4) Release chain brake by turn Hand guard toward Tubular handle to remove Clutch drum assemble.if chain brake works.
(5) Remove Clutch drum assembly. (Fig. 5)
(1) Check that the following portions of Clutch drum assembly do not have damage/ wear. (Fig. 5)
• Inside
• Chain-sprocket portion
• Needle bearing portion
If there is damage/ wear on Clutch dram assembly, replace it to new one.
(2) Apply a little amount of Makita grease N No. 2 to the needle bearing portion of Clutch drum assembly.
(3) Set Clutch drum assembly, Flat washer 8 and Retaining ring E type 6 in place.
Note: Be sure to use the new Retaining ring E type 6.
Repair
ASSEMBLING
DISASSEMBLING
[2] DISASSEMBLY/ ASSEMBLY
[2]-2. Clutch drum section
Small-slotted screwdriver
• Chain-sprocket portion
• Needle bearing portion
• Inside of Clutch
drum assembly
Retaining ring E type 6
Retaining ring E
type 6
Flat washer 8
Flat washer 8
Crank shaft
Fig. 4 Fig. 5
 Loading...