P 6/ 15
(1) Remove Sprocket guard, Guide bar and Saw chain from machine.
(2) Pull Hand guard toward Tubular handle to release Chain brake. Then, remove “Clutch drum assembly”. Refer to [2]-2.
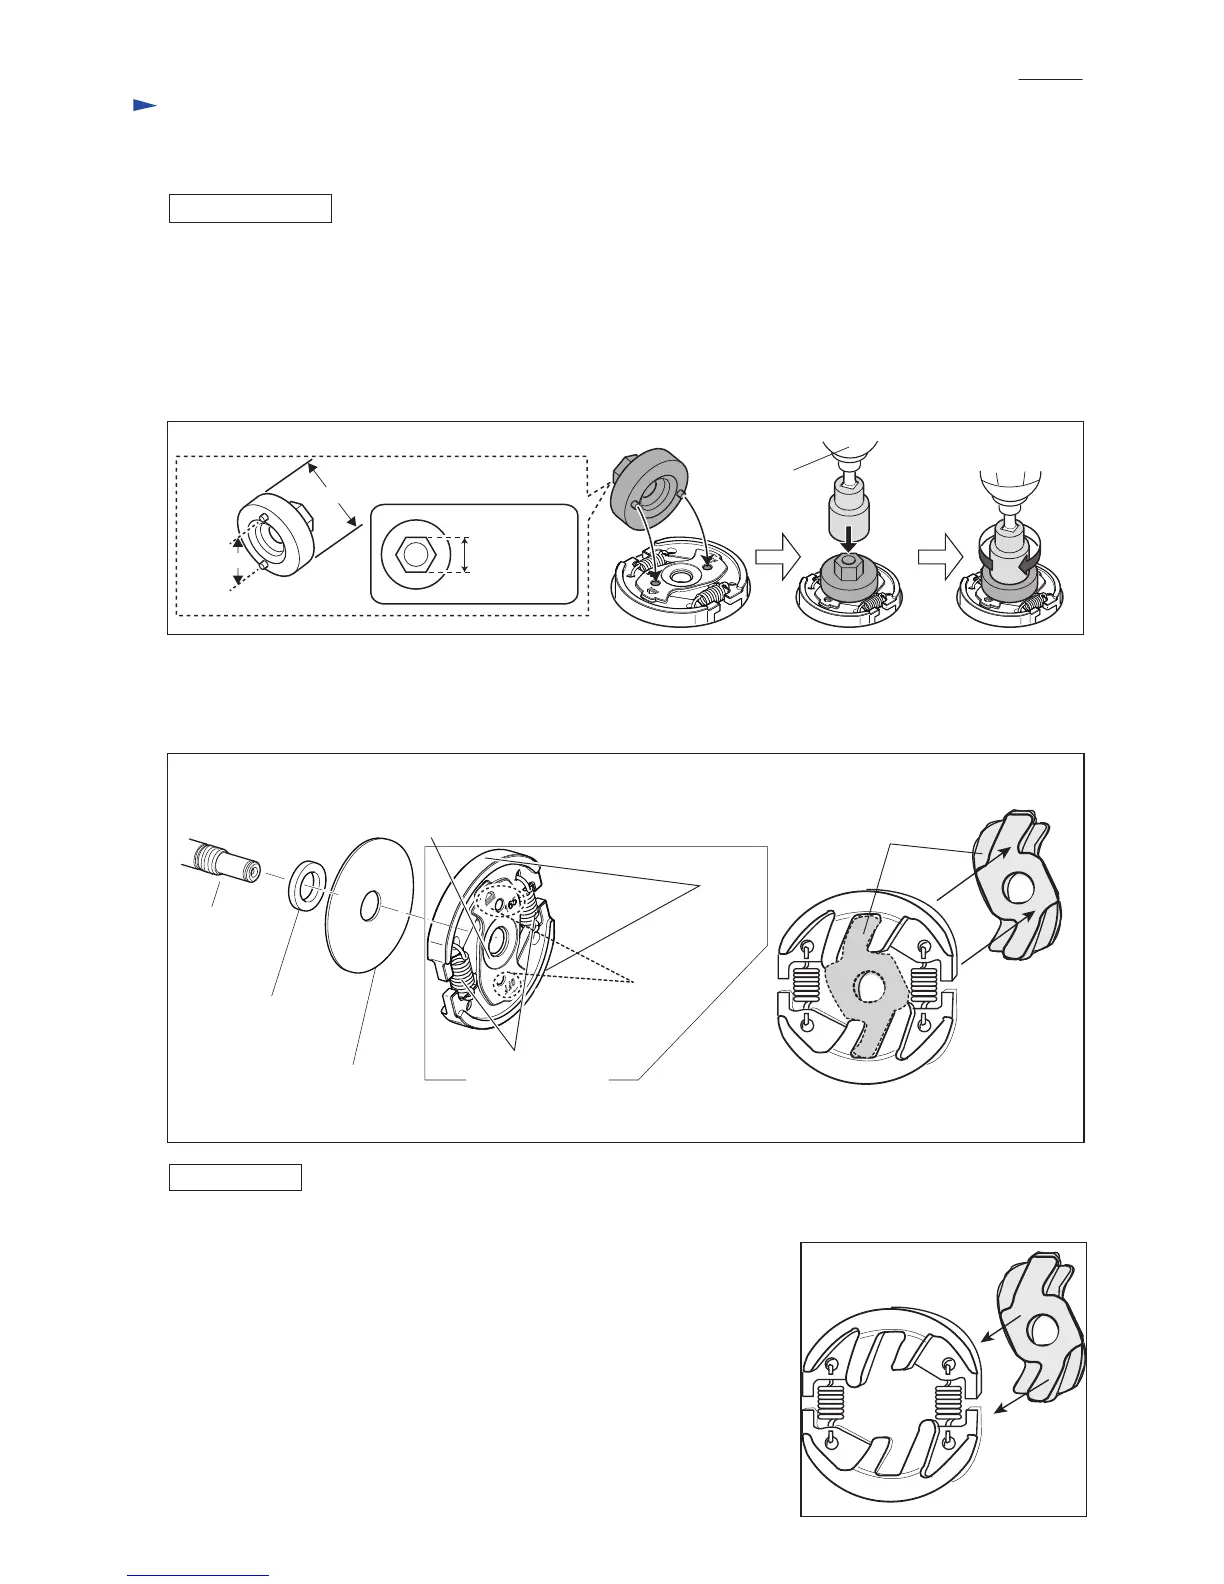
(3) Set 1R396 on Clutch and turn it clockwise using Cordless impact driver with 19mm Socket bit. (Fig. 11)
Note: In most cases, it can be loosen by Cordless impact driver without removing Spark plug as Crank shaft is locked
with compression force in Cylinder. If not, remove Spark plug and set 1R372 in the hole for Spark plug after moving
Piston to the lower dead point (visible through the exhaust opening). And then, turn 1R396 by hand tool because use of
Cordless impact driver may cause Crank shaft lock bolt to hit and possibly damage the top surface of Piston.
(4) Remove Flat washer 10 (large) and Flat washer 10 (small). (Fig. 12)
(5) Push out Clutch driver carefully so as not to pinch your finger. It is tightly fit in between two Clutch shoes with strong
spring reaction force worked by two Tension springs 5. (Fig. 12)
Note: Be careful to each direction of the components. Refer to Fig. 12.
(1) Assemble two Tension springs 5 to two Clutch shoes. (Fig. 13)
Be careful to the hooking direction of Tension springs 5. When one of
Tension spring 5 has a damage, replace two Tension springs 5 with
the new at the same time. Do not replace the damaged one only. (Fig. 13)
Fit one of Clutch shoe to Clutch driver, and then hook the other Clutch shoe
to Clutch driver. (Fig. 13)
Push Clutch driver until it stops to assemble Clutch complete securely.
(2) Set Flat washers 10 (large, small) and Clutch complete in place by reversing
the disassembling procedure.
Note: • The fastening torque of Clutch complete has to be 35 ± 2.5 N·m.
When Clutch complete is fastened to Crank shaft, remove Starter complete
in advance to prevent Ratchets from being damaged.
• Face the marks on Clutch driver to the opposite of Large flat washer 10.
(Fig. 12) Face the marks to Clutch drum assembly side. (Fig. 5)
Crank shaft
Flat washer 10 (small)
Flat washer 10 (large)
Clutch complete
[Clutch complete viewed
from Flat washer side]
Push this area of Clutch driver.
Note: Do not push out Clutch driver to your side.
Repair
DISASSEMBLING
[2] DISASSEMBLY/ ASSEMBLY
[2]-5. Clutch section
ASSEMBLING
Fig. 13
Fig. 12
Clutch
shoe
(2 pcs.)
Marks
Clutch driver
Clutch driver
Tension spring 5 (2 pcs.)
Fig. 11
ø3-25mm
Cordless
impact driver
1R396
ø35mm
19mm width
across flats
19mm width
across flats
Socket bit
 Loading...