32
9.2 FRONT SHROUD REPLACEMENT - CONTINUED
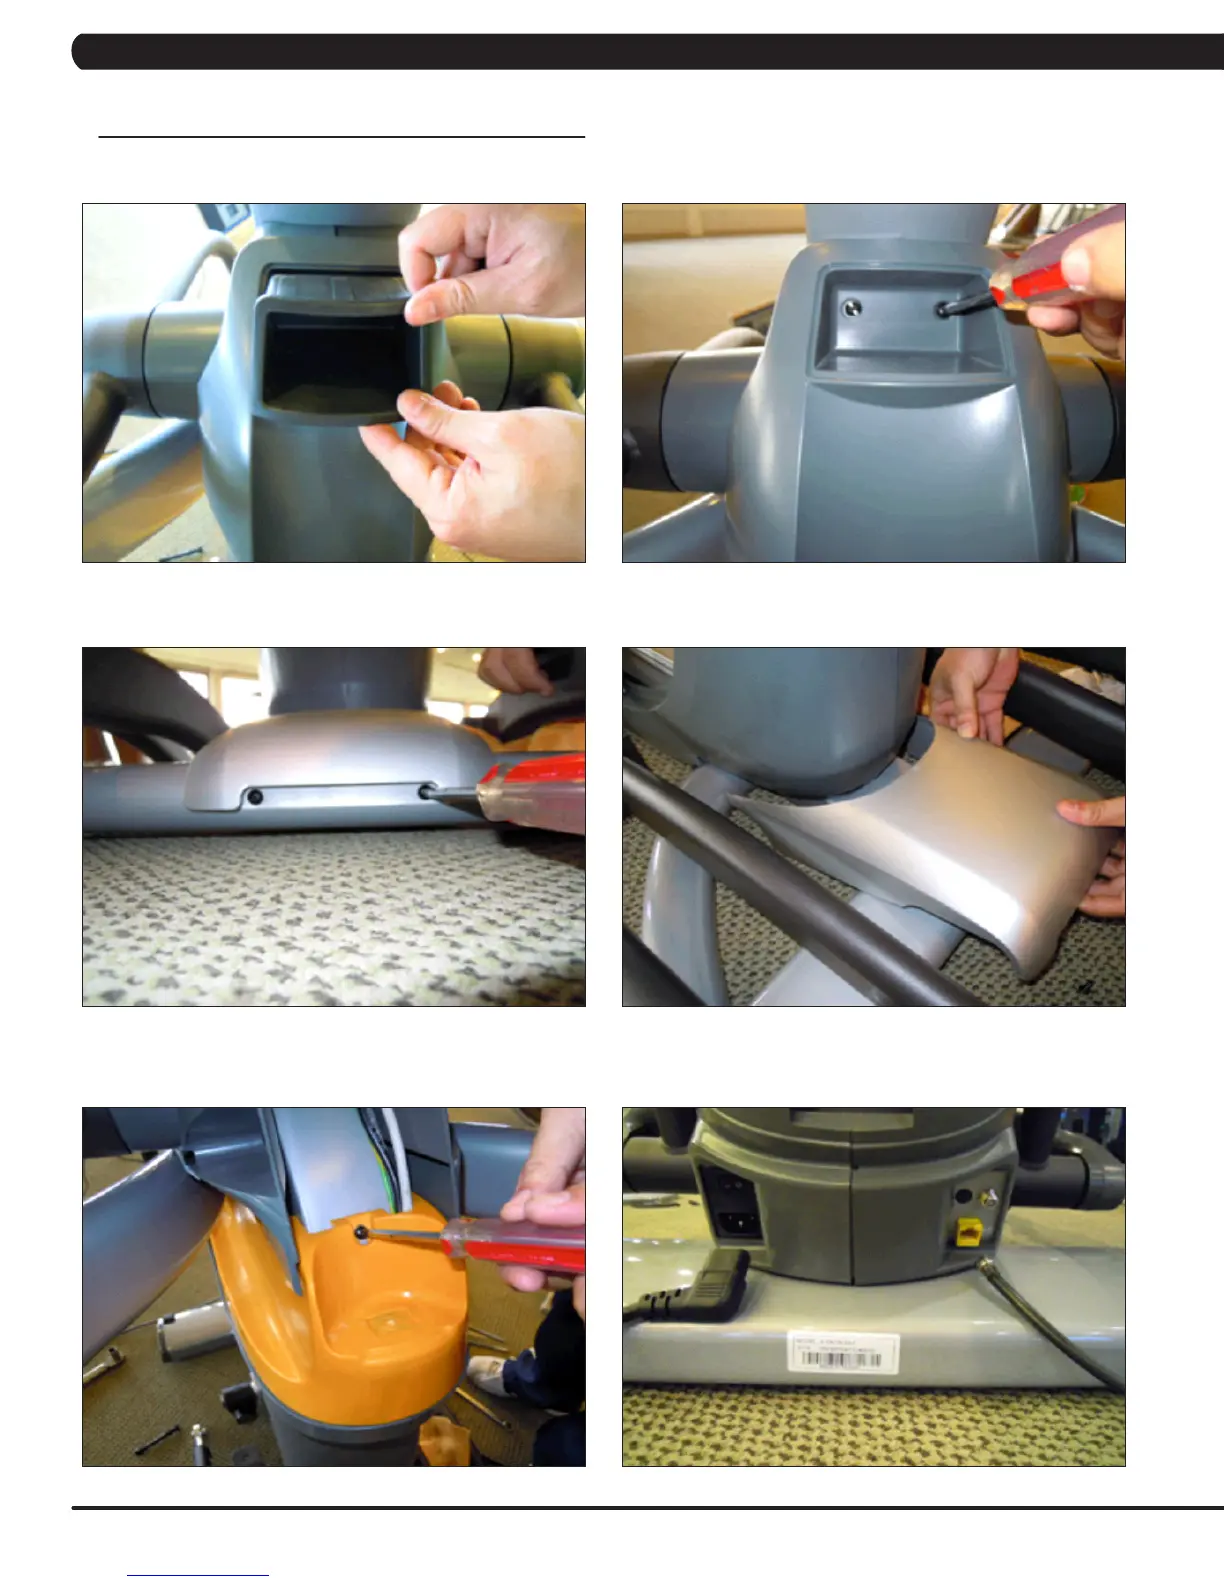
7)Pullouttherubbertrayfromthecupholderplastic(gureG).
8) Remove the 2 screws to disassemble the cup holder plastic and remove it from the unit (Figure H).
9) Remove the 2 screws to disassemble and remove the middle stabilizer sweat cover (Figures I & J).
10) Remove the 1 screw (exposed when the cup holder is removed) holding the orange slot cover to the frame and remove it (Figure K).
11) Remove all of the cables from the front shrouds (Figure L).
FIGURE L
FIGURE J
FIGURE H
FIGURE K
FIGURE I
FIGURE G
CHAPTER 9: PART REPLACEMENT GUIDE

 Loading...