64
CHAPTER 9: PART REPLACEMENT GUIDE
9.11 CHAIN REPLACEMENT - CONTINUED
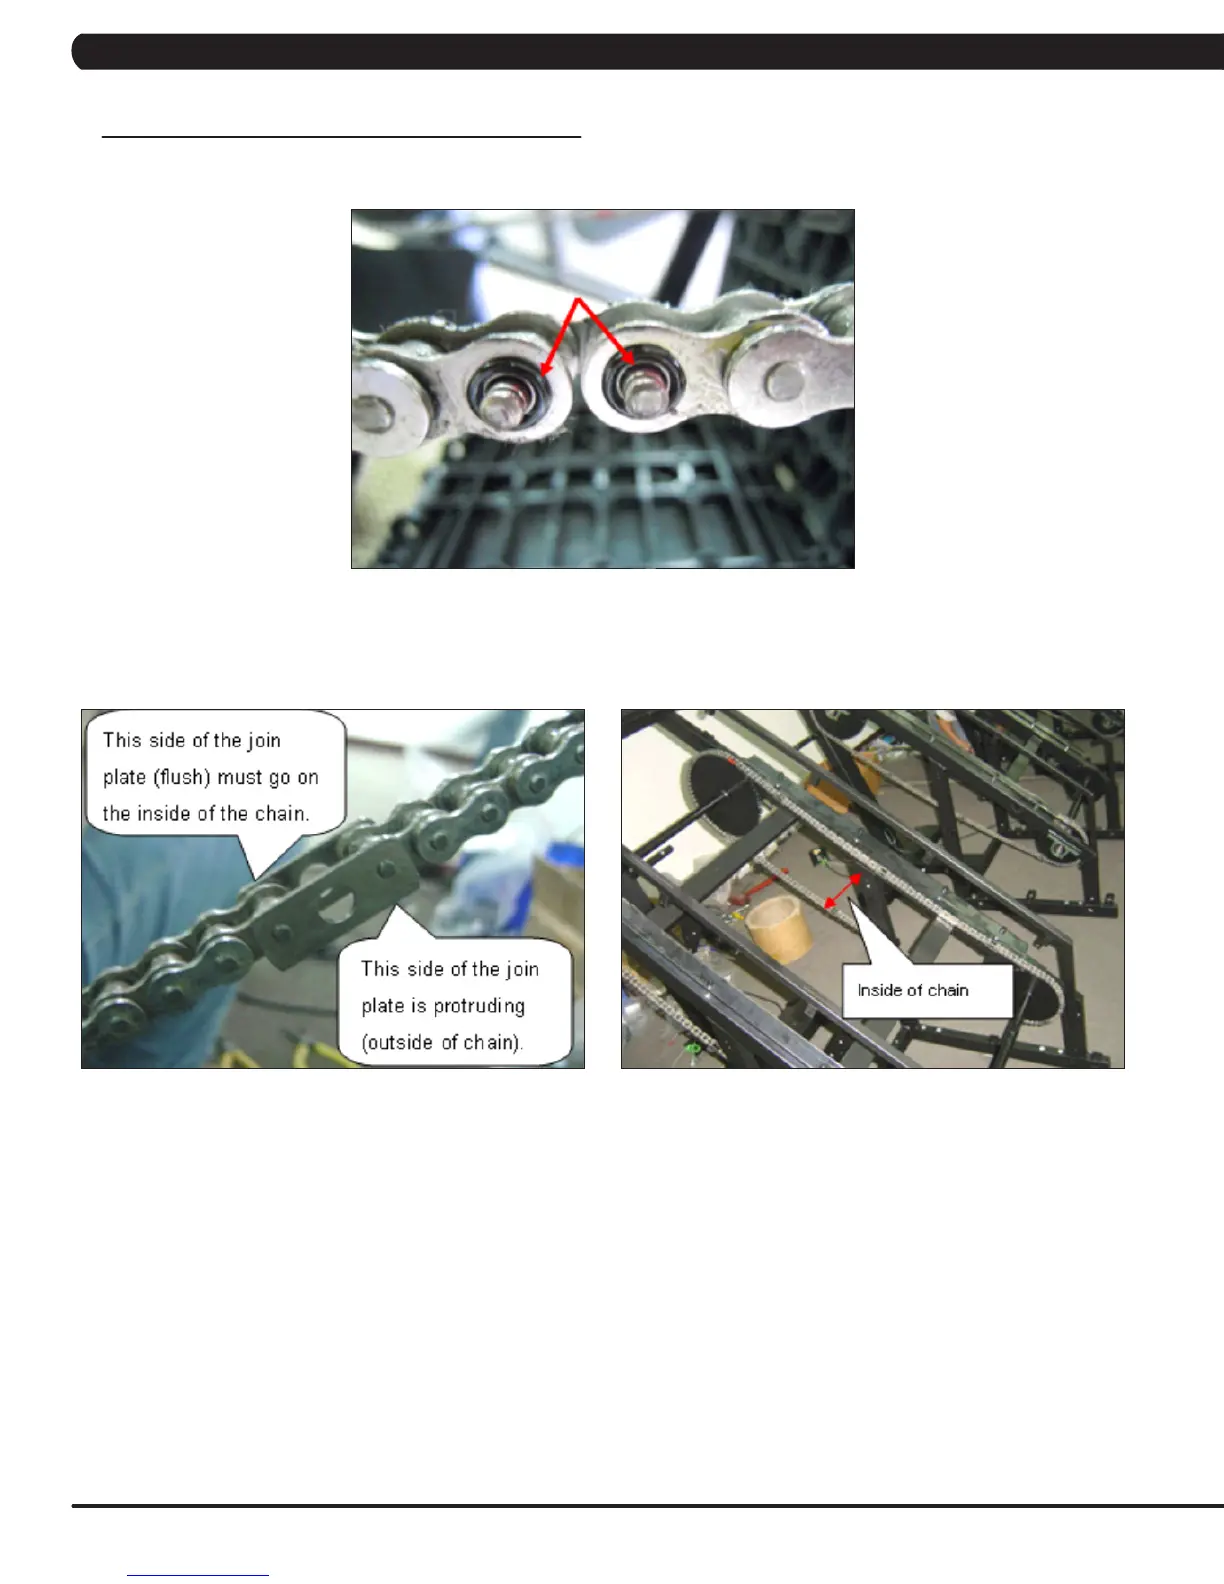
9) Remove the 2 seal rings from where the join link was just removed (Figure E).
10) The chain can now be removed.
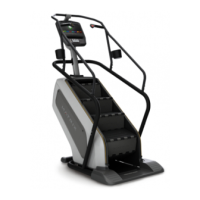
11) Reverse Steps 1-10 to install a new chain. When installing a new chain, it is important to pay attention to the join plates. The join plates are
widerthanthechainitself.Itisimportantthatthesideofthejoinplatesthatareushwiththerestofthechaingetinstalledtotheinsideofthe
chain path (Figures F & G).
12) Test the Climb Mill for function as outlined in Section 9.20.
FIGURE E
FIGURE F FIGURE G