8
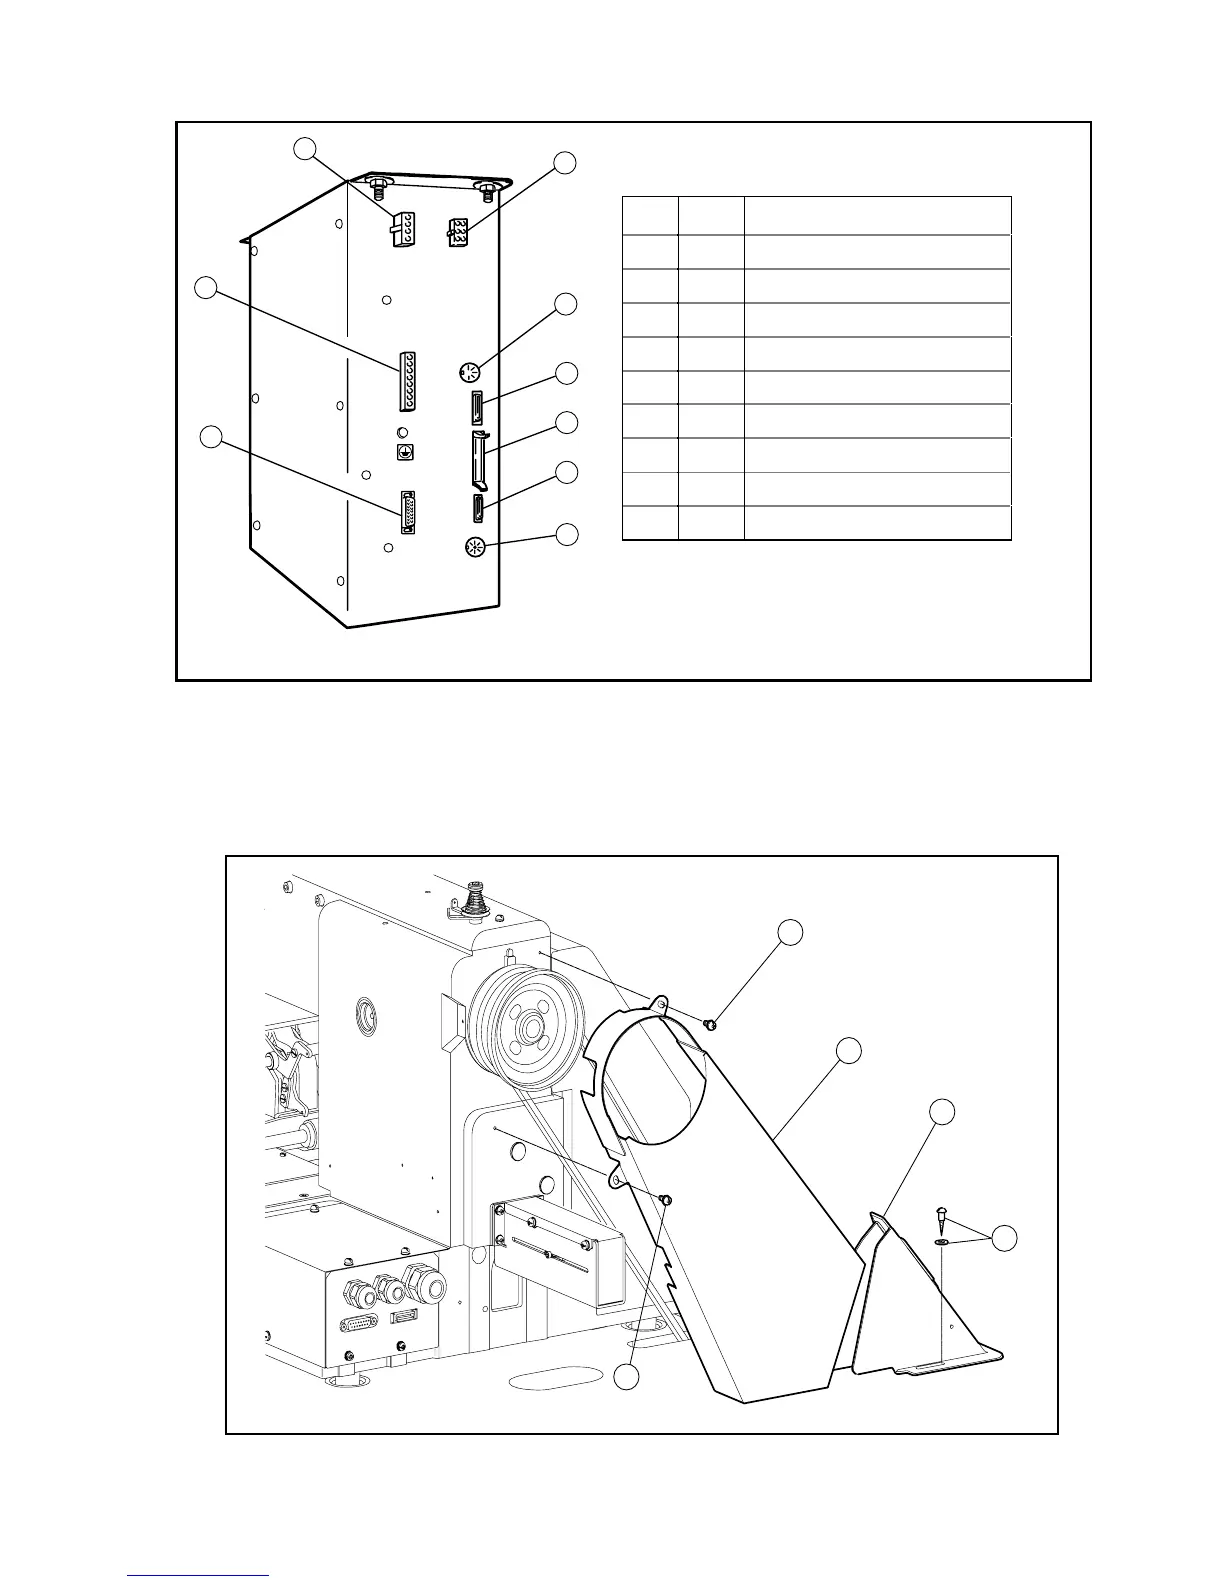
< Back side view of the Control box >
Fig Con Connect with
1 A Main motor cable
2 B Power supply cable
3 C Stepping motor cable
4 D Solenoid output cable
5 E RS-232C (optional use)
6 F Operation panel cable
7 G Extension I/O cable
8 H Input signal cable
9 I Foot switch cable
3-12 Installation of the belt cover
Put the large belt cover (NO.2) on the sewing machine head with the set screws (NO.1 & 4)
and small belt cover (NO.3) on the table top with the set screws (NO.5)
All the necessary parts are enclosed in the accessory box.
1
2
3
4
5
6
8
7
9
4
2
1
3
5

 Loading...


