― 19 ―
7. STANDARD ADJUSTMENT
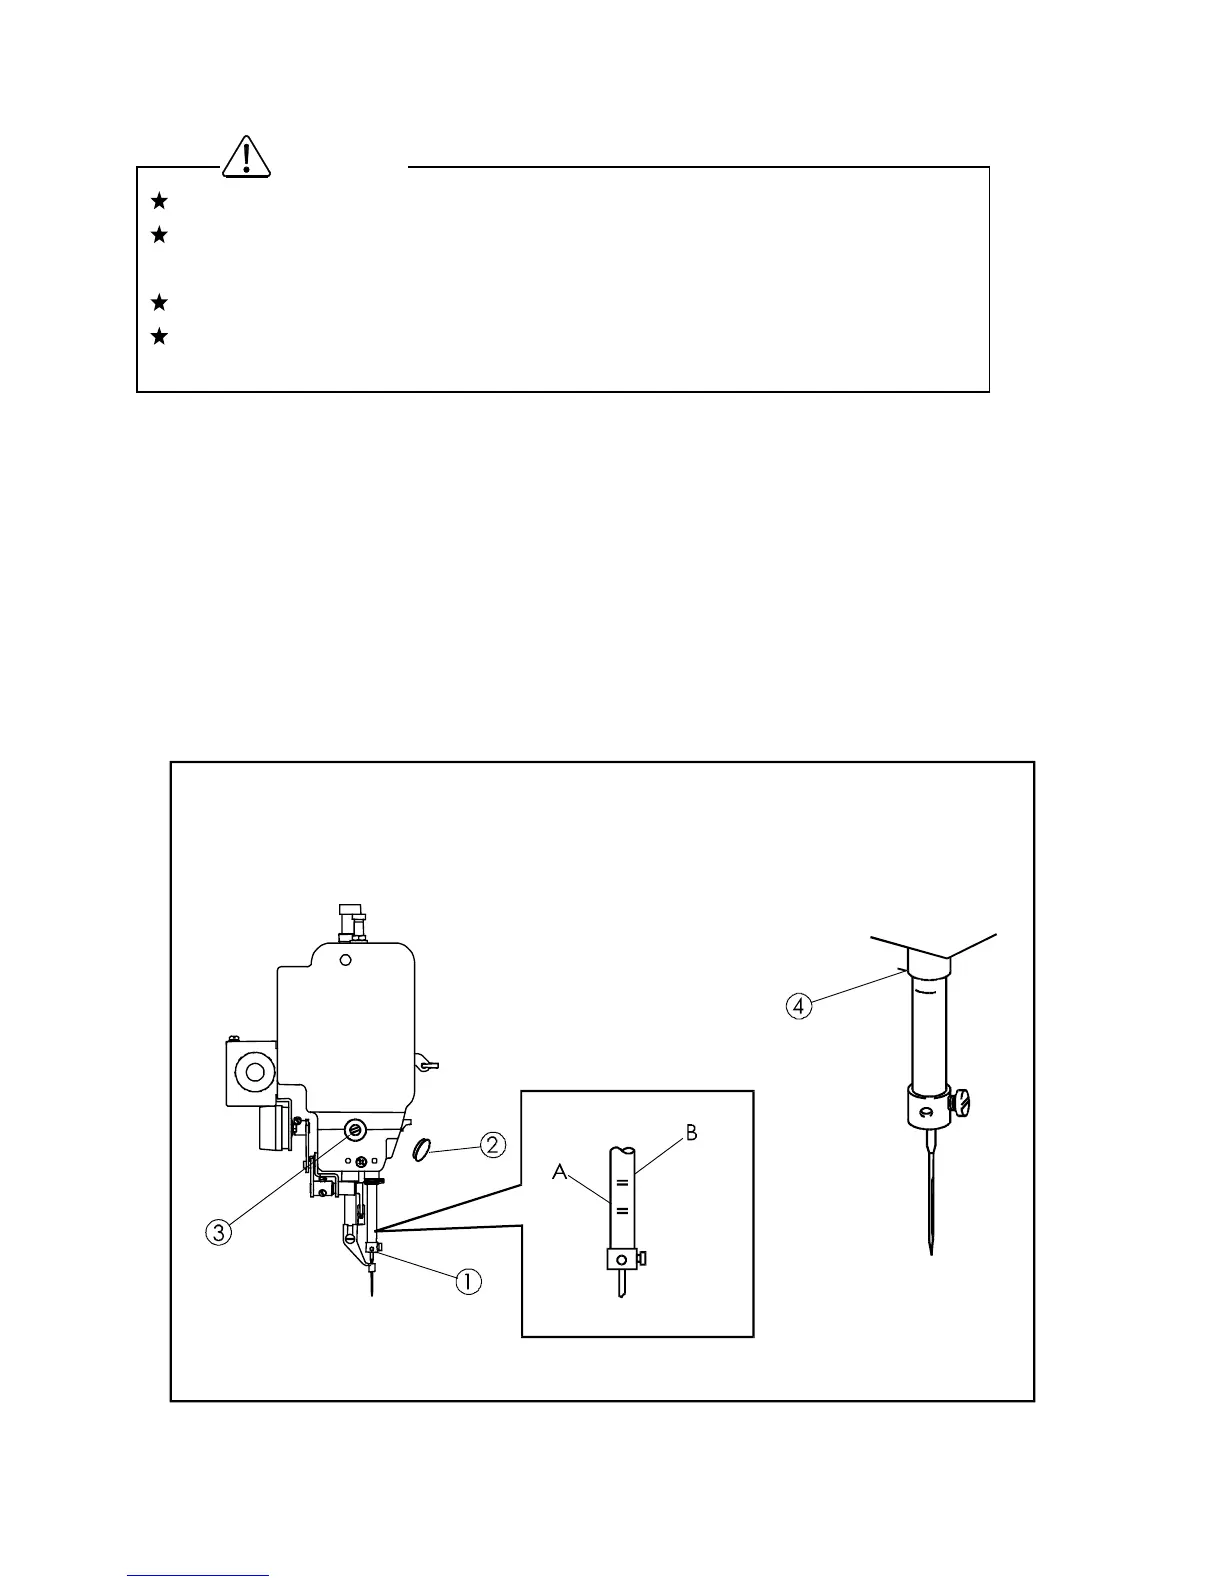
7-1. Adjustment of the needle bar position
(1)Turn the power switch OFF.
(2)Turn the sewing machine pulley by hand then, stop the needle bar (No.1) at the lowest
position.
(3)Remove the rubber plug (No.2) from the face plate then, loosen the needle bar holder
setscrew (No.3).
(4)Move the needle bar (No.1) to the position where the needle bar timing mark A is matched to
the needle bar bushing bottom line (No.4) then, tighten the needle bar holder setscrew (No.3).
[NOTE] If the needle class is DP x 5, match the needle bar timing mark B to the needle bar
bushing bottom line (No.4).
Please make sure to turn the power switch OFF before adjust the sewing machine.
If the adjustment is required under the power switch is ON, keep the start foot switch
away from the foot.
Be careful not to be wounded by the needle or the inner hook point.
Please make sure to put the safety guards (Eye guard, Belt guard, Link cover and
finger guard etc.) back on the original location after the sewing machine adjustment.
Caution

 Loading...


