EasyManua.ls Logo

Multiplex SMART SX User Manual

Multiplex SMART SX
68 pages
Go to English
To Next Page IconTo Next Page
To Previous Page IconTo Previous Page
Page #55 background image
SMART SX
_________________________________________________________________________________________________________
Pagina 55
SMART SX instructions # 985 5
3
53 (LA 15.12.2014) • Errors and omissions excepted •
MULTIPLEX
1. INDICE
1. Indice 55
2. Avvio Rapido 55
3. Introduzione 56
3.1 Filosofia della SMART SX 56
3.2 Caratteristiche della SMART SX 56
4. Note di sicurezza, Informazioni 57
5. Contenuto del set / Accessori 59
6. Specifiche 60
6.1 Trasmittente SMART SX 60
6.2 Ricevente RX-5 light M-LINK 60
7. Utilizzo 60
7.1 Controlli trasmittente 60
7.2 Controlli ricevente 61
7.3 Antenna trasmittente 61
7.4 Inserimento pile a secco / ricaricabili 61
7.5 Controllo voltaggio / tempi d’operazione 61
7.6 Collegamento 61
7.7 Assegnazione canale 62
7.8 Cambio modalità 62
7.9 Inversione servi 63
7.10 Come attivare/disattivare la funzione gas 63
7.11 Trim 63
7.12 Dual Rate 63
7.13 Fail-Safe 63
7.14 Canale ausiliario (AUX) 63
7.15 Controllo portata 63
7.16 Memoria modello (ID) 64
7.17 Installare la ricevente nel modello 65
7.18 La SMART SX come trasmittente Pupil 65
7.19 Aggiornamento firmware / caricare
nella radio le regolazioni per futuri
modelli RR+ 65
7.20 Installare gli stick in alluminio 66
7.21 Resoconto parlato dei dati telemetrici 66
8. Avvertenza e Servizio 66
9. Cura e Manutenzione 66
10. Dichiarazioni conformità CE 66
11. Garanzia /Esclusione
Responsabilità
66
12. Smaltimento 67
13. Trova Errori 67
Congratulazioni per aver acquistato il vostro nuovo si-
stema di controllo radio. Siamo lietissimi che abbiate
scelto la MULTIPLEX SMART SX M-LINK. Adesso siete
in possesso di un eccellente sistema per i principianti
dell’hobby del modellismo radio comandato. Speriamo
che possiate avere molte ore di divertimento e successi
con il vostro nuovo equipaggiamento.
2. AVVIO RAPIDO
1. Disimballate trasmittente e ricevente
Mettete al sicuro i documenti.
2. Inserite le batterie
È essenziale mantenere la cor-
retta polarità (vedi a fianco). La
polarità invertita potrebbe rovi-
nare la trasmittente e/o le bat-
terie.
3. Collegamento
Preparare il modello
L'impianto di ricezione entra in funzione subito
dopo che è avvenuto il Binding, assicurare il
modello in modo che un'elica che si sta metten-
do eventualmente in funzione, non possa causa-
re alcun danno.
Preparate la trasmittente
Tenete premuto il tasto
multifunzione e accen-
dete la trasmittente,
poi rilasciate il tasto. Il
LED lampeggia rapi-
damente.
Preparate la ricevente
Accendete la ricevente
tenendo premuto il ta-
sto SET; il LED della
ricevente adesso lam-
peggia rapidamente.
Se il collegamento ha avu-
to successo entrambi i
LED passeranno ad un lampeggio lento.
4. Controllate la direzione di rotazione dei servi
Modello con ricevente ID
La radio emette un segnale acustico quando ha
riconosciuto la ricevente. Non sono necessarie
altre regolazioni.
Il modello con ricevente M-LINK normale (light o
telemetria)
Tutte le superfici di controllo (servi) devono rispon-
dere alle levette nella corretta direzione; controllate
e invertite i servi se necessario: muovete la levetta
corretta ad un estremità
e tenete premuto il tasto
multifunzione per tre se-
condi: il servo viene in-
vertito e muove verso
l’estremità opposta.
5. Eseguite un controllo
della portata
È importante controllare
la portata della radio
prima del primo volo: te-
nete premuto il tasto per
due secondi immediata-
mente dopo aver acceso, e il LED rimane acceso.

Table of Contents

Question and Answer IconNeed help?

Do you have a question about the Multiplex SMART SX and is the answer not in the manual?

Multiplex SMART SX Specifications

General IconGeneral
BrandMultiplex
ModelSMART SX
CategoryRemote Control
LanguageEnglish

Summary

Quick-Start Guide

Unpacking and Battery Installation

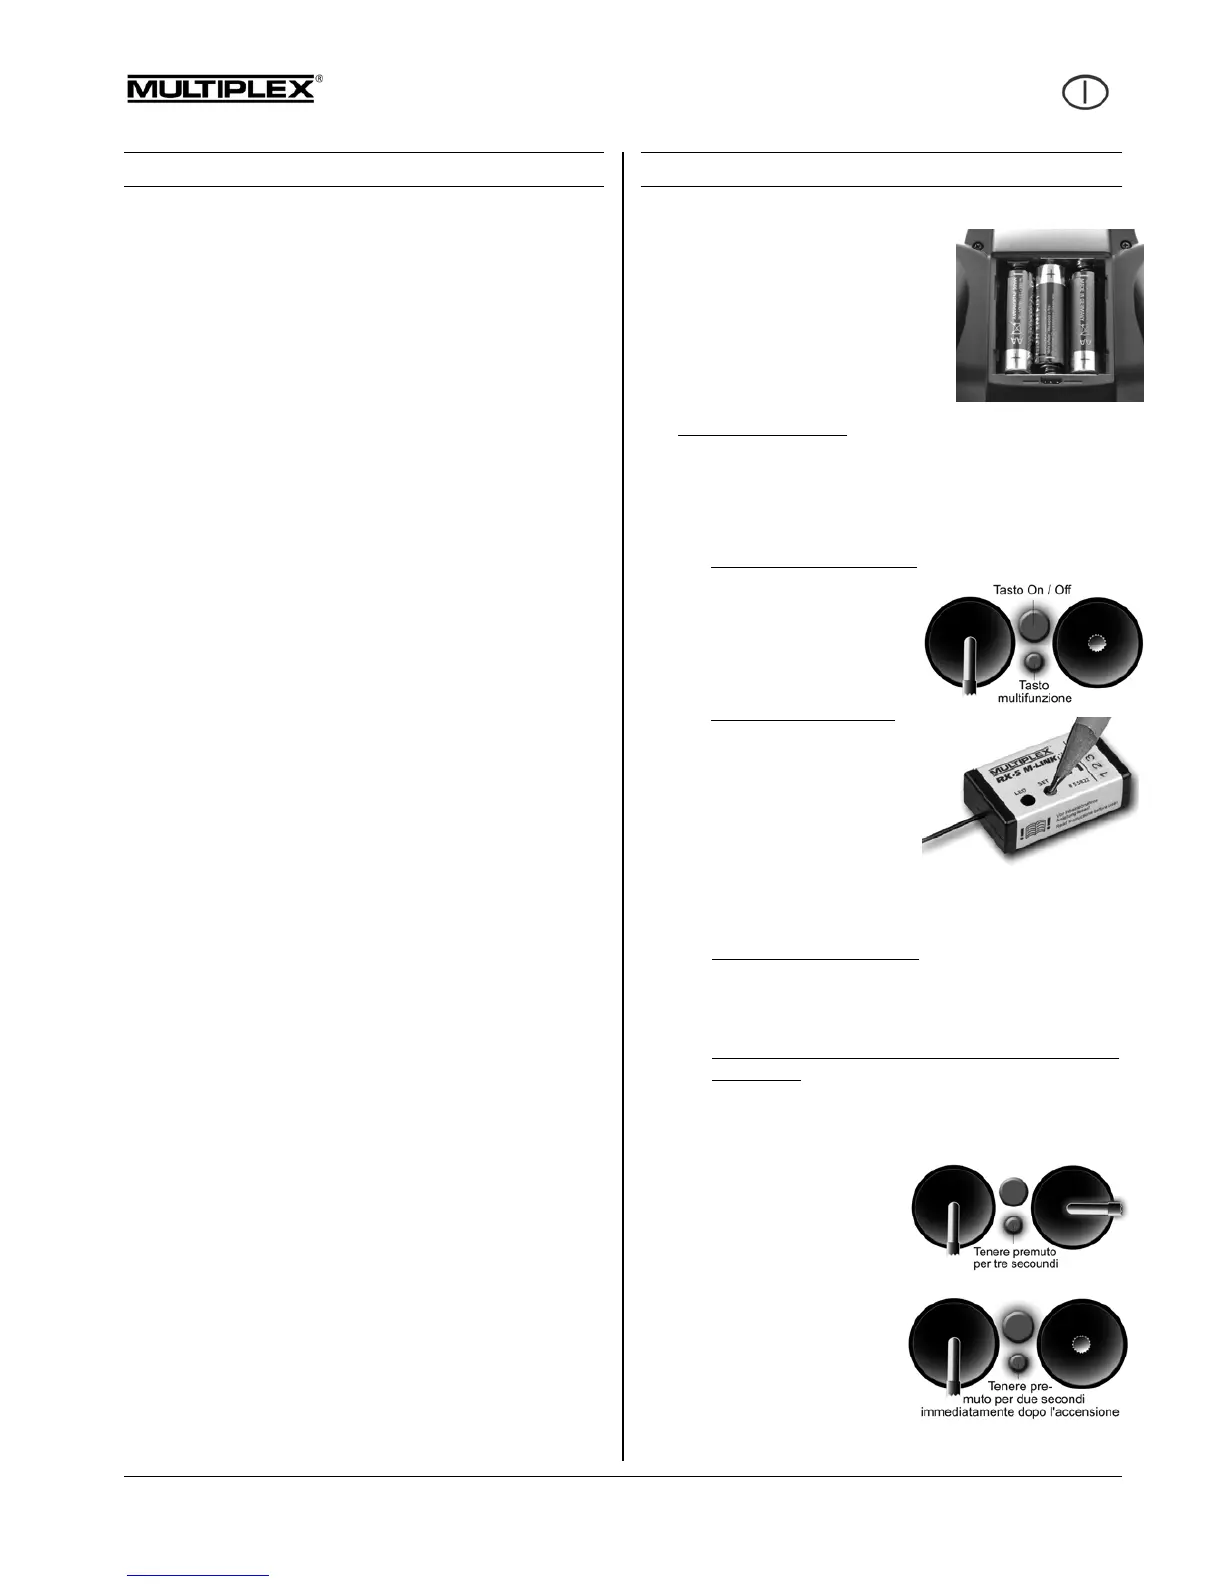
Unpack the transmitter and receiver, store documents, and insert batteries correctly.

Binding Transmitter and Receiver

Procedure to link the transmitter and receiver for initial operation.

Servo Direction and Range Check

Verify servo direction and perform a radio range check for safe operation.

Introduction to SMART SX

SMART SX Philosophy and Features

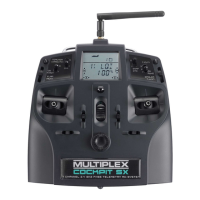
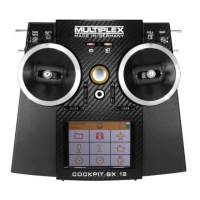
Overview of the SMART SX system's design, philosophy, and key features.

Safety and Operational Guidelines

Model Building and Operation Responsibility

User's responsibility for safe building, maintenance, and operation of RC models.

Power On/Off, Temperature, and Moisture

Correct power procedures, temperature limits, and handling moisture effects.

Model Maintenance and Checks

Regular checks of control surfaces, linkages, and power systems for safety.

Battery Management and Pre-Flight Checks

Guidance on battery handling, voltage warning, and essential pre-flight procedures.

Safe Flying Practices and Static Hazard

Guidelines for safe flying, including site selection, avoiding spectators, and static electricity.

Set Contents and Specifications

Standard Set Components

Lists the items included in the standard SMART SX radio control set.

Transmitter and Receiver Specifications

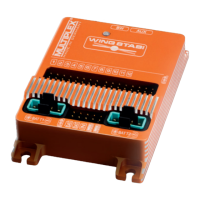
Technical details for the SMART SX transmitter and RX-5 receiver.

Handling the SMART SX System

Transmitter Controls Layout

Diagram and explanation of the SMART SX transmitter's controls and functions.

Receiver Controls and Connections

Description of the RX-5 M-LINK receiver's status LED, SET button, and servo sockets.

Transmitter Aerial Technology

Explanation of the transmitter's integrated IOAT aerial technology for improved signal.

Advanced Handling and Setup

Transmitter Battery Installation

Instructions for inserting and handling AA-size dry or rechargeable cells.

Voltage Monitoring and Battery Life

Explanation of the transmitter's low voltage warning and operating times.

Binding Transmitter to Receiver

Step-by-step guide to linking the transmitter and receiver.

Fixed Channel Assignment

Details the fixed channel assignment for the SMART SX transmitter's control functions.

Control Functions and Adjustments

Changing Control Stick Modes

How to change between different control stick modes (1-4) on the SMART SX transmitter.

Reversing Servo Direction

Procedure for reversing servo rotation direction for control surface functions.

Throttle Function Control

Steps to unlock, activate, and disable the throttle function for safe motor control.

Model Setup and Safety Features

Using Control Surface Trims

Using digital trims to fine-tune servo centre positions for control surfaces.

Adjusting Dual Rate Settings

Adjusting control surface travel for different flight conditions using the Dual Rate function.

Configuring the Fail-Safe Function

Setting predefined servo positions for when the M-LINK signal is lost.

Auxiliary (AUX) Channel Usage

Using the switched channel (Channel 6) for auxiliary functions like lighting or retracts.

Performing a Range Check

How to perform a radio range check to ensure reliable operation at a distance.

Model Memory (ID) System

How the transmitter uses ID receivers to automatically select model memories and settings.

Model Identification and Receiver Compatibility

ID Receiver Functionality

Explains how ID receivers enable automatic model memory selection and settings.

Available M-LINK Receivers and IDs

Lists available M-LINK receivers and their corresponding ID codes and default model assignments.

Installation and System Updates

Installing the Receiver in Models

Guidelines for correctly installing the M-LINK receiver and deploying its aerial.

SMART SX as Trainer/Pupil Transmitter

Using the SMART SX transmitter in a wireless Trainer system with a Teacher transmitter.

Firmware Updates and Model Settings

How to update transmitter firmware and load settings for new RR+ models via PC.

Optional Aluminium Stick Tops

Procedure for fitting optional aluminium stick tops for enhanced feel and aesthetics.

Telemetry Speech Output

Using the 'Souffleur' receiver for spoken telemetry data output.

Support, Maintenance, and Compliance

Advice and Service Information

Where to find help and service for the SMART SX system.

Care and Maintenance of Transmitter

Recommendations for cleaning and maintaining the SMART SX transmitter.

Regulatory Compliance Statements

Information on CE, FFC, and IC compliance statements for the device.

Guarantee and Liability Terms

Details on warranty coverage, limitations, and exclusions for the product.

Disposal and Troubleshooting

Environmentally Friendly Disposal

Guidelines for environmentally responsible disposal of the transmitter and batteries.

Common Faults and Remedies

A table listing common faults, their causes, and recommended remedies for the SMART SX system.

Optional Accessories

Aluminium Stick Top Options

Details optional aluminium stick tops available in black and orange.

Customizable Sticker Decals

Information on available sticker decors for customizing the transmitter, like EasyStar II and EasyGlider PRO.

Related product manuals