© National Instruments | 1-5
NI cDAQ-9171/9174/9178 User Manual
To avoid ESD damage in handling the device, take the following precautions:
• Ground yourself with a grounding strap or by touching a grounded object.
• Touch the antistatic package to a metal part of your computer chassis before removing the
device from the package.
Remove the device from the package and inspect it for loose components or any other signs of
damage. Notify NI if the device appears damaged in any way. Do not install a damaged device
in your computer or chassis.
Store the device in the antistatic package when the device is not in use.
Installing the cDAQ Chassis
The cDAQ chassis and C Series module(s) are packaged separately. For an interactive
demonstration of how to install the cDAQ chassis, go to ni.com/info and enter
cdaqinstall.
You will need the following items to set up the cDAQ chassis:
• Power adapter (packaged with the cDAQ chassis)
• Locking USB cable (packaged with the cDAQ chassis)
• Screwdriver (packaged with the cDAQ-9174/9178 chassis)
• Host computer running Windows
• Application software (such as LabVIEW), if not already installed
• NI-DAQmx driver (packaged with the cDAQ chassis)
• Number 1 and number 2 Phillips screwdrivers
• C Series module(s)
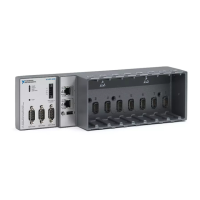
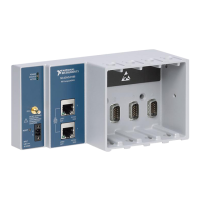
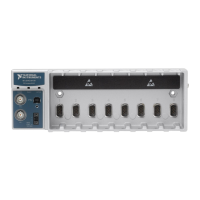
Refer to Figure 1-1, 1-2, or 1-3 while completing the following assembly steps.
1. Install the application software (if applicable), as described in the installation instructions
that accompany your software.
2. Install NI-DAQmx. For more information, download the Read Me First: NI-DAQmx and
DAQ Device Installation Guide.
Note The NI-DAQmx software is included on the disk shipped with your kit and is
available for download at
ni.com/support. The documentation for NI-DAQmx is
available after installation from Start»All Programs»National Instruments»
NI-DAQ. Other NI documentation is available from ni.com/manuals.
Artisan Technology Group - Quality Instrumentation ... Guaranteed | (888) 88-SOURCE | www.artisantg.com
 Loading...