KONTAKT PLAYER Getting Started – 36
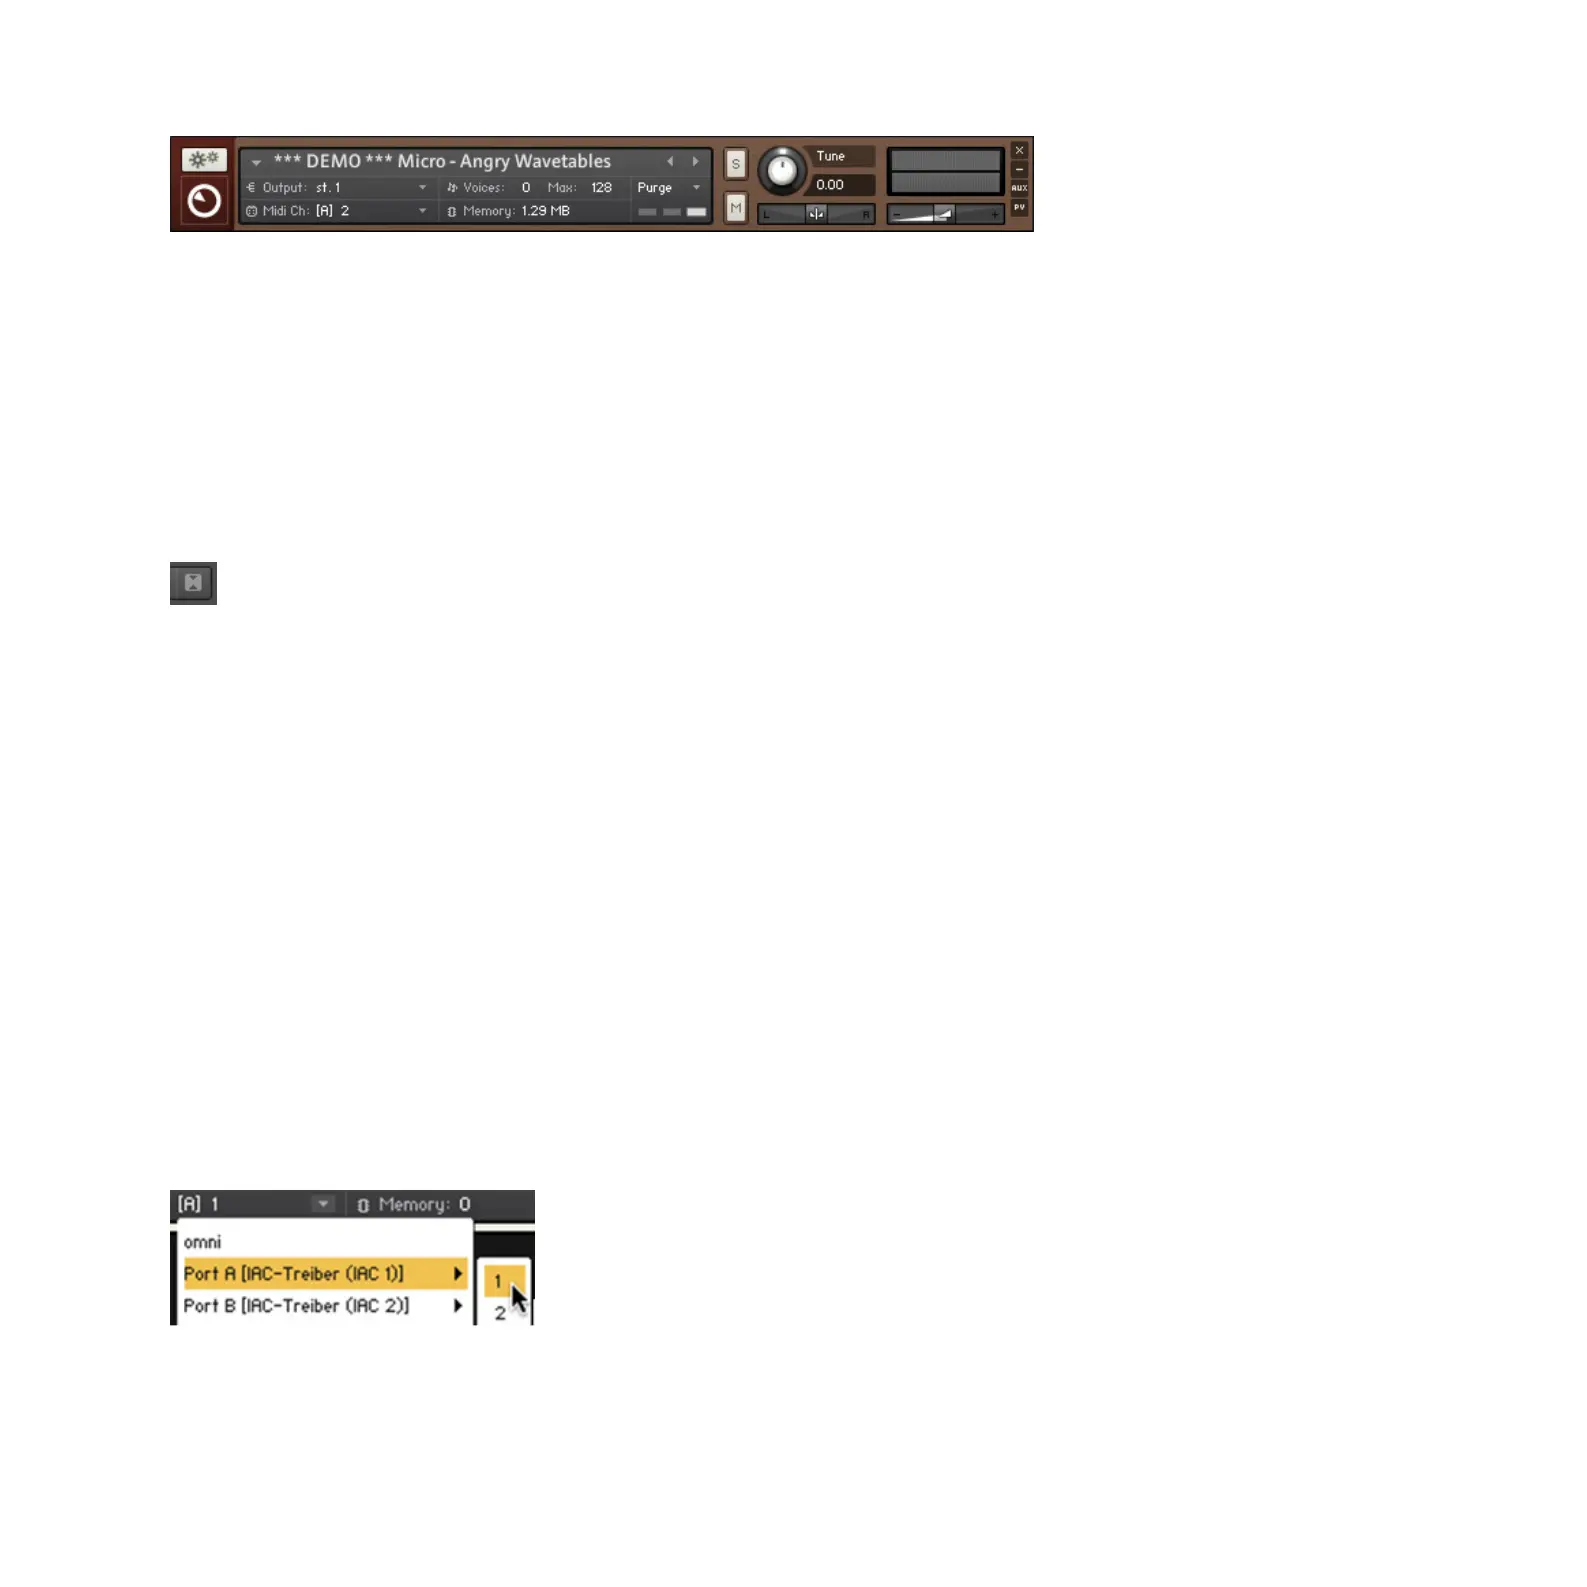
Instrument Header in maximized view.
Note that the following sections refer to Instrument Headers in their default, maximized state
that you can see above; they can also be switched into a minimized state that hides most of
their parameters in order to save vertical space in the Rack.
►
If any or all of the Instrument Headers in your Multi appear condensed, click the double-
arrow icon on the right side of the Rack Header once or twice until they’re all expanded
to their default view:
Maximize all Instrument Headers by clicking the Size Toggle button in the Rack Header once or twice.
4.4.1 Setting Audio and MIDI Ports
We already touched this topic briey in the previous sections: In order to make an Instrument
respond to incoming MIDI data, you’ll have to tell KONTAKT on which MIDI input port and
channel it should “listen” for that data.
To select both the MIDI port and the MIDI channel:
►
Use the drop-down menu that appears when you click on the Midi Ch label in the
Instrument Header.
KONTAKT designates the available MIDI ports with the letters that you assigned to them in
the Options dialog, as explained in section 2.1.3:
Assign a MIDI input to your Instrument with the MIDI Ch drop-down menu.
 Loading...