15
Removing and Reinstalling Front Panel
The projector can project an image from 60 to 300 inches diagonal. From the factory the projector is set for ceiling mount, 100 inch
diagonal screen size and a projection angle of 12.4 degrees. The projector can be used in three other degree applications.
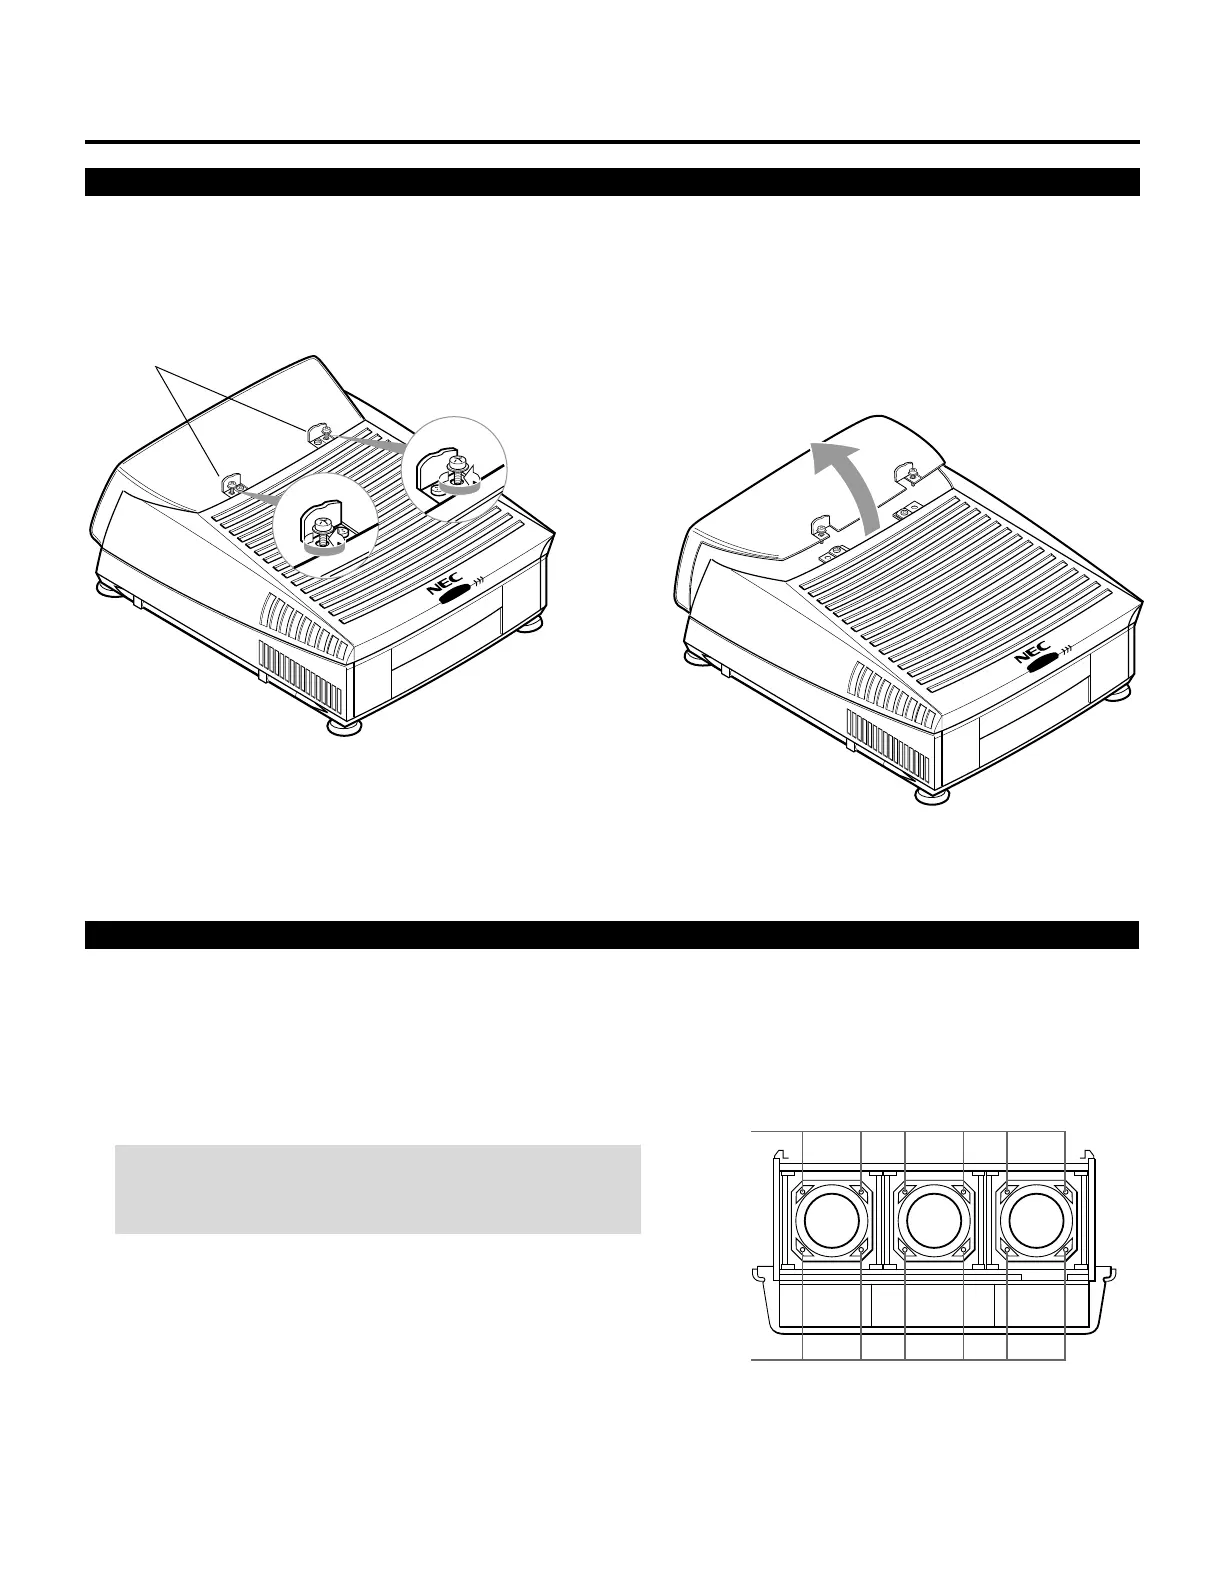
Before the following procedures, remove the front panel by loosening the two screws B which hold the front panel. There are two
screws on each side.
g
• Adjusting Focus Rings for the XG75A
There are three sets of adjusting focus rings, two between each CRT and lens.
These focus rings are used for maintaining optimum edge focus for the various screen sizes and projection angles.
*When setting the focus rings or changing CRT angle, you must first remove the front panel.
CAUTION: Be careful not to remove any of the four screws
completely. The falling lens can cause serious injury especially
when the projector is installed on the ceiling.
1 Loosen the four screws at the lens.
Screws
Screen Size Change(Adjusting Focus Rings and CRT Angle) for XG75A
• Reverse the preceding steps to reinstall the front panel.
Screws B
Screws
PROJECTION CONFIGURATION CHANGE
 Loading...